Our family's love affair with Bisquick chicken pot pie began on a rainy Tuesday when Max was home sick from school. With a pantry running low and a hungry 7-year-old needing comfort food, I turned to that trusty yellow box of Bisquick hiding in the back of my cabinet. What started as a desperate mom moment has turned into our most-requested weeknight dinner, perfected through dozens of family meals and plenty of "helping hands" from my little sous chef.
Why You'll Love Bisquick Chicken Pot Pie
I've brought this Bisquick chicken pot pie to more school potlucks and neighborhood dinners than I can count, and it never fails to impress. The beauty of this recipe is how it manages to be both incredibly simple and utterly satisfying at the same time. On busy weeknights when you're juggling homework help and after-school activities, you can have this prepped in just 15 minutes using ingredients you probably already have on hand. No fussy pastry to roll out, no complicated techniques - just straightforward comfort food that delivers every time.
What makes me smile is how kids who normally turn their noses up at vegetables will happily devour this pie, vegetable chunks and all. Max started calling it "magic chicken pie" because it somehow transforms everyday ingredients into something special. And unlike many quick dinners, the leftovers actually improve overnight as the flavors meld together, making it perfect for lunch the next day. After years of tweaking, I've found the perfect balance of creamy, savory filling and golden, fluffy topping that disappears from plates in record time.
Jump to:
- Why You'll Love Bisquick Chicken Pot Pie
- Bisquick Chicken Pot Pie Ingredients
- How To Make Bisquick Chicken Pot Pie
- Substitutions
- Bisquick Chicken Pot Pie Variations
- Equipment For Bisquick Chicken Pot Pie
- Storage Tips
- What to Serve with Bisquick Chicken Pot Pie
- Top Tip
- Aunt's Special Touch
- FAQ
- A Weeknight Winner Worth Sharing!
- Related
- Pairing
- Bisquick Chicken Pot Pie
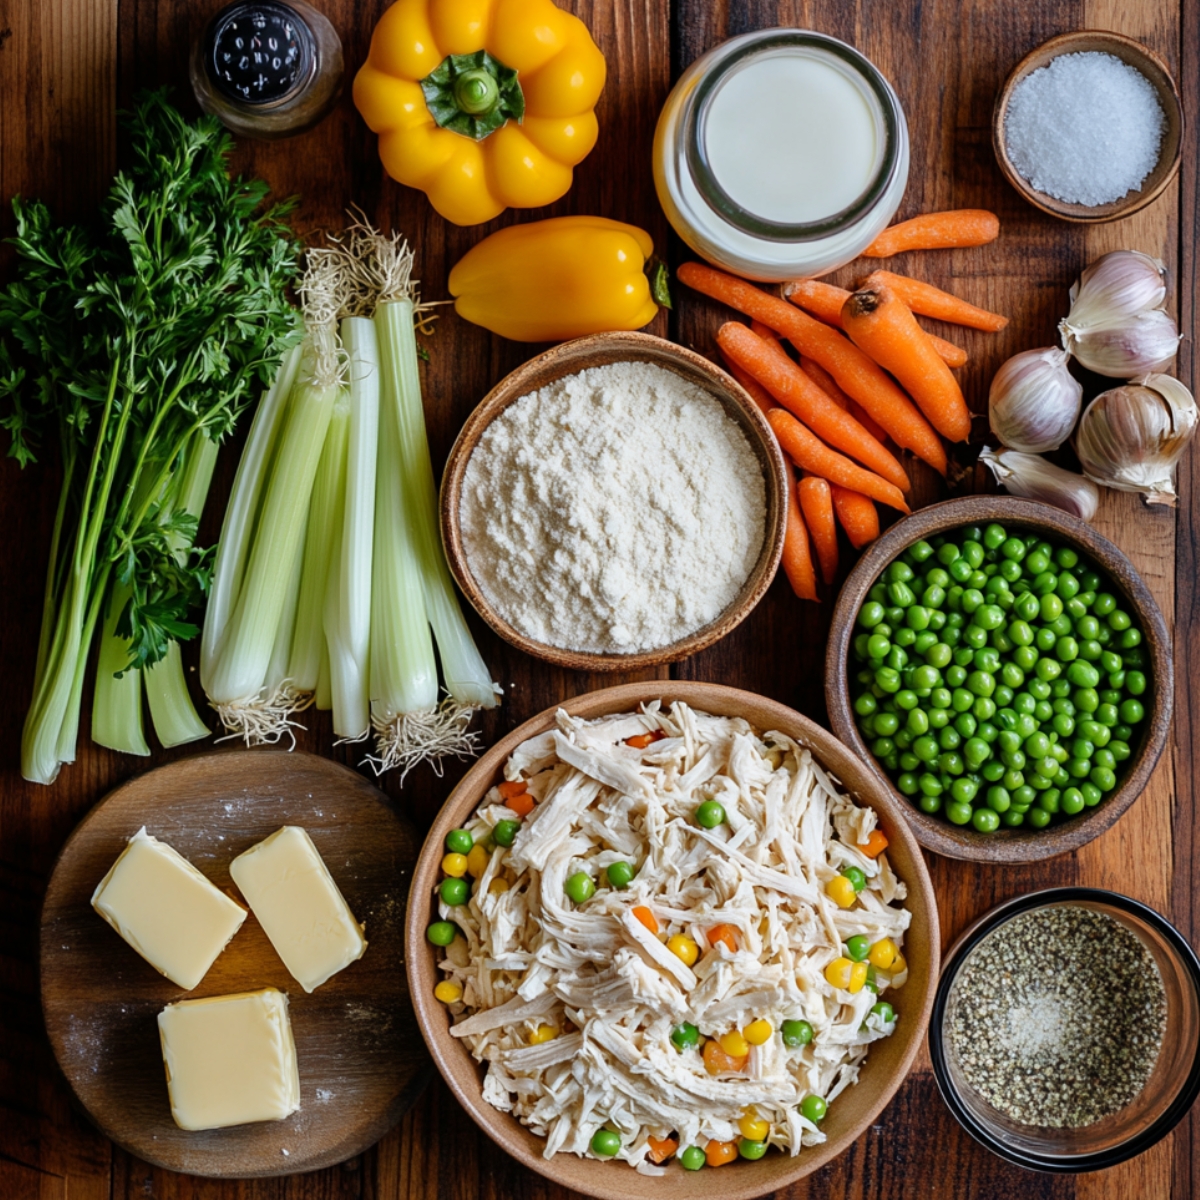
Bisquick Chicken Pot Pie Ingredients
For the Creamy Filling:
- Cooked chicken (rotisserie saves time!)
- Mixed vegetables (fresh or frozen)
- Yellow onion
- Celery
- Garlic cloves
- Butter
- Flour
- Chicken broth
- Half-and-half
- Salt and pepper
- Dried thyme
- Fresh parsley
For the Bisquick Topping:
- Bisquick baking mix
- Milk
- Egg
- Melted butter
- Garlic powder (optional)
- Dried herbs (optional)
- Shredded cheddar cheese
See recipe card for quantities.
How To Make Bisquick Chicken Pot Pie
Prep Work:
- Preheat oven to 375°F
- Chop vegetables uniformly
- Shred/dice chicken
- Measure all ingredients
Create the Filling:
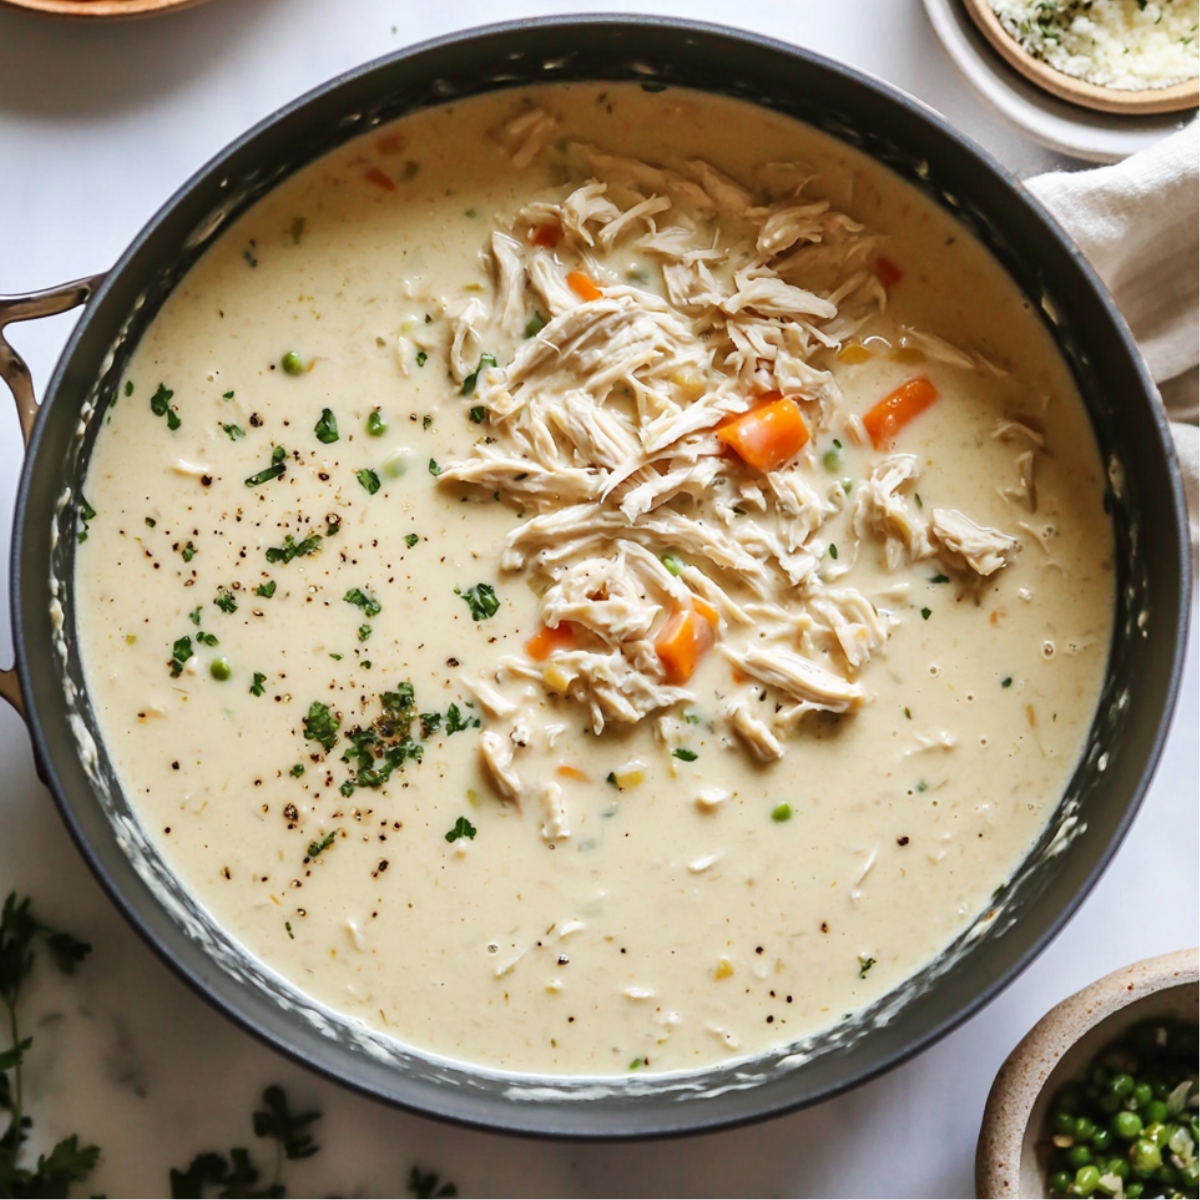
- Melt butter in large skillet
- Sauté onions, celery until soft
- Add garlic for just 30 seconds
- Sprinkle flour and cook 1 minute
Make It Creamy:
- Slowly whisk in broth
- Add half-and-half gradually
- Simmer until thickened
- Fold in chicken and vegetables
Mix the Topping:
- Combine Bisquick, milk, and egg
- Stir just until mixed
- Add any extras (cheese, herbs)
Assemble and Bake:
- Pour filling into baking dish
- Drop topping in spoonfuls
- Bake 25-30 minutes
- Cool 5-10 minutes before serving
Substitutions
Protein Options:
- Rotisserie chicken → Leftover turkey
- Chicken breast → Chicken thighs
- Traditional → Smoked chicken
- Standard → Ham chunks
Veggies Variations:
- Mixed frozen → Whatever's in the crisper
- Standard mix → Add mushrooms
- Traditional → Leeks instead of onions
- Regular → Root vegetable medley
Creamy Base Alternatives:
- Half-and-half → Heavy cream or milk
- Flour → Gluten-free blend
- Standard → Add white wine splash
- Regular → Stir in cream cheese
Bisquick Swaps:
- Regular → Gluten-free Bisquick
- Plain → Herbed homemade mix
- Standard → Add cornmeal for texture
- Regular → Use heart-healthy version
Bisquick Chicken Pot Pie Variations
Loaded Baked Potato Style:
- Add bacon bits
- Mix in cheddar cheese
- Top with green onions
- Serve with sour cream
Buffalo Chicken Twist:
- Add hot sauce to filling
- Blue cheese crumbles
- Celery and carrots
- Ranch drizzle on top
Garden Veggie Version:
- Double the vegetables
- Add fresh herbs
- Reduce chicken by half
- Finish with herb oil
Breakfast-for-Dinner Pot Pie:
- Add breakfast sausage
- Mix in scrambled eggs
- Include hash browns
- Maple drizzle finish
Equipment For Bisquick Chicken Pot Pie
Essential Equipment:
- 9x13 baking dish (glass works best)
- Large skillet or sauté pan
- Mixing bowls (medium and large)
- Measuring cups and spoons
- Whisk
- Wooden spoon
- Cutting board
- Sharp knife
Helpful But Optional:
- Kitchen scissors (for cutting herbs/chicken)
- Cookie cutters (for decorative topping)
- Pastry brush (for buttering top)
- Instant-read thermometer
Storage Tips
Refrigerator (3-4 days):
- Cool completely
- Cover with foil, not plastic
- Reheat in oven for crispy top
- Add splash of broth when reheating
Freezer (1-2 months):
- Freeze filling separately from topping
- Use freezer-to-oven safe container
- Thaw overnight in refrigerator
- Add fresh topping before baking
Make-Ahead Tips:
- Prepare filling up to 2 days ahead
- Store in refrigerator
- Make fresh topping before baking
- Add 5-10 minutes to bake time
What to Serve with Bisquick Chicken Pot Pie
Finding the perfect sides for Bisquick chicken pot pie has been a delicious journey of trial and error in our home. Since the pot pie itself is hearty and rich, I've discovered that simple, fresh accompaniments create the best balance for a complete meal.
Light, crisp salads provide the perfect contrast to the creamy, comforting pot pie. Our family favorite is a simple green salad with crisp apple slices, dried cranberries, and a light vinaigrette. The refreshing crunch and slight acidity cut through the richness of the pot pie beautifully. Max loves helping toss this salad, carefully arranging the "jewels" (cranberries) on top.
For vegetable sides, simplicity is key since the pot pie already contains vegetables. Steamed green beans with a touch of butter and lemon zest add color and freshness without competing with the main dish. Roasted asparagus is another excellent option, especially in spring when it's in season. The slight caramelization from roasting adds another flavor dimension to the meal.
Top Tip
After making this comfort food classic for countless family dinners, I've discovered some game-changing techniques that elevate a simple Bisquick chicken pot pie into something truly special. The key to that perfect golden crust lies in the temperature of your ingredients - always use very cold butter or shortening when mixing your Bisquick topping. I keep mine in the freezer and grate it directly into the dry mix, creating those beautiful flaky layers that make everyone ask for seconds.
The filling consistency makes all the difference between a perfect pot pie and a soupy disappointment. I've found that letting your chicken and vegetable mixture cool slightly before adding the Bisquick topping prevents a soggy bottom while allowing the flavors to develop more fully. Another game-changer was discovering that adding just a tablespoon of sour cream to the Bisquick chicken pot pie mixture creates a tenderness that store-bought versions can't match.
Perhaps my most valuable discovery came from a kitchen mishap when Max was helping me cook. He accidentally spilled some grated Parmesan into our Bisquick chicken pot pie topping, and that happy accident became our signature touch. The cheese creates gorgeous brown spots on the crust while adding a subtle savory note that pairs perfectly with the creamy chicken filling.
Aunt's Special Touch
My aunt has her own version of this Bisquick chicken pot pie that our family requests whenever we visit her. She discovered her twist back in the 1980s when she was cooking for a church potluck and ran short on ingredients. Instead of the traditional cream base, she uses a mixture of chicken broth and cream of celery soup, giving the filling a lighter texture with an unexpected depth of flavor.
Her other secret? She adds a handful of toasted, chopped pecans to the Bisquick chicken pot pie chicken pot pie topping. "Sweet and savory is always a winner," she says with a wink. The nuts add a wonderful crunch that contrasts perfectly with the creamy filling. Max absolutely loves helping her crush the pecans in her wooden mortar and pestle that's been in the family for generations.
Now whenever I make this recipe, I think of those cozy Sunday dinners at my aunt's table, and sometimes I'll add her special touches as a nod to the woman who first taught me that cooking with love makes everything taste better.
FAQ
How do you keep chicken pie from getting soggy on the bottom?
The key is cooking out excess moisture from vegetables before adding to the filling. I also let the filling cool for 10 minutes before adding the Bisquick chicken pot pie topping, which helps everything set properly during baking.
Why does my chicken pot pie get watery?
Usually this happens when vegetables release too much moisture during baking. Sauté vegetables thoroughly beforehand, and thicken your sauce properly with enough flour. For extra insurance, sprinkle 1 tablespoon of additional Bisquick on the bottom of your pan.
Can you use Bisquick for pie crust?
Absolutely! While this recipe uses a drop-biscuit topping, you can also press Bisquick dough into a pie plate to create a more traditional crust. Mix 2 cups Bisquick with ⅓ cup butter and ¼ cup hot water, then press into your pan.
How long does chicken pot pie stay fresh?
In the refrigerator, your Bisquick chicken pot pie stays fresh for 3-4 days. For best results, reheat in a 350°F oven for 15-20 minutes rather than using the microwave to maintain that crispy topping.
A Weeknight Winner Worth Sharing!
Now you have all the secrets to make the perfect Bisquick chicken pot pie - from simple ingredients to our accidental pickle juice discovery. This versatile, family-friendly meal proves that comfort food doesn't have to be complicated.
Looking for more crowd-pleasers? Our Easy Funnel Cake Recipe brings carnival joy right to your kitchen with no special equipment needed. Craving something fresh? The Best Lemon Blueberry Cake balances tangy citrus with sweet berries for an impressive dessert. For special occasions, try The Best Coconut Cake Recipe that's become our most-requested birthday treat!
Share your pot pie success! We love seeing your family creations!
Rate this Bisquick Chicken Pot Pie and join our cooking community!
Related
Looking for other recipes like this? Try these:
Pairing
These are my favorite dishes to serve with Bisquick Chicken Pot Pie
Bisquick Chicken Pot Pie
Equipment
- 9x13 baking dish (Glass or ceramic preferred)
- Large skillet (For sautéing and sauce)
- Mixing bowls (Medium and large)
- Whisk (For smooth sauce)
- Wooden spoon (Stirring without scratching)
- Cutting board (Cutting board)
- Sharp knife (Dicing vegetables/chicken)
Ingredients
For the Creamy Filling:
- 2-3 cups Cooked chicken - Rotisserie or leftover ,shredded
- 2 cups Mixed vegetables - Fresh or frozen
- 1 medium Yellow onion - Diced
- 2 stalks Celery - Diced
- 2-3 cloves Garlic - Minced
- 4 tablespoons Butter - Unsalted
- ⅓ cup Flour - All-purpose
- 2 cups Chicken broth - Low-sodium preferred
- 1 cup Half-and-half - Or use milk/heavy cream
- to taste - Salt and pepper - Adjust to preference
- ½ teaspoon Dried thyme - Or substitute Italian seasoning
- 2 tablespoons Fresh parsley - Chopped
For the Bisquick Topping:
- 1 cup Bisquick mix - Or use gluten-free or homemade
- ½ cup Milk - Any kind works
- 1 Egg - Lightly beaten
- 2 tablespoons Melted butter - Optional but adds flavor
- ½ teaspoon Garlic powder - Optional
- ½ teaspoon Dried herbs - Optional ,thyme, parsley, etc.
- ½ cup Cheddar cheese - Max's favorite addition
Instructions
- Preheat oven to 375°F. Chop vegetables, shred chicken, and measure ingredients.
- In a large skillet, melt butter. Sauté onion and celery until soft.
- Stir in garlic (30 sec), then sprinkle flour and cook for 1 minute.
- Slowly whisk in broth and half-and-half. Simmer until thickened.
- Fold in chicken, vegetables, seasonings. Let cool 5-10 minutes.
- Stir Bisquick, milk, egg, butter, and any extras just until combined.
- Pour filling into dish, drop topping over, bake 25-30 mins, cool before serving.














Leave a Reply