
My journey with red velvet cupcakes began in culinary school, where our instructor insisted they revealed more about a baker's skill than almost any other recipe. "Too much cocoa and they're just chocolate. Too much food coloring and they taste artificial," she'd warn. It took me years to understand the delicate balance that creates that distinctive red velvet flavor - not quite chocolate, not quite vanilla, but something uniquely delicious in between.

Why You'll Love These Red Velvet Cupcakes
These Red Velvet Cupcakes have converted even the most dedicated chocolate-only dessert fans in my family. After years of baking them for special occasions and everyday treats, I've discovered exactly what makes people reach for seconds:
Perfect Flavor & Texture:
- Delicate chocolate notes without overwhelming cocoa flavor
- Incredibly moist yet light crumb
- Subtle tanginess that balances the sweetness
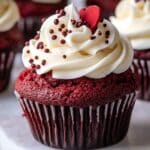
- Rich cream cheese frosting that complements rather than overwhelms
Practical Baking Benefits:
- Simpler than they look (no complicated techniques)
- Make-ahead friendly for parties and gatherings
- Freezes beautifully (even with frosting!)
- Perfect proportions for consistent results
The first time Max helped me make these cupcakes, he was completely mesmerized by the transformation from pale batter to vibrant red. "It's like magic, but science too!" he exclaimed while watching the color develop. Now at seven, he's our official "color expert," carefully counting the drops of food coloring to make sure they're exactly right. Last Valentine's Day, he proudly delivered these to his classroom party and returned home with an empty container, announcing: "Even the kids who don't like cake ate these!"
What makes these red velvet cupcakes special isn't just their beautiful appearance, but how they bring people together. There's something about that vibrant color paired with the familiar comfort of cream cheese frosting that makes any occasion feel more festive and brings smiles to faces of all ages.
Jump to:
- Why You'll Love These Red Velvet Cupcakes
- Red Velvet Cupcakes Ingredients
- How To Make Red Velvet Cupcakes
- Substitutions
- Red Velvet Cupcakes Variations
- Equipment For Red Velvet Cupcakes
- Storage Tips
- What to Serve With Red Velvet Cupcakes
- Top Tip
- Grandmama's Magic Touch
- FAQ
- Ready to Bake the Perfect Red Velvet Cupcakes!
- Related
- Pairing
- Red Velvet Cupcakes
Red Velvet Cupcakes Ingredients
For the Cupcakes:
- All-purpose flour
- Unsweetened cocoa powder (not Dutch-processed)
- Baking soda
- Salt
- Unsalted butter (room temperature)
- Granulated sugar
- Eggs (room temperature)
- Pure vanilla extract
- Buttermilk (full-fat works best)
- Red food coloring (gel preferred)
- White vinegar

For the Cream Cheese Frosting:
- Full-fat cream cheese (brick style, not spreadable)
- Unsalted butter
- Powdered sugar
- Pure vanilla extract
- Pinch of salt
See recipe card for quantities.

How To Make Red Velvet Cupcakes
The beauty of red velvet cupcakes lies in their simplicity, despite their impressive appearance. After years of baking these for everything from classroom parties to wedding showers, I've perfected this foolproof method:
Prep Work:
- Preheat your oven to 350°F and line a standard 12-cup muffin tin with paper liners.
- Set butter, eggs, and buttermilk on the counter an hour before baking - room temperature ingredients create that signature velvety texture.
- In a medium bowl, whisk 1½ cups all-purpose flour, 2 tablespoons natural cocoa powder, ½ teaspoon baking soda, and ¼ teaspoon salt. Sift if your cocoa has lumps.
Creating the Batter:
- In your mixer bowl, beat ½ cup room temperature butter until creamy. Gradually add 1 cup sugar and beat on medium-high for 3-4 minutes until light and fluffy (don't rush this step!).
- Add 2 large eggs one at a time, beating well after each. Mix in 1 teaspoon vanilla and 1-2 tablespoons red food coloring (gel coloring gives the most vibrant color without affecting taste).
- Beginning and ending with dry ingredients, alternate adding the flour mixture and ½ cup buttermilk in this order: ⅓ flour, ½ buttermilk, ⅓ flour, remaining buttermilk, remaining flour. Mix just until each addition is incorporated.
- Stir in 1 teaspoon white vinegar - you'll notice the batter becomes slightly fluffier as the vinegar reacts with the baking soda and cocoa.
Baking to Perfection:
- Divide batter evenly among cupcake liners, filling each about ⅔ full - a 3-tablespoon cookie scoop works perfectly for this.
- Bake for 18-20 minutes until a toothpick inserted in the center comes out with a few moist crumbs (not wet batter).
- Let cupcakes cool in the pan for 5 minutes, then transfer to a wire rack to cool completely.

Frosting & Finishing:
- Beat 8 oz room temperature cream cheese and ½ cup room temperature butter until completely smooth (about 2 minutes).
- Add 3-4 cups powdered sugar in batches, mixing well after each addition, then mix in 1 teaspoon vanilla and a pinch of salt.
- Once cupcakes are completely cool, pipe or spread frosting on top. For a classic look, reserve a bit of cake (trim the top of one cupcake) and crumble it to sprinkle over the frosting.
Substitutions
Flour Options:
- All-purpose → Measure-for-measure gluten-free blend
- Regular → 50/50 blend of all-purpose and cake flour for extra tenderness
- Standard → White whole wheat (use 25% less for lighter texture)
Buttermilk Alternatives:
- Regular buttermilk → Plant-based milk + 1 tablespoon vinegar
- Full-fat → Low-fat buttermilk (slightly less rich)
- Traditional → Sour cream thinned with milk (1:1 ratio)
Food Coloring Choices:
- Artificial red → Natural beet powder (2-3 Tbsp)
- Liquid color → Gel food coloring (more concentrated)
- Standard → Color-free version (still delicious!)
Frosting Options:
- Cream cheese → Cream cheese + mascarpone blend
- Traditional → Vanilla buttercream
- Regular → Vegan cream cheese frosting
Red Velvet Cupcakes Variations
After years of baking these beloved cupcakes, I've developed some variations that have become favorites:
Red Velvet Cheesecake Cupcakes:
- Add cream cheese filling in center
- Swirl into batter before baking
- Reduces need for as much frosting
- Creates surprise inside
Mini Red Velvet Cupcakes:
- Use mini muffin tin
- Reduce baking time to 10-12 minutes
- Perfect for parties and large gatherings
- Bite-sized indulgence
Red Velvet Oreo Cupcakes:
- Place Oreo at bottom of each liner
- Crush additional Oreos into batter
- Sprinkle Oreo crumbs on frosting
- Cookies and cream meets red velvet!
Holiday Red Velvet:
- Christmas: Sprinkle with crushed peppermint
- Valentine's Day: Add heart-shaped sprinkles
- Halloween: Add edible "blood" drips on frosting
- Fourth of July: Top with blueberries for red, white, and blue
Equipment For Red Velvet Cupcakes
Must-Have Basics:
- Standard 12-cup muffin tin
- Paper cupcake liners (red ones add a fun touch!)
- Electric mixer (stand or handheld)
- Medium and large mixing bowls
- Measuring cups and spoons
- Rubber spatula
- Wire cooling rack
- Toothpicks for testing doneness
Helpful Extras:
- Cookie scoop (for perfectly portioned batter)
- Sifter or fine-mesh strainer (for cocoa and flour)
- Offset spatula (for smooth frosting)
- Piping bags and decorative tips
- Cupcake carrying container (for transport)
Storage Tips
Counter Storage (2-3 days):
- Place in airtight container
- Single layer if frosted
- Room temperature preserves texture
- Keeps cream cheese frosting at perfect consistency
Refrigerator Tips (up to 1 week):
- Store in covered container
- Bring to room temperature before serving
- Cover loosely with plastic wrap to prevent drying
- Prevents frosting from becoming too soft in warm weather
Freezer Magic (up to 3 months):
- Freeze unfrosted cupcakes in airtight container
- Or freeze frosted cupcakes unwrapped until solid
- Then wrap individually in plastic and foil
- Thaw in refrigerator overnight
What to Serve With Red Velvet Cupcakes
These vibrant cupcakes pair beautifully with several beverages and accompaniments:
Perfect Pairings:
- Coffee with cream (complements the slight tanginess)
- Cold milk (Max's preferred choice)
- Hot chocolate (for chocolate lovers)
- Fresh berries on the side
Special Occasion Pairings:
- Champagne or Prosecco (the bubbles balance the sweetness)
- Dessert wine such as Moscato
- After-dinner coffee with liqueur
- Hot tea with honey
For children's parties, I often serve these with strawberry milk for a fun color theme. For adult gatherings, a dessert coffee bar with various flavored syrups makes an elegant accompaniment to a platter of red velvet cupcakes.
Max's serving suggestion is what he calls "upside-down cupcakes" - where you break the bottom half off and place it on top of the frosting to make a cupcake sandwich. "This way you get frosting in every bite!" he explains. It's messy but undeniably delicious, and now all his friends request cupcakes served "Max-style."
Top Tip
1. The Room Temperature Rule: Ensure ALL refrigerated ingredients (butter, eggs, buttermilk) come to room temperature before starting. This creates a properly emulsified batter that bakes into that perfect velvety texture.
2. The Perfect Red: For the most vibrant color without artificial taste, use gel food coloring instead of liquid. You'll need far less, and it won't water down your batter. Add it gradually until you reach your desired shade.
3. The Mixing Method: Always alternate adding dry ingredients and buttermilk, beginning and ending with dry (3 additions of dry, 2 of buttermilk). This prevents overmixing and creates the tender crumb red velvet is known for.
4. The Cocoa Secret: Use natural cocoa powder, not Dutch-processed. The natural acidity in regular cocoa reacts with the buttermilk and vinegar, contributing to both the color and the distinctive flavor.
5. The Frosting Trick: For perfectly smooth cream cheese frosting, beat the cream cheese and butter for a full 2-3 minutes before adding any sugar. This eliminates any potential lumps and creates a silky-smooth base.
Grandmama's Magic Touch
My grandmother had a special technique with red velvet that elevated it from good to extraordinary: she added a touch of almond extract alongside the vanilla.
"Just a quarter teaspoon," she'd insist, measuring carefully. "Too much and it takes over, but just a drop and it makes people wonder what that special flavor is." She was right - that subtle hint of almond adds a complexity that perfectly complements the mild cocoa notes in red velvet.
Her other signature touch was using a combination of butter and oil in the batter. "Butter for flavor, oil for moisture," she'd explain. This hybrid approach creates cupcakes with the perfect balance of rich taste and tender texture that stay moist for days.
When Max helps me make Grandma version, he's in charge of what he calls the "secret ingredient ceremony" - adding that tiny bit of almond extract. He takes this responsibility very seriously, carefully measuring the extract and declaring, "The secret ingredient makes it magic!" These moments in the kitchen keep my grandmother's legacy alive in the sweetest possible way.
FAQ
What are the ingredients in red velvet cupcakes?
Classic red velvet cupcakes contain flour, a small amount of cocoa powder, butter, sugar, eggs, vanilla extract, buttermilk, red food coloring, vinegar, and baking soda. What makes them unique is the specific ratio - just enough cocoa to provide a subtle chocolate flavor without overwhelming the other notes. The traditional topping is cream cheese frosting made with cream cheese, butter, powdered sugar, and vanilla.
What icing is best for red velvet cupcakes?
Cream cheese frosting is the traditional and most complementary choice for red velvet cupcakes. Its slight tanginess balances the sweetness of the cupcake while echoing the subtle tang from the buttermilk in the batter. For best results, use full-fat brick-style cream cheese (not spreadable) and beat it with butter until completely smooth before adding powdered sugar and vanilla.
What makes red velvet cake different?
Red velvet is unique because it's neither chocolate nor vanilla, but exists in its own special category. The hallmarks are: a small amount of cocoa (2-3 tablespoons), buttermilk for tenderness and tang, vinegar which reacts with natural cocoa and buttermilk, and traditionally, red food coloring. This combination creates a flavor profile that's subtle, balanced, and distinctive, with a velvety texture that gives the cake its name.
Can I make red velvet cupcakes without buttermilk?
Absolutely! While buttermilk contributes to red velvet's signature tang and tender texture, you can easily substitute by adding 1 tablespoon of white vinegar or lemon juice to 1 cup of regular milk and letting it sit for 5-10 minutes. Other good substitutes include thinned sour cream, plain yogurt, or even dairy-free alternatives like almond milk with a tablespoon of vinegar added.
Ready to Bake the Perfect Red Velvet Cupcakes!
Now you have all the secrets to creating perfect red velvet cupcakes - from achieving that ideal cocoa balance to mastering the distinctive velvety texture. These vibrant treats prove that sometimes the classics become classics for good reason!
Looking for more delicious cupcake inspiration? Try our Easy Boston Cream Cupcakes that transform the beloved pie into perfectly portioned treats. For something rich and creamy, our The Best Cheesecake Cupcakes deliver all the luxury of cheesecake in a convenient handheld form. Need something quick and wholesome? Our Easy Applesauce Muffins come together in minutes and make a perfect breakfast or snack!
Drop a star rate and share how this Red Velvet Cupcakes turned out for you!!
Remember what my grandmother always said - "Red velvet is as much about the experience as the taste." The vibrant color and creamy frosting create a multi-sensory treat that makes any day feel special.
Related
Looking for other recipes like this? Try these:


Pairing
These are my favorite dishes to serve with Red Velvet Cupcakes


Red Velvet Cupcakes
Ingredients
Equipment
Method
- Preheat your oven to 350°F and line a 12-cup muffin tin with paper liners. Ensure butter, eggs, and buttermilk are at room temperature.
- In a medium bowl, whisk together the flour, cocoa powder, baking soda, and salt.
- In a mixing bowl, beat the butter and sugar until light and fluffy (3-4 minutes)
- Add eggs one at a time, mixing well after each. Add vanilla extract and red food coloring.
- Alternate adding dry ingredients and buttermilk, beginning and ending with dry ingredients.
- Stir in the vinegar.
- Divide batter evenly between cupcake liners. Bake for 18-20 minutes, or until a toothpick comes out with moist crumbs.
- Let the cupcakes cool in the tin for 5 minutes, then transfer to a wire rack to cool completely
- Beat cream cheese and butter until smooth. Gradually add powdered sugar, then mix in vanilla and salt.
- Once cupcakes are cool, pipe or spread the frosting on top of each cupcake. Garnish with crumbs from one cupcake if desired.


Leave a Reply