
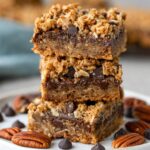
These gooey, buttery Gluten-Free Oatmeal Carmelita Bars layer crisp oat crust, melted chocolate, crunchy pecans, and ribbons of salted caramel into one ridiculously indulgent dessert. I first made these on a rainy Sunday afternoon when my sister Karla announced she'd invited friends over in two hours, and I needed something impressive but easy. The smell of toasted oats and bubbling caramel filled the kitchen so fast, even Liam wandered in asking if we'd opened a bakery.

If you love the cozy comfort of my Sticky Toffee Pudding Cookies or the rich layers in Nutty Chocolate Bars, you'll fall hard for these Oatmeal Carmelita Bars. They come together with pantry staples, no mixer gymnastics, and they're naturally gluten-free without tasting like a compromise.
Why You'll Love This Oatmeal Carmelita Bars Dessert
You'll love these Oatmeal Carmelita Bars because they deliver bakery-level flavor with zero fuss. The crust is buttery and crumbly, the filling is rich and gooey, and the chocolate melts into every bite. They're easy enough for a weeknight but fancy enough for holidays. Plus, they use simple gluten-free ingredients you probably already have, and the whole thing bakes in under 40 minutes. Whether you're gluten-free by choice or necessity, these bars taste like pure indulgence, not a compromise.
Jump to:
- Why You'll Love This Oatmeal Carmelita Bars Dessert
- Oatmeal Carmelita Bars Ingredients
- How to Make Oatmeal Carmelita Bars
- Substitutions and Variations
- Equipment For Oatmeal Carmelita Bars
- Storage Tips For Oatmeal Carmelita Bars
- Serving Suggestions
- Expert Tips
- FAQ
- Related
- Pairing
- Gluten-Free Oatmeal Carmelita Bars
Oatmeal Carmelita Bars Ingredients
Here's everything you need to make these rich, gooey Oatmeal Carmelita Bars.
See Recipe Card Below This Post For Ingredient Quantities
For the Crust:
- Gluten-free all-purpose flour: Forms the base of the crust and holds everything together. I recommend King Arthur brand for the best texture and flavor.
- Gluten-free quick oats: Adds that classic oatmeal cookie texture and a nutty, toasted flavor. Make sure they're certified gluten-free.
- Coconut sugar (or brown sugar): Brings a deep, caramel-like sweetness and helps the crust turn golden and crisp. You can swap in regular brown sugar if you prefer.
- Salted butter, softened: Creates the rich, tender crumb and adds a hint of salt that balances the sweetness.
- Sea salt: Enhances all the flavors and keeps the bars from tasting too sweet.
- Baking soda: Helps the crust puff slightly and gives it a tender crumb.
- Vanilla extract: Adds warmth and depth to the buttery crust.
For the Filling:
- Semi-sweet chocolate chips: Melts into a gooey, glossy layer. Use dark chocolate chips if you want a richer, less sweet flavor. Just make sure they're certified gluten-free.
- Chopped pecans or walnuts: Adds crunch and a toasty, nutty flavor that plays beautifully with the caramel. Either nut works great.
- Caramel sauce: The star of the filling. I love Smuckers Salted Caramel, but homemade works too. The salt in the caramel cuts through the sweetness.
- Gluten-free all-purpose flour (for thickening): Whisked into the caramel to keep it from being too runny. This small step makes slicing so much easier.
How to Make Oatmeal Carmelita Bars
Follow these steps to make perfectly gooey, golden Oatmeal Carmelita Bars every time.
Preheat oven: Preheat your oven to 350°F (175°C). Line an 8-inch square baking dish with parchment paper, leaving some overhang on the sides so you can lift the bars out later.
Mix the crust: In a stand mixer, combine the gluten-free flour, quick oats, coconut sugar, softened butter, baking soda, sea salt, and vanilla extract. Mix on low speed until the mixture forms crumbs that hold together when you squeeze them, about 1 to 2 minutes.

Bake the base: Press half of the crumb mixture firmly into the bottom of the prepared baking dish, spreading it evenly. Bake for 12 minutes until it just starts to look set and lightly golden around the edges.
Add the filling: Once the crust is baked, remove it from the oven and immediately sprinkle the chopped nuts and chocolate chips evenly over the top. The hot crust will start to soften the chocolate slightly.
Drizzle the caramel: In a small bowl, whisk together the salted caramel sauce and 1 tablespoon of gluten-free flour until smooth and slightly thickened. Drizzle this mixture evenly over the nuts and chocolate chips, covering as much surface as you can.

Add the topping: Sprinkle the remaining crumb mixture over the caramel filling, breaking up any large clumps with your fingers. Don't worry if it doesn't cover completely, the gaps will fill in as it bakes.
Bake again: Return the dish to the oven and bake for an additional 18 to 22 minutes, until the top is lightly golden and the caramel is bubbling around the edges.
Cool completely: Let the bars cool completely in the baking dish on a wire rack. This takes about 30 minutes. Once cool, transfer the dish to the fridge and chill for 1 to 2 hours to let the caramel set.
Slice and serve: After chilling, lift the bars out of the dish using the parchment paper overhang. Place on a cutting board and slice into 16 squares. Wipe your knife between cuts for cleaner slices.
Substitutions and Variations
Nut-free option: Skip the pecans or walnuts and use roasted sunflower seeds or pepitas for crunch. You can also leave them out entirely if you prefer.
Dairy-free version: Swap the salted butter for vegan butter or coconut oil, and use dairy-free chocolate chips. Make sure your caramel sauce is also dairy-free.
Sugar-free caramel: Use Torani's sugar-free caramel sauce mixed with a little gluten-free flour to thicken it. The bars will be less sweet but still delicious.
Different chocolate: Try dark chocolate chips, white chocolate chips, or even a mix of both for a fun twist.
Add espresso powder: Stir ½ teaspoon of espresso powder into the crust mixture for a subtle coffee flavor that makes the chocolate taste even richer.
Equipment For Oatmeal Carmelita Bars
- 8-inch square baking dish: The perfect size for thick, even bars. If you only have a 9-inch pan, the bars will be slightly thinner.
- Stand mixer: Makes mixing the crust fast and easy. You can also use a hand mixer or even a wooden spoon if you're feeling old-school.
- Parchment paper: Lines the pan and makes lifting the bars out a breeze. Don't skip this step or you'll be digging them out with a spatula.
Storage Tips For Oatmeal Carmelita Bars
Room temperature: Store the Oatmeal Carmelita Bars in an airtight container at room temperature for up to 3 days. They'll stay soft and gooey.
Refrigerator: Keep them in the fridge for up to 1 week. I actually prefer them cold because the caramel firms up and the chocolate gets that perfect snap.
Freezer: Wrap individual Oatmeal Carmelita Bars in plastic wrap, then place them in a freezer-safe bag or container. Freeze for up to 3 months. Thaw at room temperature for 20 minutes before eating, or enjoy them straight from the freezer for a chewy, fudgy texture.
Serving Suggestions
Serve these Oatmeal Carmelita Bars warm with a scoop of vanilla ice cream melting over the top. The cold cream against the gooey caramel is heaven.
Pair them with a hot cup of coffee or a frothy latte for an afternoon treat that feels like a coffee shop splurge.
Stack a few Oatmeal Carmelita Bars on a dessert platter alongside my Crème Brûlée Cheesecake and Lemon Angel Pie for a stunning gluten-free dessert spread.
Cut them into smaller squares and pack them in lunchboxes or wrap them up as homemade gifts during the holidays.
Expert Tips
Chill before slicing: This is the most important step. If you skip the fridge time, the caramel will be too soft and the bars will fall apart. Patience pays off.
Use parchment paper: It makes lifting the bars out of the pan so much easier and gives you clean edges.
Don't skip the flour in the caramel: Whisking a tablespoon of gluten-free flour into the caramel sauce thickens it just enough to keep it from oozing everywhere when you slice.
Press the crust firmly: The bottom crust needs to be packed down tightly or it won't hold together. Use the bottom of a measuring cup to press it flat.
FAQ
What makes these Carmelita bars gluten-free?
These bars are made with certified gluten-free all-purpose flour and gluten-free oats instead of regular flour. Just make sure all your ingredients, especially the chocolate chips and caramel sauce, are labeled gluten-free. Karla always double-checks the labels when she's baking for her gluten-free friends.
Can I substitute the nuts in oatmeal Carmelita bars?
Absolutely. You can swap the pecans or walnuts for any nut you like, such as almonds or cashews. If you need a nut-free version, try roasted sunflower seeds or just leave them out entirely. The bars will still be delicious and gooey.
How can I make these bars without butter?
Use vegan butter or coconut oil in place of the salted butter. The texture will be slightly different, but the bars will still turn out rich and flavorful. Make sure your chocolate chips and caramel sauce are also dairy-free.
Is there a sugar-free caramel sauce for this recipe?
Yes, Torani makes a great sugar-free caramel sauce that works beautifully in this recipe. Just whisk it with a tablespoon of gluten-free flour to thicken it before drizzling. The bars will be a little less sweet, but still totally satisfying.
Related
Looking for other recipes like this? Try these:
 1")


Pairing
These are my favorite dishes to serve with Oatmeal Carmelita Bars


Gluten-Free Oatmeal Carmelita Bars
Ingredients
Method
- Mix the gluten-free flour, quick oats, coconut sugar, softened butter, baking soda, sea salt, and vanilla extract in a stand mixer on low speed until the mixture forms crumbs.
- Press half of the crumb mixture into the bottom of an 8" square baking dish lined with parchment paper (reserve the other half for the topping).
- Bake at 350°F (175°C) for 12 minutes.
- Once the crust is done baking, immediately sprinkle chopped nuts and chocolate chips over the warm crust.
- In a small bowl, whisk together the caramel sauce and 1 tablespoon gluten-free flour until smooth. Pour over the nuts and chocolate chips, then sprinkle the remaining crumb mixture on top.
- Return the pan to the oven and bake for 18-22 minutes, or until the top is lightly golden.
- Let the bars cool completely in the baking dish before chilling them in the refrigerator for 1-2 hours.
- Once chilled, lift the bars out using the parchment paper and slice into 16 bars.


Leave a Reply