These s'mores bars have saved me from so many camping cravings when we're stuck inside and can't get a fire going. I came up with this recipe after way too many disasters trying to make s'mores in our fireplace that ended with burnt marshmallows, the smoke detector going off, and everyone being grumpy. Instead of giving up on that perfect combo of graham crackers, chocolate, and marshmallows, I figured out how to layer all those flavors into bars that you can make in your regular oven whenever you want.

Why You'll Love These S'mores Bars
I've been making these S'mores Bars for a few years now, and they always make people smile. The best thing about them is you get all the good parts of s'mores without any of the annoying stuff. No fire, no hunting for good sticks, no standing outside getting smoke in your eyes, and definitely no fighting over who gets the marshmallow that didn't burn. You just put everything in a pan, stick it in the oven, and twenty minutes later you've got something that tastes like your best camping memory but way easier. The texture is what really gets people going. The graham cracker bottom is crunchy and sweet, the chocolate middle gets all melty and gooey.
What makes these S'mores Bars work for busy families is how many different ways you can use them. After-school snacks when kids are whining about being bored, weekend treats when you want something fun, dessert when people come over and you need something that looks good but doesn't make you want to cry from stress, or just because everyone's had a crappy week and needs chocolate. They look nice enough that guests think you actually tried, but they're easy enough that you can make them even when you're tired and don't want to do anything complicated. And since you probably already have this stuff in your kitchen.
Jump to:
S'mores Bars Ingredients
For the Graham Cracker Base:
- Graham crackers
- Butter
- Brown sugar
- Salt
For the Chocolate Layer:
- Chocolate chips
- Sweetened condensed milk
- Butter
- Vanilla extract
For the Marshmallow Top:
- Mini marshmallows
- Extra chocolate chips for sprinkling
- More crushed graham crackers for texture
See recipe card for quantities.

How To Make S'mores Bars Step By Step
Create the Perfect Graham Cracker Foundation
- Preheat oven to 350°F and line 9x13 pan with parchment paper
- Crush graham crackers until you have fine crumbs but not powder
- Mix crumbs with melted butter, brown sugar, and pinch of salt until it holds together
- Press mixture firmly into bottom of prepared pan to create solid base

Build the Rich Chocolate Layer
- Melt chocolate chips with sweetened condensed milk in microwave or double boiler
- Stir until completely smooth and glossy, then mix in vanilla
- Pour chocolate mixture over graham cracker base and spread evenly
- Use spatula to get it into all corners and make surface level
Add the Golden Marshmallow Top
- Sprinkle mini marshmallows evenly over chocolate layer
- Don't pack them down, just let them sit naturally on top
- Add extra chocolate chips scattered between marshmallows
- Finish with light sprinkle of crushed graham crackers

Bake to Perfection
- Bake for 15-18 minutes until marshmallows are golden brown and puffed
- Don't overbake or marshmallows will get hard and weird
- Cool completely in pan before cutting - this is really important
- Use sharp knife to cut into squares, wiping blade between cuts
Substitutions
Over the years, I've had to make these work with whatever I had on hand or for people with different dietary needs. Here's what actually works:
For Different Dietary Needs:
- Gluten-free graham crackers → Regular graham crackers (Kinnikinnick brand works pretty well)
- Dairy-free chocolate chips → Regular chocolate chips (Enjoy Life brand tastes good)
- Coconut condensed milk → Regular sweetened condensed milk (slightly different flavor but still delicious)
- Vegan marshmallows → Mini marshmallows (Dandies brand melts okay but not quite the same)
When You're Missing Ingredients:
- Graham crackers → Vanilla wafers or digestive biscuits (crush them the same way)
- Mini marshmallows → Regular marshmallows cut into small pieces with scissors
- Sweetened condensed milk → Make your own with milk and sugar (look up how online)
- Chocolate chips → Chopped up chocolate bars or even candy bars like Hershey's
Fun Flavor Twists:
- Cinnamon graham crackers → Regular ones (adds warm spice flavor)
- Peanut butter chips → Some of the chocolate chips (for peanut butter s'mores taste)
- Dark chocolate → Milk chocolate chips (more grown-up flavor)
- Crushed cookies → Graham crackers (Oreos make it cookies and cream style)
Tasty Twists on Classic S'mores Bars
Peanut Butter Paradise:
- Add peanut butter to the graham cracker crust
- Swirl peanut butter into the chocolate layer
- Use peanut butter chips mixed with chocolate chips
- Top with chopped peanuts for extra crunch
Cookies and Cream Style:
- Replace graham crackers with crushed Oreos for the base
- Use white chocolate chips in the middle layer
- Add crushed cookie pieces on top with marshmallows
- Looks fancy but tastes like childhood
Birthday Cake Version:
- Mix funfetti cake mix crumbs into graham cracker base
- Add colorful sprinkles to chocolate layer
- Use vanilla marshmallows and white chocolate
- Kids go absolutely crazy for these at parties
Coffee Shop Twist:
- Add instant coffee powder to chocolate layer
- Use espresso-flavored chocolate chips
- Sprinkle cocoa powder over marshmallows
- Perfect for grown-up gatherings
Holiday Peppermint:
- Crush candy canes into graham cracker base
- Use white chocolate for middle layer
- Add peppermint extract to chocolate
- Top with crushed candy canes and marshmallows
Caramel Apple Fall:
- Add cinnamon to graham cracker base
- Drizzle caramel sauce over chocolate layer
- Use dried apple pieces mixed with marshmallows
- Tastes like autumn in bar form
Equipment For S'mores Bars
- 9x13 inch baking pan
- Parchment paper
- Food processor or rolling pin for crushing crackers
- Large mixing bowl
- Rubber spatula for spreading
Storage Tips
I've learned the hard way what keeps these bars fresh and what turns them into disappointing, hard squares. Here's what actually works:
Room Temperature Storage (Best Option):
- Store in airtight container for up to 5 days
- Layer parchment paper between stacked bars to prevent sticking
- Don't refrigerate unless your kitchen is really hot - they get hard and lose that perfect texture
- Keep away from heat sources that could melt the chocolate again
Cutting and Serving Tips:
- Always let bars cool completely before cutting or they'll be a gooey mess
- Use sharp knife wiped clean between cuts for neat squares
- Cut while still in the pan, then lift out individual pieces
- Warm knife under hot water for easier cutting through chocolate
Make-Ahead Strategy:
- These actually taste better the next day when flavors have had time to settle
- You can make them up to 2 days ahead for parties or events
- Store covered at room temperature, not in fridge
- Don't cut until you're ready to serve for best presentation
What Not to Do:
- Don't freeze these - the marshmallow gets weird and the texture is never the same
- Don't store them uncovered or they'll get stale and hard
- Don't stack them without parchment paper or they'll stick together
- Don't try to cut them while warm - you'll end up with a sticky disaster
For Transport:
- Cut into squares and pack in single layer in container with tight lid
- Bring napkins because they can be a little sticky to eat
- Keep cool during transport but don't refrigerate
- These travel really well to potlucks and parties

Top Tip
- The other thing that took me forever to figure out is when to add the marshmallows. Don't put them on until the chocolate layer has had a chance to cool down a little bit - about 5 minutes after you pour it over the crust. If you put marshmallows on really hot chocolate, they start melting right away and you end up with a swirled, gross mess instead of nice layers that look good when you cut them.
- Temperature stuff is really important too, and this is where lots of people screw up without knowing it. A bunch of folks turn the oven way up thinking it'll make the marshmallows brown faster, but all that does is burn the tops while the chocolate underneath is still runny and gross. Keep it at exactly 350°F and don't get impatient - good marshmallow browning takes time and you can't rush it. The S'mores Bars are done when the marshmallows are golden brown and puffed up but not burnt black.

FAQ
What are s'mores bars?
S'mores bars are a baked dessert that layers all the classic s'mores flavors - graham crackers, chocolate, and marshmallows - into bar form. They give you that campfire taste without needing a fire, and they're way easier to eat than traditional s'mores that fall apart.
How do you store s'mores bars?
Store them in an airtight container at room temperature for up to 5 days. Don't refrigerate them or they'll get hard and lose their gooey texture. Layer parchment paper between stacked S'mores Bars to prevent sticking, and keep them away from heat sources.
Can s'mores bars be made ahead of time?
Yes! These actually taste better the next day when the flavors have had time to blend together. You can make them up to 2 days ahead for parties. Just store them covered at room temperature and don't cut until you're ready to serve.
Can I make s'mores bars without an oven?
You need an oven to get that golden, toasted marshmallow top that makes these special. However, you could make no-bake versions using melted chocolate and marshmallow fluff, but they won't have the same texture as these baked ones with the crispy crust and toasted marshmallows.
Ready for Indoor S'mores Magic!
These S'mores Bars have become my answer to so many different situations. Rainy days when we're wanting campfire flavors but we're stuck inside, potluck dinners where you need something that won't fall apart in transport, after-school snacks that make kids actually happy about what's waiting at home, or just because it's been a rough week and everyone needs something sweet and comforting. The best part is how they make your whole kitchen smell like being a kid again, but without having to deal with building fires or marshmallows that always burn on one side and stay cold on the other.
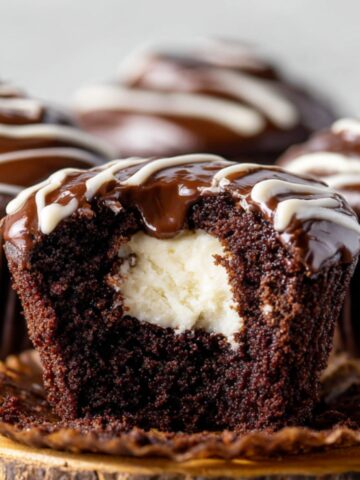
Want more treats that give you those comfort food feelings but are way easier than the original versions? Check out The Best Oatmeal Fudge Bars Recipe that makes those perfect chewy, chocolatey squares that disappear so fast you'll wonder if you made enough. Our Easy S'mores Crescent Rolls Recipe takes campfire flavors and wraps them in flaky pastry for something you can actually eat with your hands without making a huge mess. And our Easy Hostess Cupcakes Recipe Ready in 15 minutes gives you those chocolate cupcakes with the cream filling that taste way better than anything you can buy in a package!
Share your S'mores Bars wins! We really do love seeing how these work out for other families and hearing about which flavor twists become your new favorites!
⭐️⭐️⭐️⭐️⭐️ Rate this S'mores Bars and join our dessert crew!

Related
Looking for other recipes like this? Try these:
Pairing
These are my favorite dishes to serve with S'mores Bars

S'mores Bars
Ingredients
Equipment
Method
- Preheat oven to 350°F (175°C) and line a 9×13-inch pan with parchment paper.
- Crush graham crackers, mix with melted butter, brown sugar, and salt, then press firmly into the bottom of the pan.
- Melt chocolate chips with sweetened condensed milk and butter, then stir in vanilla until smooth.
- Spread the chocolate mixture evenly over the crust using a spatula.
- Let chocolate cool 5 minutes, then add marshmallows, extra chocolate chips, and crushed graham crackers.
- Bake 15-18 minutes until marshmallows are golden brown and puffed.
- Cool completely, then cut into squares with a sharp knife, wiping between cuts.

Leave a Reply