
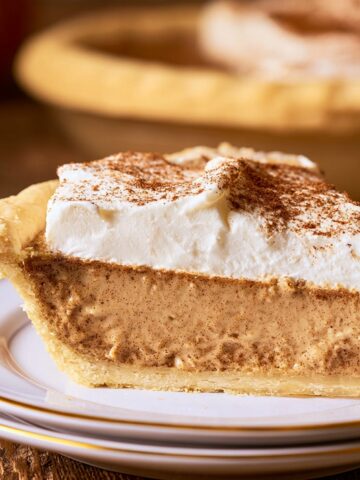
Don't you just love when the air gets crisp and it's finally time for pumpkin everything? I'm so excited to share my favorite Pumpkin Pie with Condensed Milk recipe with you today! This Pumpkin Pie with Condensed Milk is a total game-changer - the sweetened condensed milk makes it super creamy and velvety smooth. Trust me, your family will be begging for seconds! Whether you're whipping this Pumpkin Pie with Condensed Milk up for Thanksgiving or just because it's Tuesday (totally valid reason!), this recipe is super easy to follow and turns out amazing every single time. Let's get baking!


Why You'll Love This Pumpkin Pie with Condensed Milk
This Pumpkin Pie with Condensed Milk recipe has been a family favorite for generations, and for good reason. The Pumpkin Pie with Condensed Milk creates a velvety smooth filling that sets beautifully every time. Unlike recipes that use evaporated milk, this Pumpkin Pie with Condensed Milk version offers a more consistent sweetness and a luxurious texture that melts in your mouth.
Perfect for autumn gatherings and holiday celebrations, this pie pairs wonderfully with a dollop of whipped cream and a cup of coffee. It's also an excellent make-ahead dessert, as the flavors continue to develop overnight in the refrigerator.
Jump to:
- Why You'll Love This Pumpkin Pie with Condensed Milk
- Ingredients
- Pumpkin Pie with Condensed Milk Instructions
- Hints and Tips for Perfect Pumpkin Pie with Condensed Milk
- Dietary Benefits & Serving Suggestions
- Recipe Variations & Substitutions
- Equipment
- Storage
- Top Tip
- Grandma's Magic Touch:
- FAQ
- How did your Pumpkin Pie with Condensed Milk turn out?
- Related
- Pairing
- Easy Pumpkin Pie with Condensed Milk
Ingredients
Okay, let's gather everything we need for this deliciousness! I promise this isn't a complicated shopping list - you probably have most of this in your pantry already!
For the Pie Crust:
- 1¼ cups all-purpose flour (psst... gluten-free friends, just swap in your favorite GF flour blend!)
- ¼ teaspoon salt (just a pinch!)
- ½ cup cold unsalted butter, cubed (the colder the better for a flaky crust!)
- 3-4 tablespoons ice water (emphasis on ICE - trust me on this one!)
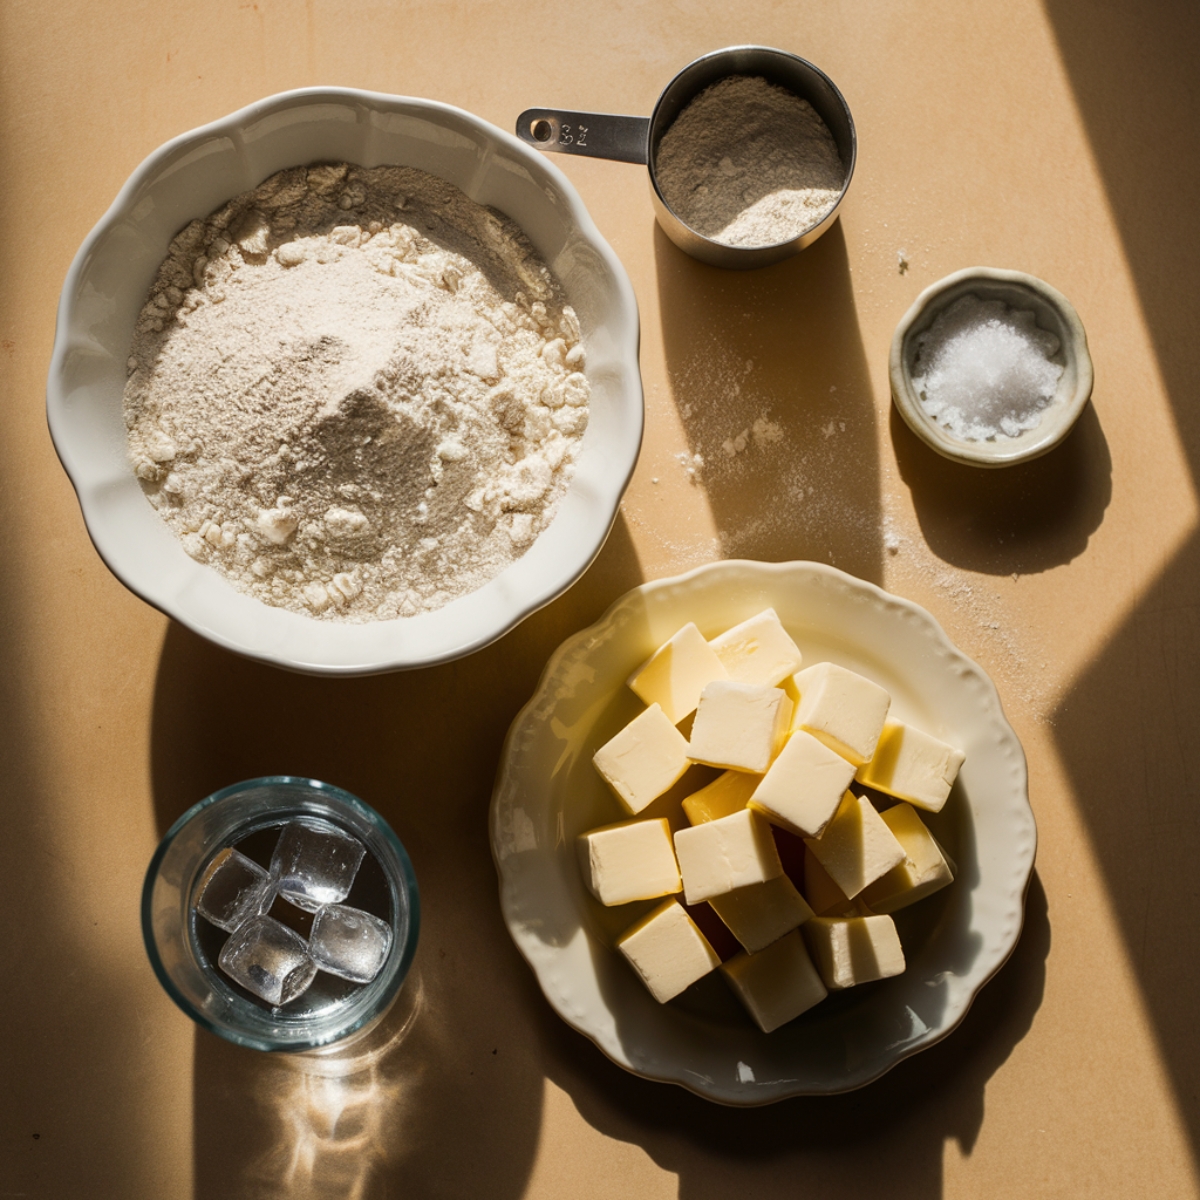
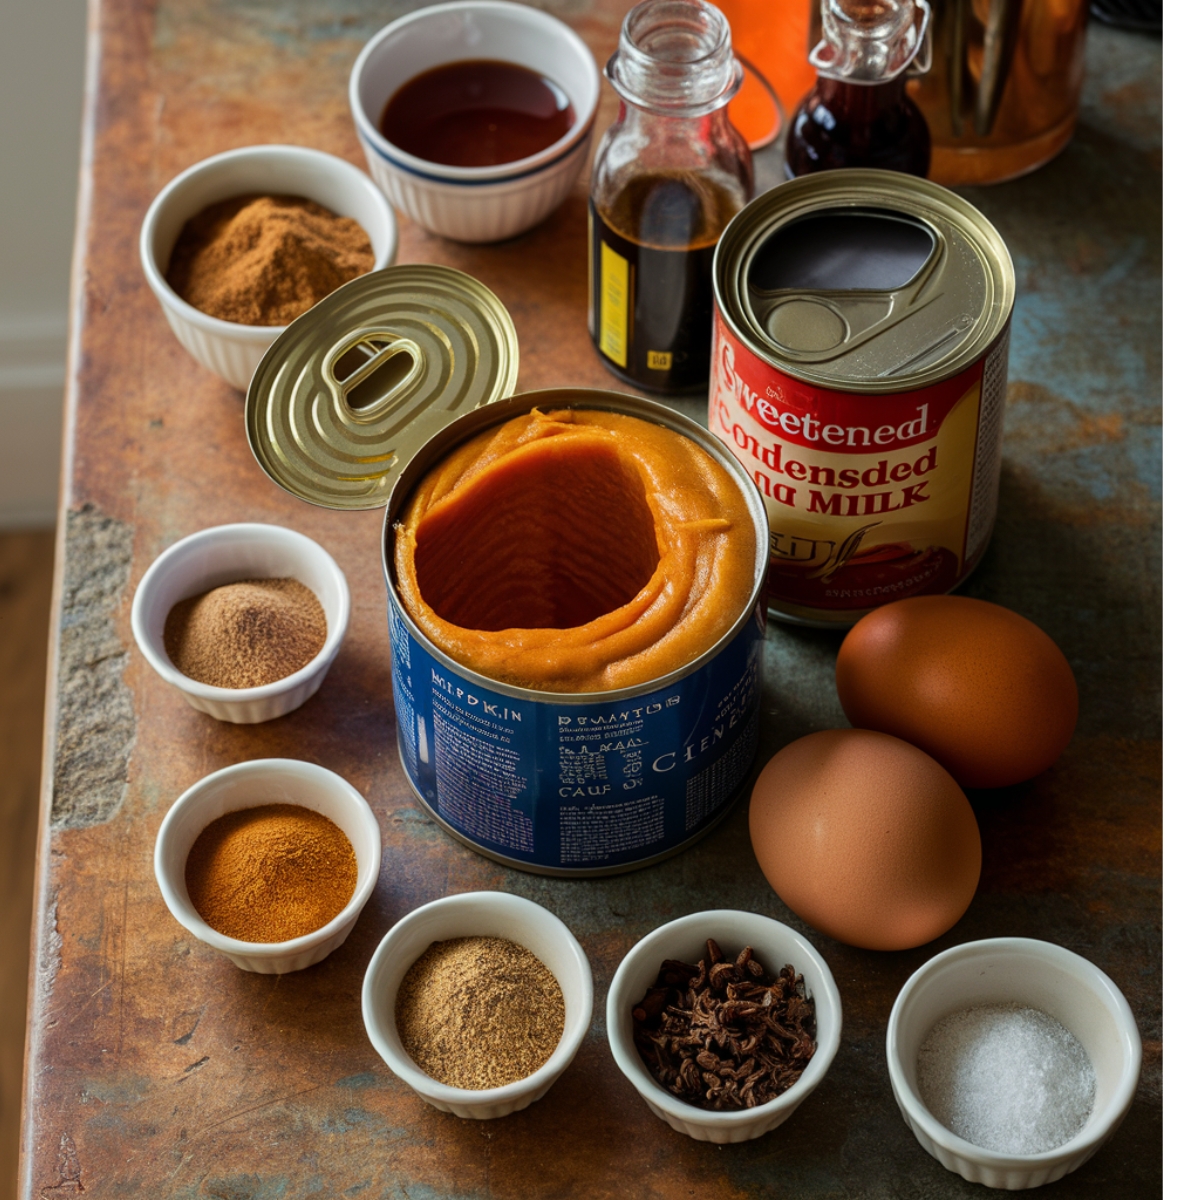
For the Pumpkin Filling (where the magic happens!):
- 1 can (15 oz) pumpkin puree (not the pre-spiced stuff - we want to control our own flavor destiny!)
- 1 can (14 oz) sweetened condensed milk (this is our secret weapon for that dreamy texture!)
- 2 large eggs (these bind everything together beautifully)
- 1 teaspoon vanilla extract (the real stuff if you have it!)
- 1½ teaspoons ground cinnamon (because it's not fall without cinnamon, right?)
- ½ teaspoon ground ginger (adds that perfect zing!)
- ¼ teaspoon ground nutmeg (freshly grated is amazing but pre-ground works great too!)
- ¼ teaspoon ground cloves (just a touch for that warm spice flavor)
- ½ teaspoon salt (balances the sweetness perfectly)
For Serving (because presentation is half the fun!):
- Whipped cream (homemade or store-bought - no judgment here!)
- Ground cinnamon for dusting (makes it look fancy with zero effort!)
- Chopped pecans (totally optional but adds a great crunch factor)
Pumpkin Pie with Condensed Milk Instructions
Alright friends, let's get baking! Don't worry if you're new to pie-making - I'll walk you through each step!
Step 1: Preparing the Pie Crust (or Your Pie's Cozy Blanket!)
- Combine dry ingredients. Grab a large bowl and whisk together the flour and salt. Easy peasy!
- Cut in the butter. This is where the magic starts! Using a pastry cutter or two forks (or even your fingers if you work quickly!), cut that cold butter into the flour mixture. You're looking for something that looks like coarse crumbs with some pea-sized butter bits still visible. Those little butter pockets = flaky crust heaven!
- Add ice water. Sprinkle 3 tablespoons of super cold ice water over your mixture and gently stir with a fork. The dough should start coming together like old friends at a reunion. If it seems too dry, go ahead and add that extra tablespoon of water - you'll know when it feels right!
- Form and chill the dough. Gather all that goodness into a ball, gently flatten it into a disk (like a hockey puck!), wrap it in plastic wrap, and pop it in the fridge for at least 30 minutes. In a rush? 30 minutes works great! Got time? It can hang out in there for up to 2 days!
- Roll out the dough. Dust your counter with a little flour (to prevent the dreaded stick-situation), and roll your chilled dough into a 12-inch circle about ⅛-inch thick. No perfect circles required - we're going for homemade charm here!
- Transfer to pie plate. Here's a pro tip: gently fold your dough in half, then in quarters to make it easier to move! Unfold it into your 9-inch pie plate, and lovingly press it into the bottom and sides. Trim any excess dough hanging over the edge (leave about ½-inch of overhang), then fold and crimp the edges however you like - pinched, forked, or thumbprinted - make it yours!
- Chill again. Pop your pie shell back in the fridge while you whip up the filling. This extra chill time prevents shrinkage (nobody wants a shrunken pie crust!).
Step 2: Making the Pumpkin Filling (Where All The Yumminess Happens!)
- Preheat the oven. Crank up that oven to 425°F (220°C) and position a rack in the lower third. Your pie is about to get the VIP treatment!
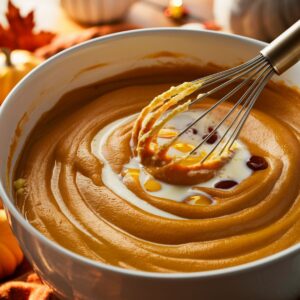
- Combine wet ingredients. In a large bowl, whisk together your pumpkin puree, that magical sweetened condensed milk, eggs, and vanilla extract until they're all best friends in the bowl.
- Add spices. Now for the aromatherapy part! Sprinkle in the cinnamon, ginger, nutmeg, cloves, and salt. Mix until everything is beautifully incorporated. Go ahead, take a sniff - smells like fall, doesn't it?
- Pour into crust. Grab your chilled crust from the fridge and pour in that gorgeous pumpkin filling. Give the bowl a little scrape with a spatula - we don't want to waste any of that deliciousness!
Step 3: Baking the Pumpkin Pie (The Hardest Part is Waiting!)
- Initial high-temperature bake. Slide your pie into that hot oven and let it bake at 425°F for 15 minutes. This blast of heat helps set the crust so it doesn't get soggy. Nobody likes a soggy bottom!
- Reduce heat and continue baking. Here's a little secret - don't open that oven door! Just turn the temperature down to 350°F (175°C) and continue baking for another 35-40 minutes. Opening the door lets out all the heat and can make your pie sad.
- Check for doneness. Your pie is ready when a knife inserted about 1 inch from the edge comes out clean. The center might still have a slight wiggle - that's perfect! It's like checking if a cheesecake is done. If you notice the crust edges getting too brown too quickly, just cover them with a pie shield or some foil strips - like putting a little hat on your pie!
- Cool completely. The hardest part! Take your masterpiece out of the oven and place it on a wire rack to cool completely, about 2 hours. I know it's tempting to dig in right away, but patience pays off! The filling needs this time to finish setting up, and trust me, it's worth the wait!
Congratulations! You just made an amazing Pumpkin Pie with Condensed Milk from scratch! While it's cooling, why not whip up some fresh cream for topping? Or brew a pot of coffee? You deserve it after all this baking!
Hints and Tips for Perfect Pumpkin Pie with Condensed Milk
For the perfect crust: Keep all ingredients cold and handle the dough as little as possible to ensure a flaky texture. If you're short on time, a high-quality store-bought crust works well too for your Pumpkin Pie with Condensed Milk.
Prevent cracks: Avoid overbaking your Pumpkin Pie with Condensed Milk. The pie is done when the edges are set but the center still has a slight jiggle. As the Pumpkin Pie with Condensed Milk cools, it will continue to set without cracking.
Enhanced flavor: For a deeper flavor profile, try using brown sugar instead of white sugar in your crust, or add a tablespoon of maple syrup to your filling.
Dietary Benefits & Serving Suggestions
This pumpkin pie with condensed milk is naturally high in vitamin A from the pumpkin, which supports eye health and immune function. To make this recipe dairy-free, you can substitute the butter in the crust with solid coconut oil and use dairy-free condensed milk alternatives.
Serve your pumpkin pie with any of these delicious accompaniments:
- Classic whipped cream or vanilla ice cream
- A drizzle of caramel sauce
- A sprinkle of candied pecans
- A side of spiced apple compote
Recipe Variations & Substitutions
Make it gluten-free: Substitute the all-purpose flour with a gluten-free flour blend in the crust. Many brands work as a 1:1 replacement.
Spice it up: Create a chai-spiced version by adding cardamom and a pinch of black pepper to the spice mix.
Mini pumpkin pies: Use a muffin tin and cut circles of pie dough to create individual servings - perfect for parties!
Pumpkin pie bars: Press the crust into a rectangular baking dish, pour in the filling, and cut into squares after baking for an easy-to-serve alternative.
Equipment
A ceramic or glass pie plate is ideal for this pumpkin pie with condensed milk recipe, as these materials distribute heat evenly and help prevent a soggy bottom crust. A pie shield is also helpful to protect the crust edges from over-browning during the longer baking time needed for the filling to set.
If you don't have a pastry cutter, two knives or a food processor can be used to cut the butter into the flour for the crust.
Storage
Your pumpkin pie with condensed milk can be stored in the refrigerator for up to 4 days. Cover it loosely with plastic wrap or aluminum foil once it has completely cooled.
For longer storage, this pie freezes beautifully for up to 1 month. Wrap the completely cooled pie tightly in several layers of plastic wrap and then aluminum foil before freezing. Thaw overnight in the refrigerator before serving.
Top Tip
For the silkiest, smoothest pumpkin pie filling, warm your pumpkin puree and spices in a saucepan over medium heat for 3-5 minutes before adding the condensed milk and eggs. This simple step "blooms" the spices and removes any raw flavor from the pumpkin, resulting in a more developed flavor profile.
Grandma's Magic Touch:
Want to know what makes this Pumpkin Pie with Condensed Milk truly special? It's all about those little tricks passed down through generations! My grandma always said, "The secret's in the details, honey!" And was she ever right!
For this Pumpkin Pie with Condensed Milk, try warming your spices in a dry pan for just 30 seconds before adding them to the filling. This quick step "wakes up" the spices and makes your whole kitchen smell amazing! Grandma also taught me to brush the unbaked crust with a thin layer of egg white - it creates a barrier that keeps the crust crisp even with that wet pumpkin filling.
Another grandma-approved trick? After mixing your Pumpkin Pie with Condensed Milk filling, let it sit for 10 minutes before pouring into the crust. This allows the flavors to marry together and any air bubbles to rise to the surface. Give the bowl a gentle tap, skim off any foam, and you'll get that perfectly smooth top that makes everyone say "Wow!"
FAQ
Is pumpkin pie better with condensed milk or evaporated milk?
This answer clearly states the benefits of condensed milk over evaporated milk for pumpkin pies, highlighting texture differences and reliability. The direct comparison helps Google understand this is answering a comparative question.
Can I use sweetened condensed milk instead of evaporated milk for a pie?
This response directly answers the question in the first sentence with a "Yes, but..." format that search engines favor. It includes practical advice on recipe adjustments needed when making this substitution.
What does condensed milk do in baking?
Sweetened condensed milk adds sweetness, moisture, richness, and improved texture to baked goods. In pumpkin pie specifically, it serves as both sweetener and thickening agent, creating a silky-smooth filling that sets perfectly every time.
How to replace evaporated milk with sweetened condensed milk?
Replace evaporated milk with an equal amount of sweetened condensed milk, but omit or reduce any sugar called for in the recipe. For example, substitute 1 cup evaporated milk plus ¾ cup sugar with one 14 oz can of sweetened condensed milk.
How did your Pumpkin Pie with Condensed Milk turn out?
This classic pumpkin pie uses sweetened condensed milk for an incredibly smooth, rich filling that sets perfectly every time. The warm spices blend beautifully with the pumpkin, creating a dessert that's perfect for holidays or anytime you're craving a slice of homemade comfort.
Looking for classic flavors? Our Gooseberry Pie is a timeless treat, while the Pecan Pie Cheesecake Recipe combines the best of pecan pie and creamy cheesecake. And for easy snacking, our Pecan Pie Bars Recipe delivers all the flavors of pecan pie in a handy bar form!
Did you make this Pumpkin Pie with Condensed Milk? We'd love to hear about your experience! Leave a star rating and share your thoughts in the comments.Did you try any creative twists or use any unique ingredients? Your feedback not only helps others but also contributes to our growing community of home cooks. Don't forget to share a photo of your culinary creation!
Related
Looking for other recipes like this? Try these:

Pairing
These are my favorite dishes to serve with Pumpkin Pie with Condensed Milk




Easy Pumpkin Pie with Condensed Milk
Ingredients
Equipment
Method
- In a large bowl, whisk together the flour and salt.
- Cut the cold butter into the flour mixture until it resembles coarse crumbs with some pea-sized pieces remaining.
- Sprinkle 3 tablespoons of ice water over the mixture and stir with a fork until the dough begins to come together. Add the remaining tablespoon of water if needed.
- Gather the dough into a ball, flatten into a disk, wrap in plastic wrap, and refrigerate for at least 30 minutes or up to 2 days.
- On a lightly floured surface, roll the chilled dough into a 12-inch circle about ⅛-inch thick.
- Carefully place the dough into a 9-inch pie plate, gently pressing it into the bottom and sides. Trim any excess dough, leaving about a ½-inch overhang, then fold and crimp the edges.
- Refrigerate the prepared crust while you make the filling.
- Preheat the oven to 425°F (220°C) and position a rack in the lower third of the oven.
- In a large bowl, whisk together the pumpkin puree, sweetened condensed milk, eggs, and vanilla extract until well combined.

- Stir in the cinnamon, ginger, nutmeg, cloves, and salt, mixing until all ingredients are thoroughly incorporated.
- Remove the chilled pie crust from the refrigerator and pour in the pumpkin filling, spreading it evenly.
- Place the pie in the preheated oven and bake at 425°F for 15 minutes.
- Without opening the oven door, reduce the temperature to 350°F (175°C) and continue baking for 35-40 minutes more, or until a knife inserted 1 inch from the edge comes out clean.
- Remove the pie from the oven and place on a wire rack to cool completely, about 2 hours.
- Serve with whipped cream, a sprinkle of cinnamon, and chopped pecans if desired.
Nutrition
Notes
- For the best flavor, make this pie a day ahead to allow the flavors to meld together.
- To prevent cracks, avoid overbaking. The pie is done when the edges are set but the center still has a slight jiggle.

Samantha Thomas says
This pumpkin pie with condensed milk is wonderfully creamy and perfectly spiced! The texture is smooth and silky, and it sets up beautifully. My go-to Thanksgiving pie recipe!