
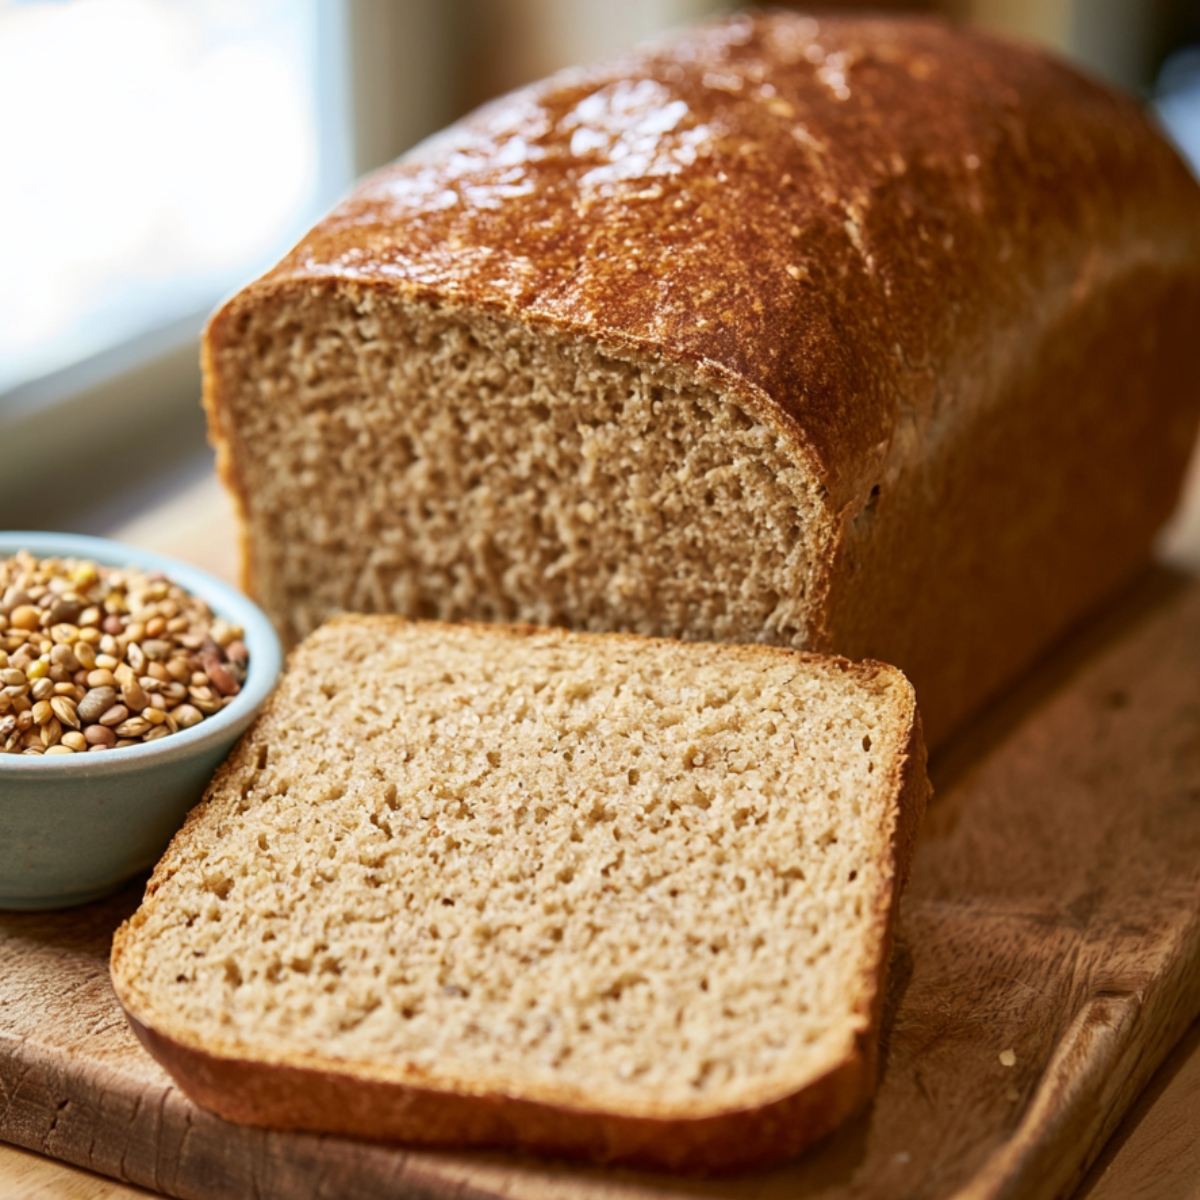
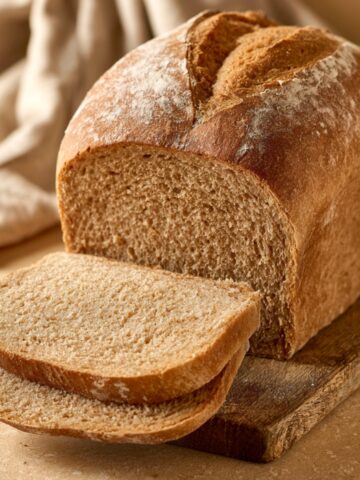
Dense, hearty, golden-crusted Ezekiel bread that smells like a warm grain mill and toasts up with the most satisfying crunch you've ever had from a homemade loaf. I started baking this after finding my grandma's handwritten note about biblical bread tucked inside one of her old cookbooks, and now I make it almost every week.
If you love baking from scratch, you might also enjoy my Blueberry Danish or these cozy Apple Cider Cookies for your next weekend bake day, and my Chocolate Peanut Butter Rolls are always a hit alongside a warm slice of this loaf.
Why You'll Love This Ezekiel Bread
This is a wholesome, high-fiber bread that doesn't taste like cardboard, which seems like a low bar but honestly matters so much. The honey gives it just enough natural sweetness, the olive oil keeps the crumb tender, and the grain-forward flavor gets better the longer the dough rests. It makes a fantastic base for sandwiches, holds up beautifully when toasted, and actually fills you up. One slice keeps you going, and that's the whole point of a nutritious homemade bread like this.
Jump to:
Ezekiel Bread Ingredients
See Recipe Card Below This Post For Ingredient Quantities
- Ezekiel Mix (Ground): This is the heart of the whole recipe. Grinding the mix fresh gives you a nutty, hearty flavor that pre-ground flour just can't match. Three cups is the perfect amount for one sturdy loaf.
- Warm Water: The water needs to be between 105 and 110°F, warm enough to activate the yeast but not hot enough to kill it. Think warm bath water, not boiling.
- Olive Oil: Adds richness and helps keep the crumb from drying out. It also gives the crust a slightly golden, tender finish.
- Honey: A quarter cup brings natural sweetness that balances the earthy, grainy flavor of the Ezekiel mix beautifully. It also feeds the yeast and helps with browning.
- Salt: Keeps the bread from tasting flat. Even in a healthy whole grain loaf, salt is doing a lot of quiet work.
- Egg (Optional): If you add it, the egg gives the loaf a little more structure and a richer, slightly golden crumb. It's completely optional but worth trying.
- Lecithin (Optional): This is a natural emulsifier that helps bind everything together and can give you a slightly softer texture. Totally fine to skip it.
- Instant Yeast: Two and a half teaspoons gives this loaf a good rise. Instant yeast doesn't need to be proofed separately, which makes the whole process smoother.
How to Make Ezekiel Bread
Here's everything you need to do, step by step. Don't rush the rise times. That's where the flavor really builds.
Mix the base: In the bowl of a stand mixer or a large mixing bowl, combine the warm water, olive oil, honey, lecithin (if using), egg (if using), salt, and 2 cups of the ground Ezekiel flour. Stir everything together until it's well combined and looks like a thick, sticky batter.
Add the yeast and remaining flour: Sprinkle in the instant yeast and start mixing. Gradually add the remaining flour, about half a cup at a time, and keep mixing between each addition.
Build the dough: Keep adding flour until the dough starts to pull away from the sides of the bowl. You want it to feel soft but not sticky on your hands.
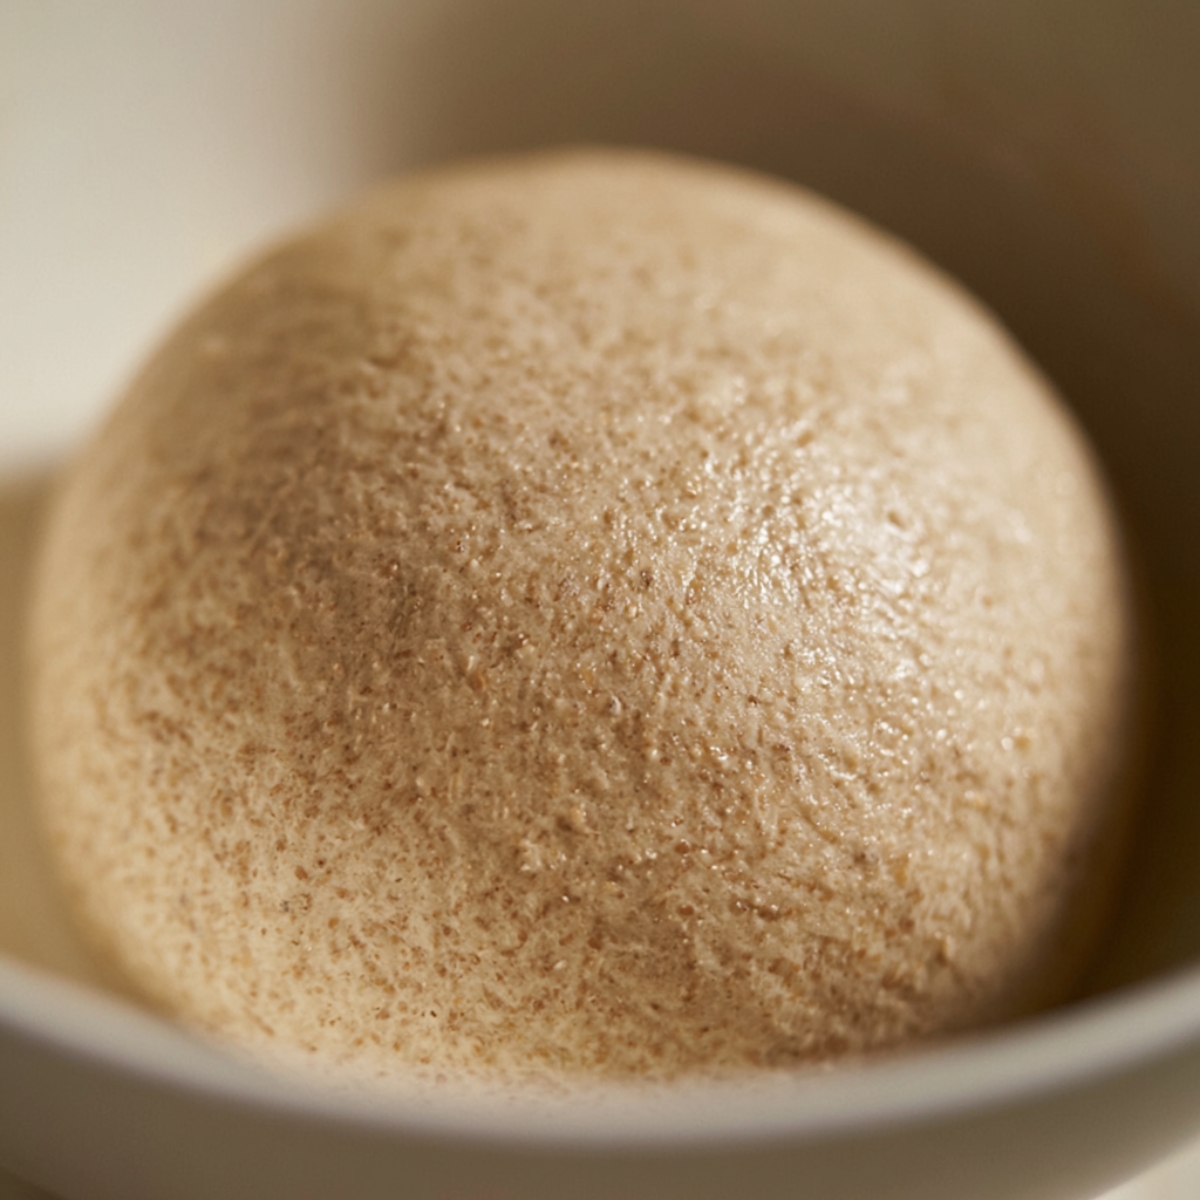
Knead: Knead the dough for 10 minutes until it's smooth and elastic. If you're using a stand mixer, the dough hook does this work for you. If you're doing it by hand, it's a workout, but a good one.
First rise: Transfer the dough to a lightly greased bowl and cover it with a clean towel or plastic wrap. Let it rise at room temperature until it's doubled in size, about 1 ½ to 2 hours. Find a warm spot in your kitchen, near the oven or on top of the fridge works great.
Shape the loaf: Once the dough has doubled, gently press it down to deflate it. Then shape it into a smooth log and place it into a greased loaf pan.
Second rise: Cover the pan loosely and let the dough rise again until it crests over the edge of the pan. This second rise is shorter but just as important for texture.
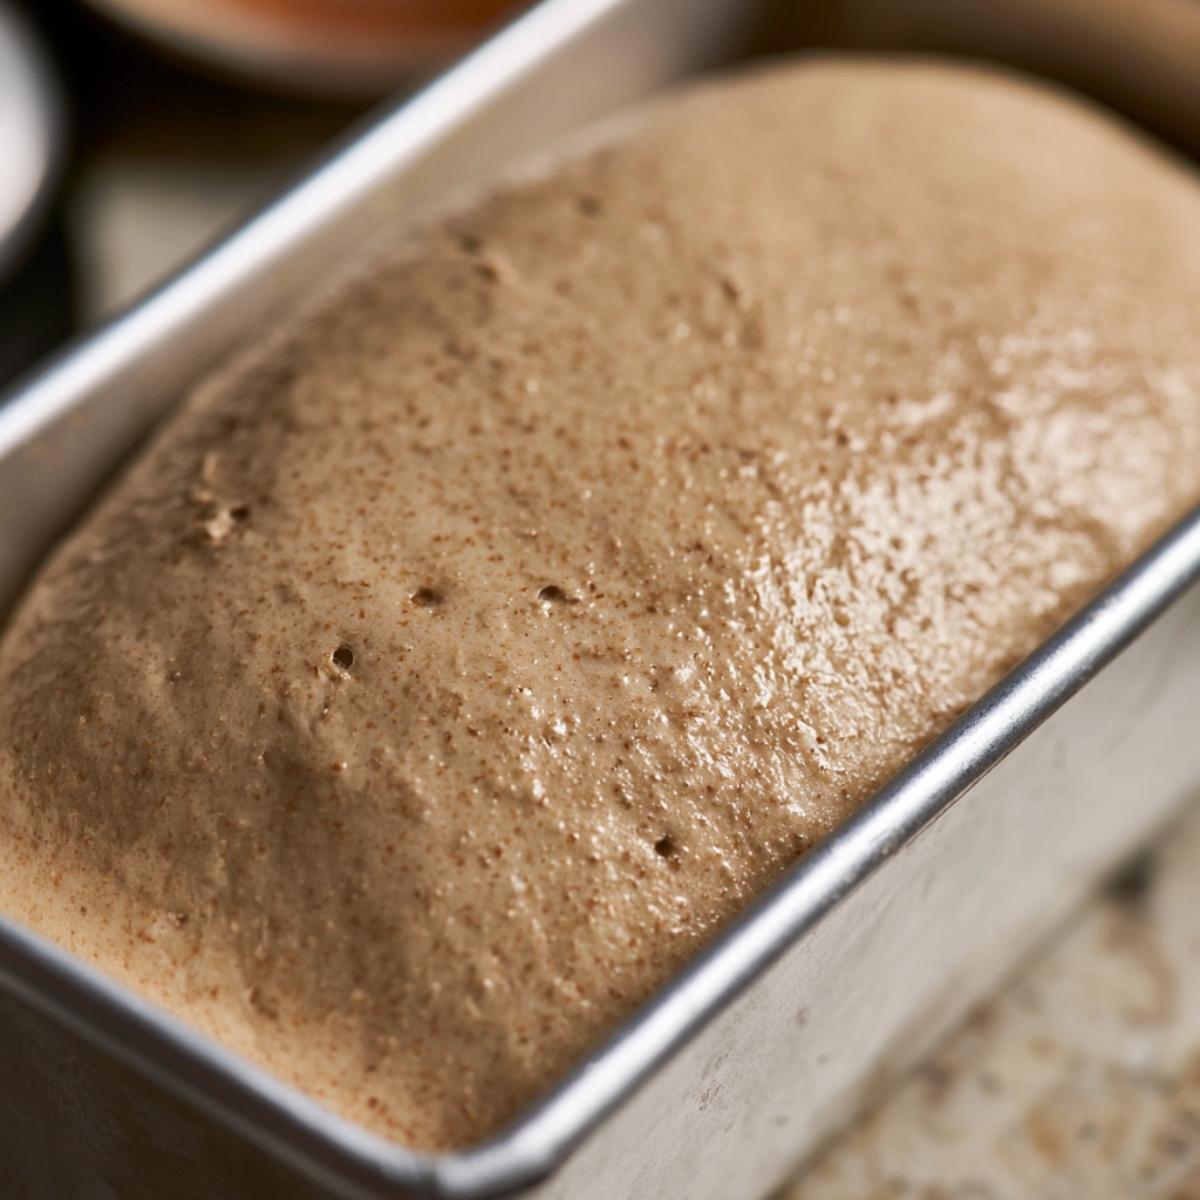
Preheat your oven: While the dough finishes its second rise, preheat your oven to 350°F (175°C).
Bake: Slide the loaf into the oven and bake for 30 to 35 minutes, until the top is deep golden brown and the kitchen smells like toasted grain and honey. If you tap the bottom of the loaf, it should sound slightly hollow.
Cool: Immediately remove the bread from the pan and set it on a cooling rack. Let it cool completely before you slice it. I know it's hard to wait, but cutting in too early gives you a gummy crumb. Ask Sofia.
Substitutions and Swaps
No grain mill? A high-powered blender works well for grinding the Ezekiel mix. Blend in batches for the most even consistency.
No honey? Maple syrup is a solid swap. It's slightly less sweet but still adds that natural depth the bread needs.
No olive oil? Melted coconut oil or a neutral avocado oil both work fine. The flavor will be slightly different but still good.
Egg-free? The egg is already optional in this recipe. Leave it out and the bread still bakes up well, just slightly denser.
No lecithin? Skip it entirely. Most home bakers don't keep it on hand, and the loaf turns out great without it.
Equipment For Ezekiel Bread
- Stand mixer or large mixing bowl
- Loaf pan
- Grain mill or blender (for grinding the Ezekiel mix)
- Cooling rack
- Measuring cups and spoons
A stand mixer with a dough hook makes the kneading much easier, but a strong pair of hands works too. Just give yourself a full 10 minutes and don't rush it.
Storing Your Ezekiel Bread
At room temperature: Wrap the cooled loaf tightly in plastic wrap or store it in a zip bag. It keeps well for about 3 to 4 days on the counter.
In the fridge: This Ezekiel Bread holds up nicely refrigerated for up to a week. Toast slices straight from cold, no thawing needed.
In the freezer: Slice the loaf before freezing so you can pull out individual pieces as needed. Wrapped well, it freezes for up to 3 months. Toast directly from frozen and it comes back beautifully.
Ways to Serve Ezekiel Bread
This fiber-rich Ezekiel Bread is wonderful in so many ways. Here are a few favorites.
Thick-sliced toast with almond butter and a drizzle of honey is the kind of breakfast that actually keeps you full until lunch. It's simple and genuinely good.
A sandwich with turkey, avocado, and a little Dijon is hearty and satisfying, and the grain flavor from the bread makes every bite feel more substantial than your average sandwich.
Serve it warm alongside a big bowl of vegetable soup on a cold evening and watch everyone at the table get a little quiet with appreciation.
If you've got a sweet tooth, try a slice with a smear of cream cheese and a few fresh berries. It's cozy in a way that feels almost indulgent, even though it's completely wholesome. For more sweet ideas, my Raspberry Filled Cupcakes or a slice of Berries and Cream Cake make a great dessert after a bread-based dinner.
Expert Tips
Measure your water temperature. This is probably the most important tip. If the water is too cool, the yeast won't activate well. Too hot and the yeast dies. A kitchen thermometer is your best friend here.
Don't skip the second rise. The first rise builds flavor. The second rise shapes the structure of the loaf. Both matter.
Grind the flour just before you mix. Freshly ground Ezekiel mix has a much more vibrant, nutty flavor than flour that's been sitting. It's worth the extra two minutes.
Give it space to cool. The Ezekiel Bread keeps cooking a little after it comes out of the oven, and slicing it early gives you a gummy, dense crumb. Set a timer if you need to. Thirty minutes minimum, a full hour is even better.
FAQ
What is Ezekiel bread made of?
Homemade Ezekiel bread is made from a biblical grain and legume blend that typically includes wheat, barley, lentils, millet, spelt, and pinto beans. In this recipe, we use a pre-blended Ezekiel mix that gets ground fresh before mixing. A tip from my kitchen: grinding it yourself takes about two minutes and makes a big difference in flavor.
Is homemade Ezekiel bread healthier than regular bread?
It can be. Ezekiel bread is made with whole grains and legumes, which means it's higher in fiber, protein, and nutrients than most white or standard wheat breads. This homemade sprouted grain bread style recipe skips preservatives and lets you control exactly what goes in. That said, it's not a health claim, it's just real food made from scratch.
Can I make Ezekiel bread without a stand mixer?
Absolutely. A large mixing bowl and some elbow grease work fine. The kneading step takes about 10 minutes by hand, and you'll know the dough is ready when it feels smooth and springs back slightly when you poke it. My neighbor Sofia did it by hand her second time and said it was actually kind of therapeutic.
How long does homemade Ezekiel Bread stay fresh?
At room temperature, wrapped well, it stays good for 3 to 4 days. In the fridge, up to a week. In the freezer, up to 3 months. Slice it before freezing so you can grab a piece whenever you need it without defrosting the whole loaf.
Related
Looking for other recipes like this? Try these:



Pairing
These are my favorite dishes to serve with Ezekiel Bread


Homemade Ezekiel Bread
Ingredients
Method
- Combine the warm water, olive oil, honey, lecithin if using, egg, salt, and 2 cups of the Ezekiel flour in a stand mixer bowl or a large mixing bowl until blended.
- Continue mixing while sprinkling in the instant yeast, then gradually add the remaining flour a little at a time until a soft dough forms and begins pulling away from the bowl.
- Knead the dough for about 10 minutes until it becomes smooth, elastic, and slightly tacky.
- Transfer the dough to a lightly greased bowl, cover it, and let it rise in a warm place until doubled in size, about 1½ to 2 hours.
- Gently press the air from the risen dough, shape it into a loaf, and place it into a greased loaf pan. Cover and allow it to rise again until the dough crowns about 1 inch above the rim of the pan.
- Preheat the oven to 350°F while the dough finishes its second rise.
- Bake the loaf for 30-35 minutes, or until the top is golden brown and the bread sounds hollow when tapped.
- Immediately remove the bread from the pan and place it on a wire rack to prevent the crust from becoming soggy.
- Allow the bread to cool completely before slicing to help the crumb set properly.



Leave a Reply