
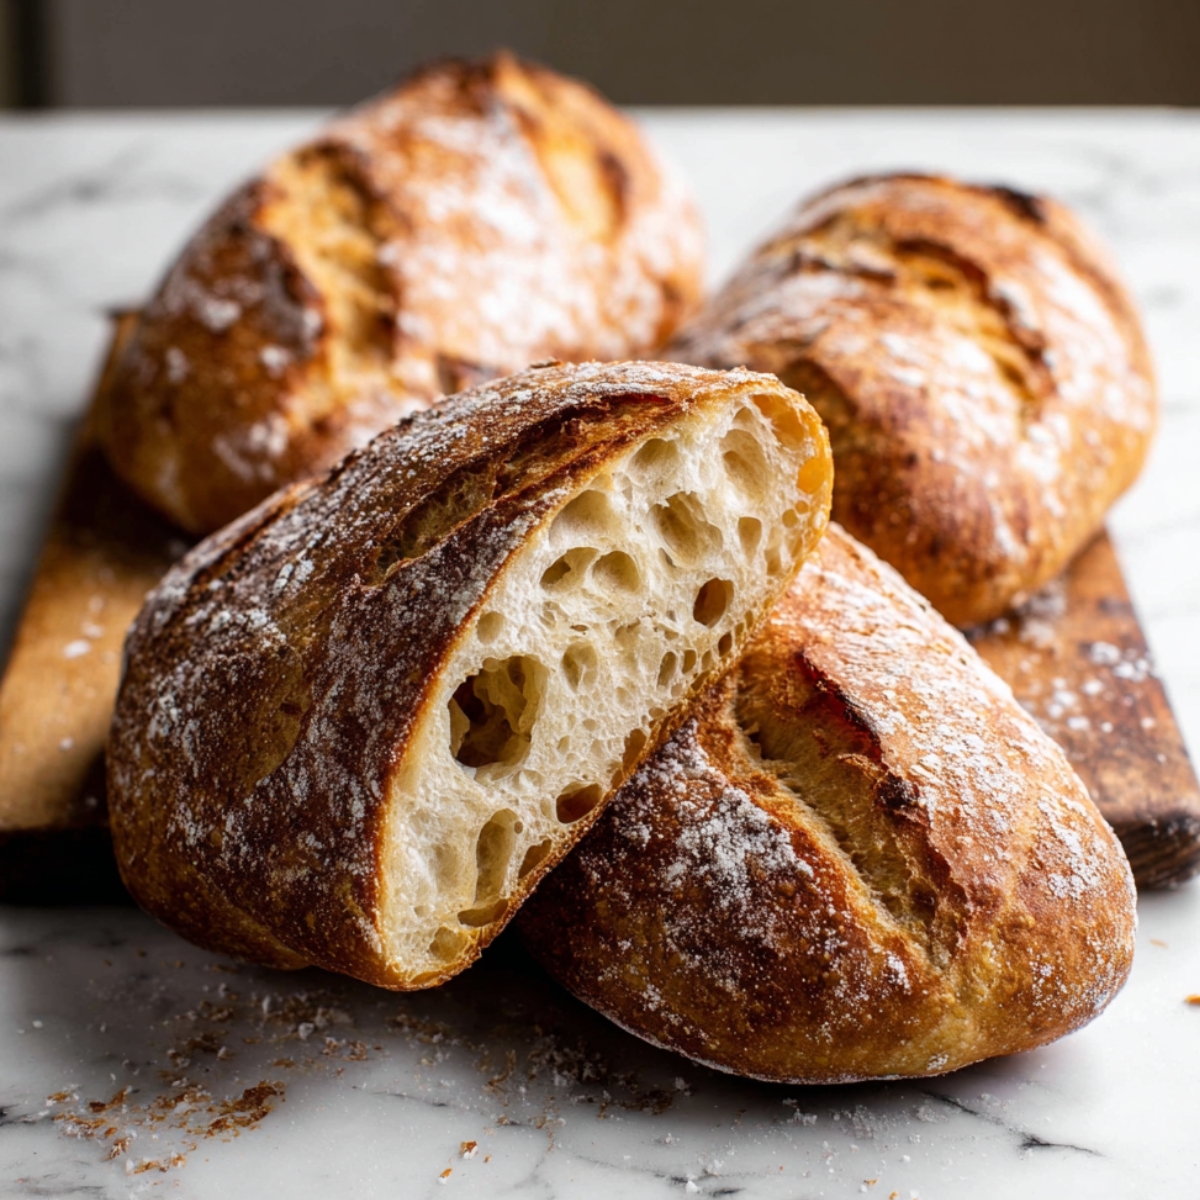
A crisp, golden crust. A soft, chewy pull on the inside. That faint yeasty warmth drifting from the oven that makes the whole house smell like a bakery on a slow Saturday morning. This homemade artisan bread is the kind of loaf that feels like an achievement, except it really isn't that hard. You only need four pantry staples and a little patience, and the dough does most of the work for you. I started making this on a cold January weekend when I had nothing better to do, and honestly I've never gone back to store-bought.
If you love baking from scratch, you might also enjoy my Pumpkin Cream Cheese Muffins for cozy morning baking, or these Puff Pastry Apple Tartlets when you want something equally impressive with minimal effort.
Why You'll Love This Artisan Bread
This homemade artisan bread recipe proves you don't need a fancy kitchen or years of baking experience to pull off a gorgeous, bakery-style loaf at home. Four ingredients, one bowl, and a little hands-off time is genuinely all it takes. The dough comes together in minutes, and while the long rise sounds intimidating, it's actually what makes this recipe so forgiving. You're not rushing anything. The bread works on your schedule, not the other way around.
Jump to:
Artisan Bread Ingredients
Here's a look at the short, simple ingredient list and what each one brings to the dough.
See Recipe Card Below This Post For Ingredient Quantities
- Bread flour: This is the backbone of the loaf. Bread flour has more protein than all-purpose, which develops stronger gluten and gives the bread that satisfying chewy texture with an open crumb. Use it measured at about 430g for accuracy.
- Instant yeast: The workhorse of this recipe. Instant yeast doesn't need to be dissolved in water first, so you mix it straight in with the dry ingredients. It keeps the process simple and reliable.
- Coarse salt: Brings out all the flavor and keeps the dough from tasting flat. Coarse salt dissolves more slowly, which helps it distribute evenly through the dough without overwhelming any one spot.
- Water : Warm but not hot. Water that's too hot can kill the yeast, and water that's too cold slows everything down too much. Room-temperature water that feels comfortable on your wrist is just right.
- Cornmeal (optional): A light dusting on the baking sheet helps prevent sticking and adds a tiny bit of texture to the bottom crust. Totally optional but worth trying.
How to Make This Homemade Artisan Bread Recipe
Here's everything laid out clearly, step by step.
Mix the dry ingredients: In a large ungreased mixing bowl, whisk together the bread flour, instant yeast, and coarse salt until evenly combined.
Add the water: Pour in the 1½ cups of water and use a silicone spatula or wooden spoon to mix everything together until all the flour is moistened. The dough will look shaggy and sticky, that's completely normal and exactly what you want. If a few dry bits remain at the bottom, use your hands to press them in and gather it into a rough ball.
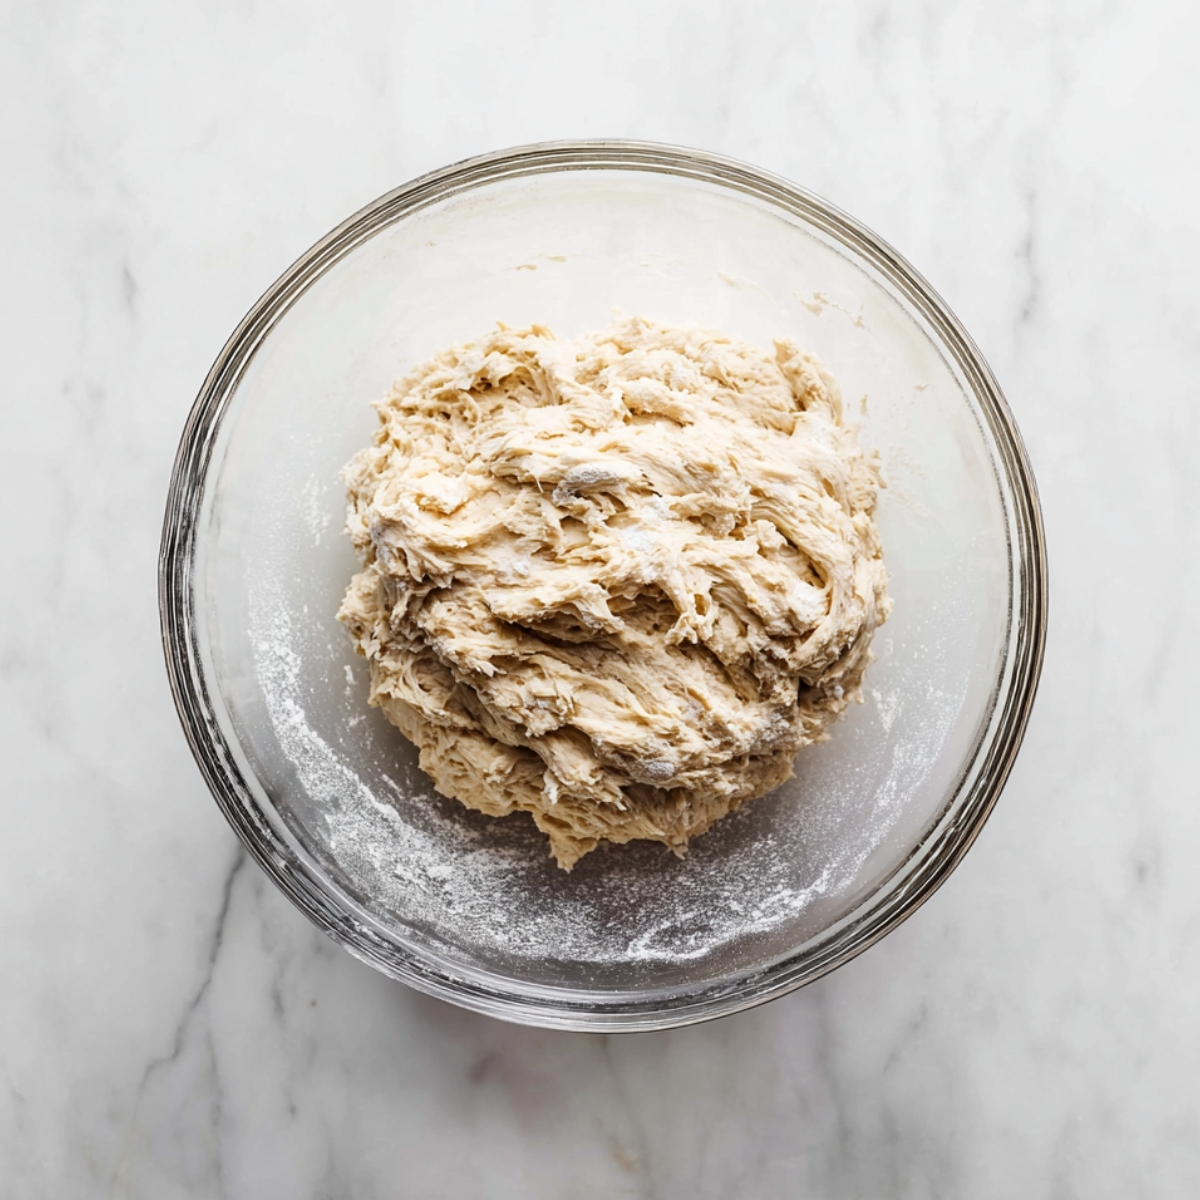
First rise: Cover the bowl tightly with plastic wrap or aluminum foil and let the dough rest at room temperature for 2 to 3 hours. You're looking for it to nearly double in size with plenty of air bubbles visible on the surface. That's your sign the yeast is alive and working.
Cold fridge rise (for best flavor): For the best possible flavor and texture, slide the covered bowl into the refrigerator and let the dough chill for at least 12 hours, or up to 3 full days. This slow cold fermentation is what makes overnight artisan bread taste so different from bread that's rushed. The flavors deepen and the crumb opens up beautifully.
Prepare your pan: When you're ready to bake, lightly dust a large nonstick baking sheet with flour and/or cornmeal.
Divide and shape: Turn the cold dough onto a lightly floured work surface. Use a sharp knife or bench scraper to cut it in half. Shape each half into a loaf roughly 9 inches by 3 inches, tucking the ends under gently. Place the loaves about 3 inches apart on your prepared baking sheet.
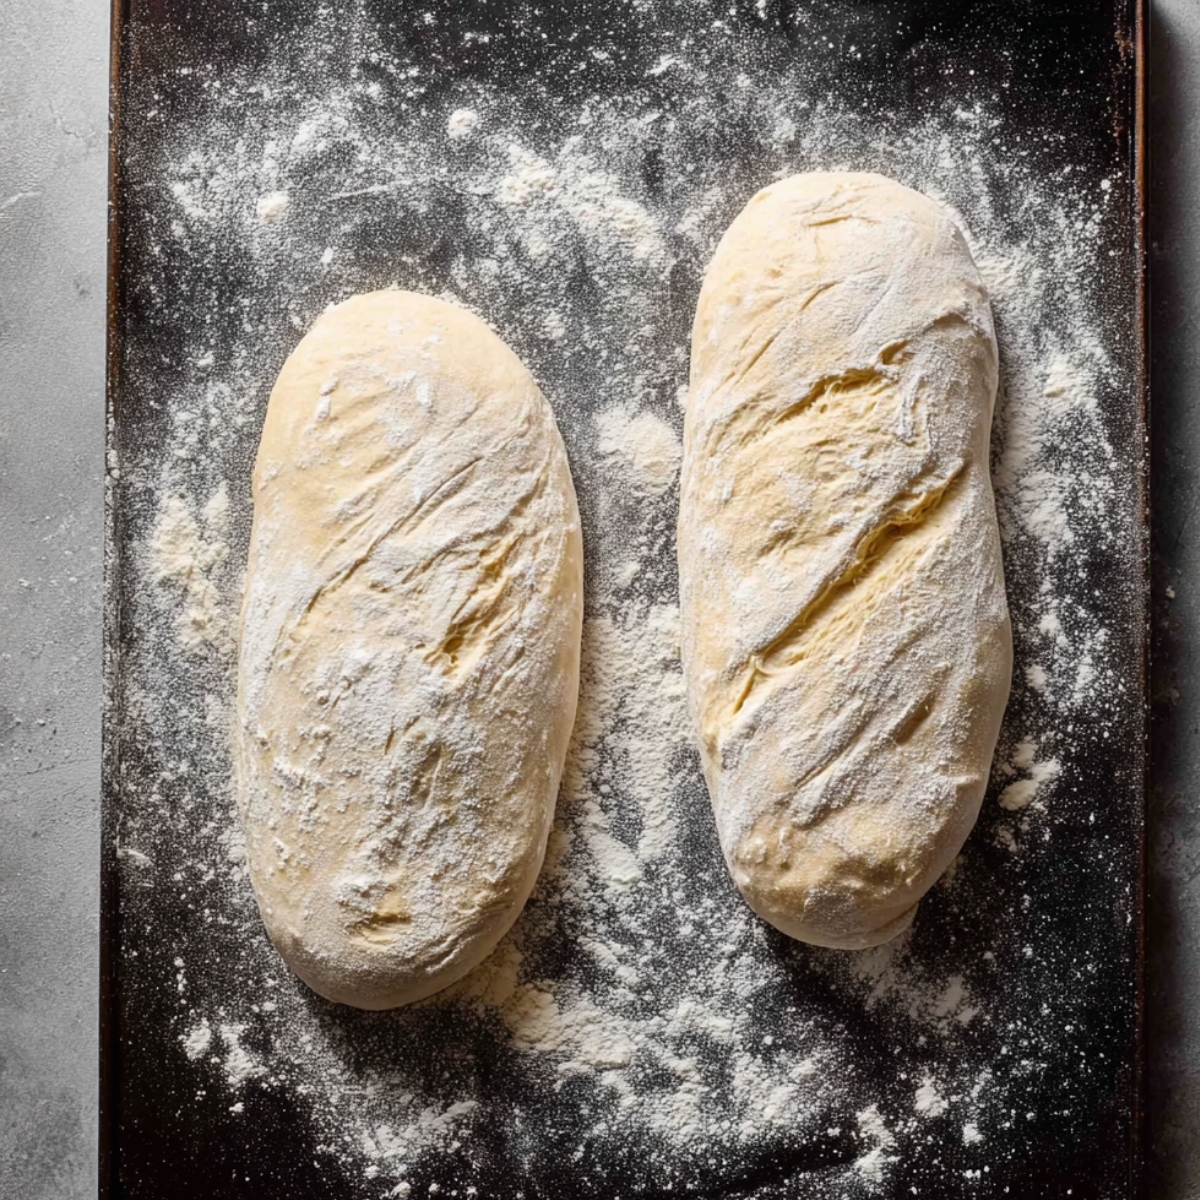
Rest the loaves: Cover loosely and let them rest for 45 minutes. While they rest, preheat your oven to 475°F (246°C). The oven needs a full preheat to give you that great crust.
Score the tops: Use a very sharp knife or a bread lame to cut 3 shallow slashes across the top of each loaf, going about ½ inch deep. Scoring lets the bread expand as it bakes without tearing in random spots.
Add steam (optional but great): For a seriously crispier crust, set a shallow metal or cast iron pan on the bottom oven rack. Right before you put the bread in, carefully pour 3 to 4 cups of boiling water into the pan. Stand back, steam comes up fast.
Bake: Slide the baking sheet onto the center oven rack and bake for 20 to 25 minutes. The loaves are ready when the crust is a deep golden brown and the bottom sounds hollow when tapped. If you have an instant-read thermometer, the internal temperature should reach 195°F (90°C).
Cool: Transfer the loaves to a cooling rack and resist slicing for at least 20 minutes. The interior is still setting up inside, and cutting too early can make the crumb gummy.
Substitutions and Swaps
Bread flour vs. all-purpose: Bread flour gives a chewier, more structured crumb, but all-purpose flour works in a pinch. The texture will be slightly softer and less chewy.
Instant yeast vs. active dry yeast: You can swap in active dry yeast, but dissolve it in the warm water for 5 minutes before mixing with the flour. Use the same amount.
Coarse salt vs. table salt: If you only have table salt, reduce the amount slightly, about 1½ teaspoons, since table salt is finer and saltier by volume.
No steam pan? Skip it. The bread will still bake well. The crust just won't have quite as much crackle.
Equipment For Artisan Bread
Here's what you'll want to have ready before you start.
- Large mixing bowl - for mixing and rising the dough
- Whisk - for combining the dry ingredients
- Silicone spatula or wooden spoon - for the initial mix
- Plastic wrap or aluminum foil - to cover the dough during rising
- Nonstick baking sheet - where the loaves will bake
- Sharp knife, bench scraper, or bread lame - for dividing and scoring
- Measuring cups - for accuracy
- Instant-read thermometer (optional) - takes the guesswork out of doneness
- Metal or cast iron pan/skillet (optional) - for the steam method
- Cooling rack - always let bread rest off the hot pan
How to Store This Artisan Bread
Room temperature: Keep leftover bread loosely covered at room temperature for up to 5 days. A clean kitchen towel works better than an airtight bag, which can trap moisture and soften the crust.
Refrigerator: Wrap in foil or a zip bag and refrigerate for up to 1 week. Let it come back to room temperature before serving, or give it a quick warm in a 300°F oven for 10 minutes.
Freezer: Slice the cooled bread and freeze in a zip bag for up to 3 months. Toast slices straight from frozen.
Serving Ideas
This Artisan Bread loaf is good with practically everything, but here are four ways I love it most.
With soup. Pull a thick vegetable or tomato soup off the stove, slice this Artisan Bread thickly, and use it to scoop right from the bowl. Absolute winter comfort.
With salted butter. Nothing else. Just room-temperature butter spread thick while the bread is still a little warm from the oven. Simple and genuinely wonderful.
As a cheeseboard base. Slice thin and arrange around a board with soft cheese, olives, and something sweet like honey. It makes even a casual snack feel a little fancy.
Toasted for breakfast. The next-day bread toasts beautifully. Top with jam, mashed avocado, or a fried egg. If you want something sweet alongside, my Cookie Dough Cheesecake or even a square of Dark Chocolate Raspberry Truffles make for a very happy morning spread.
Expert Tips
Use a kitchen scale. Flour measurement by volume is inconsistent. Weighing out 430g gets you the right hydration every time.
Don't skip the cold rise. The overnight refrigerator fermentation isn't just about convenience. It builds flavor and makes the dough easier to shape.
Score deep enough. Shallow scoring tears; proper scoring opens. Go about ½ inch deep with confidence.
Let the oven fully preheat. This Artisan Bread bakes at 475°F. Give your oven a full 20 to 30 minutes to get there before baking, especially if you're using a heavy pan.
FAQ
How do you make homemade artisan bread?
This easy homemade artisan bread comes together with just four ingredients: bread flour, instant yeast, coarse salt, and water. You mix them into a rough dough, let it rise for 2 to 3 hours at room temperature, then refrigerate overnight for the best flavor. Shape, rest, score, and bake at high heat for that crisp golden crust. My family tip: the longer the cold rise, up to 3 days, the more complex and delicious the bread tastes.
Can I make artisan bread without a Dutch oven?
Yes, and this recipe is designed exactly for that. Instead of a Dutch oven, you bake the loaves on a regular nonstick baking sheet. For a crispier crust without a Dutch oven, use the optional steam method by placing a pan of boiling water on the bottom oven rack. It mimics the trapped steam effect you'd get from a covered pot and gives you that beautiful crackling crust.
Why is my artisan bread dense?
Dense artisan bread usually comes down to one of three things: the yeast wasn't active, the dough didn't rise long enough, or too much flour was worked in during shaping. Make sure your yeast isn't expired, give the dough plenty of time during both the room-temperature and cold rises, and keep your hands lightly floured rather than packing extra flour into the dough.
What flour is best for artisan bread?
Bread flour is the best choice for this recipe. It has a higher protein content than all-purpose flour, which builds more gluten and gives the loaf that chewy, satisfying texture you want from a good artisan loaf. All-purpose flour can be used as a substitute, but the crumb will be a bit softer and less structured.
Related
Looking for other recipes like this? Try these:


Pairing
These are my favorite dishes to serve with Artisan Bread



No-Knead Artisan Bread
Ingredients
Method
- Combine the bread flour, instant yeast, and salt in a large bowl until evenly blended.
- Pour in the room-temperature water and stir with a sturdy spoon or spatula until a rough, sticky dough forms with no dry flour remaining.
- Shape the dough into a loose ball inside the bowl, cover tightly, and let it rise at room temperature for about 2-3 hours until doubled and bubbly.
- For deeper flavor, refrigerate the covered dough for at least 12 hours or up to 3 days before shaping.
- Dust a baking sheet with flour or cornmeal. Transfer the chilled dough onto a lightly floured surface and divide it evenly into two portions.
- Shape each portion into a long loaf about 9 inches long and place them several inches apart on the prepared baking sheet. Cover loosely and let rest for 45 minutes.
- While the dough rests, preheat the oven to 475°F (246°C).
- Slash each loaf three times with a sharp knife or bread lame. If desired, create steam by placing a metal pan on the lower oven rack and carefully pouring boiling water into it just before baking.
- Bake the loaves for 20-25 minutes until deeply golden and hollow-sounding when tapped, or until the center reaches about 195°F (90°C).
- Transfer the loaves to a cooling rack and allow them to cool for at least 20 minutes before slicing and serving.

Leave a Reply