
Golden, crusty on the outside and cloud-soft on the inside, this homemade Italian bread is the kind of loaf that makes your whole house smell like a real bakery. I started making it years ago after my mom brought one to Sunday dinner and I couldn't stop pulling pieces off, still warm from the oven. What I love most is that it uses pantry staples you probably already have, and the dough practically rises on its own while you go do something else.
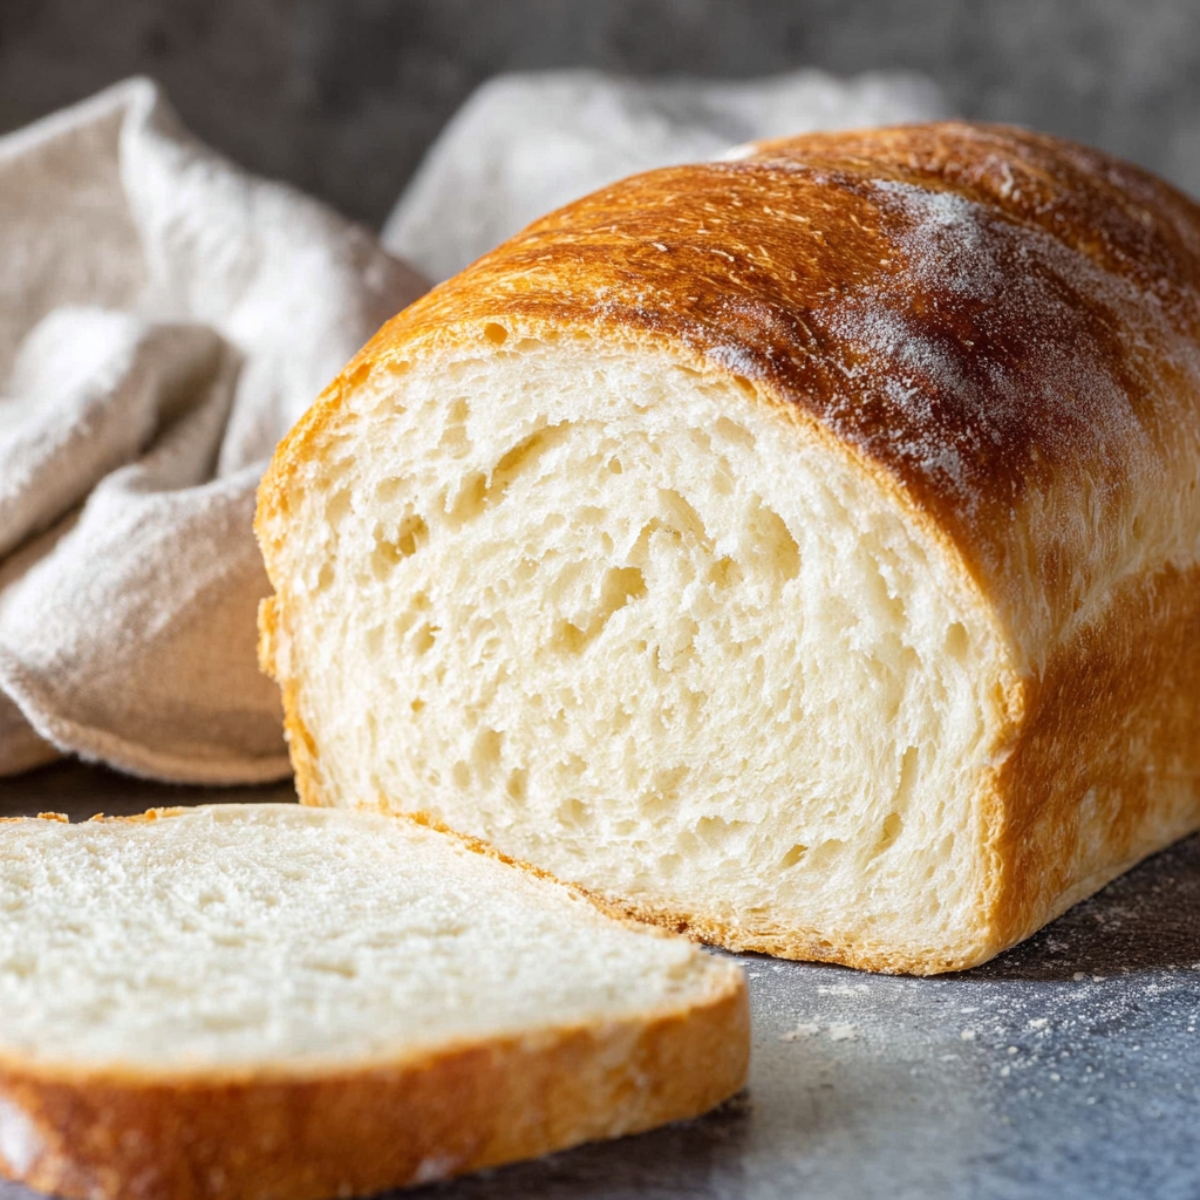
If you've ever been intimidated by bread baking, this one is your sign to try it. And when you're in a baking mood, these Mini Chocolate Éclairs and Choux au Craquelin make the most incredible little desserts to go alongside a warm bread board. This no-knead Italian loaf delivers two big, beautiful loaves with golden tops and a soft, pillowy crumb that holds up perfectly for sandwiches or dunking into a bowl of soup. If you love baking from scratch, you'll feel right at home here, and maybe afterward you'll want to treat everyone to a slice of Mango Mousse Cake for dessert.
Why You'll Love This Italian Bread
This homemade Italian Bread is the kind of bake that feels impressive but asks very little of you.
- No kneading required. The dough does the work during the rise, so you don't have to.
- Simple pantry ingredients. Flour, yeast, oil, and a little sugar. That's it.
- Two big loaves. Or three smaller ones, depending on how you divide the dough.
- Versatile every day. Garlic bread, sandwich bread, soup bread, or just warm bread with butter. All of it works.
- Beginner-friendly. If you've never made yeast bread before, this is the best place to start.
Jump to:
Italian Bread Ingredients
Everything here is simple and easy to find.
See Recipe Card Below This Post For Ingredient Quantities
- Active dry yeast : This is the leavening that makes the dough rise and gives the bread its light, airy texture. Make sure your yeast is fresh or it won't activate properly.
- Warm water, 110°F : Used to activate the yeast. It needs to be warm but not hot, closer to bath-water temperature. Too hot and it will kill the yeast.
- Granulated sugar, for the yeast : Feeds the yeast during activation and helps it bloom quickly.
- Hot water, 115-120°F : Combined with the flour mixture to start the dough. A little hotter than the proofing water, but not boiling.
- Granulated sugar, for the dough : Adds a very faint sweetness and helps with browning.
- Salt : Enhances the overall flavor and controls the yeast's activity during the rise.
- Vegetable oil : Keeps the crumb soft and moist and gives the bread a little richness without heaviness.
- All-purpose flour : The base of the loaf. You'll add it gradually, so the dough doesn't get too stiff. The sticky dough is normal and part of what makes this bread so soft.
- Egg white : Brushed over the tops of the loaves before baking to give them that beautiful golden, slightly glossy finish.
How to Make Homemade Italian Bread
Here's a one-liner to get you going: this Italian Bread comes together fast, rises on its own, and bakes up golden every time.
Activate the yeast: In a small bowl, stir together the active dry yeast, the ½ cup of warm water at 110°F, and the ½ teaspoon of sugar. Set it aside for 5 to 10 minutes. You'll know it's ready when it looks foamy and smells pleasantly yeasty.
Mix the base: In a large mixing bowl or the bowl of your stand mixer, combine the 2 cups of hot water (115-120°F), 3 tablespoons of sugar, 1 tablespoon of salt, ½ cup of vegetable oil, and 3 cups of flour. Mix until everything is combined.
Add the yeast: Pour the activated yeast mixture into the flour mixture and stir to incorporate.
Build the dough: Add another 2 to 3 cups of flour and mix until the dough comes together. It will still feel sticky, and that's completely normal. Don't be tempted to add too much flour here.
First rise: Cover the bowl with a clean kitchen towel and let the dough rise at room temperature for 1 hour. No kneading, no punching down, just leave it alone and let it do its thing.
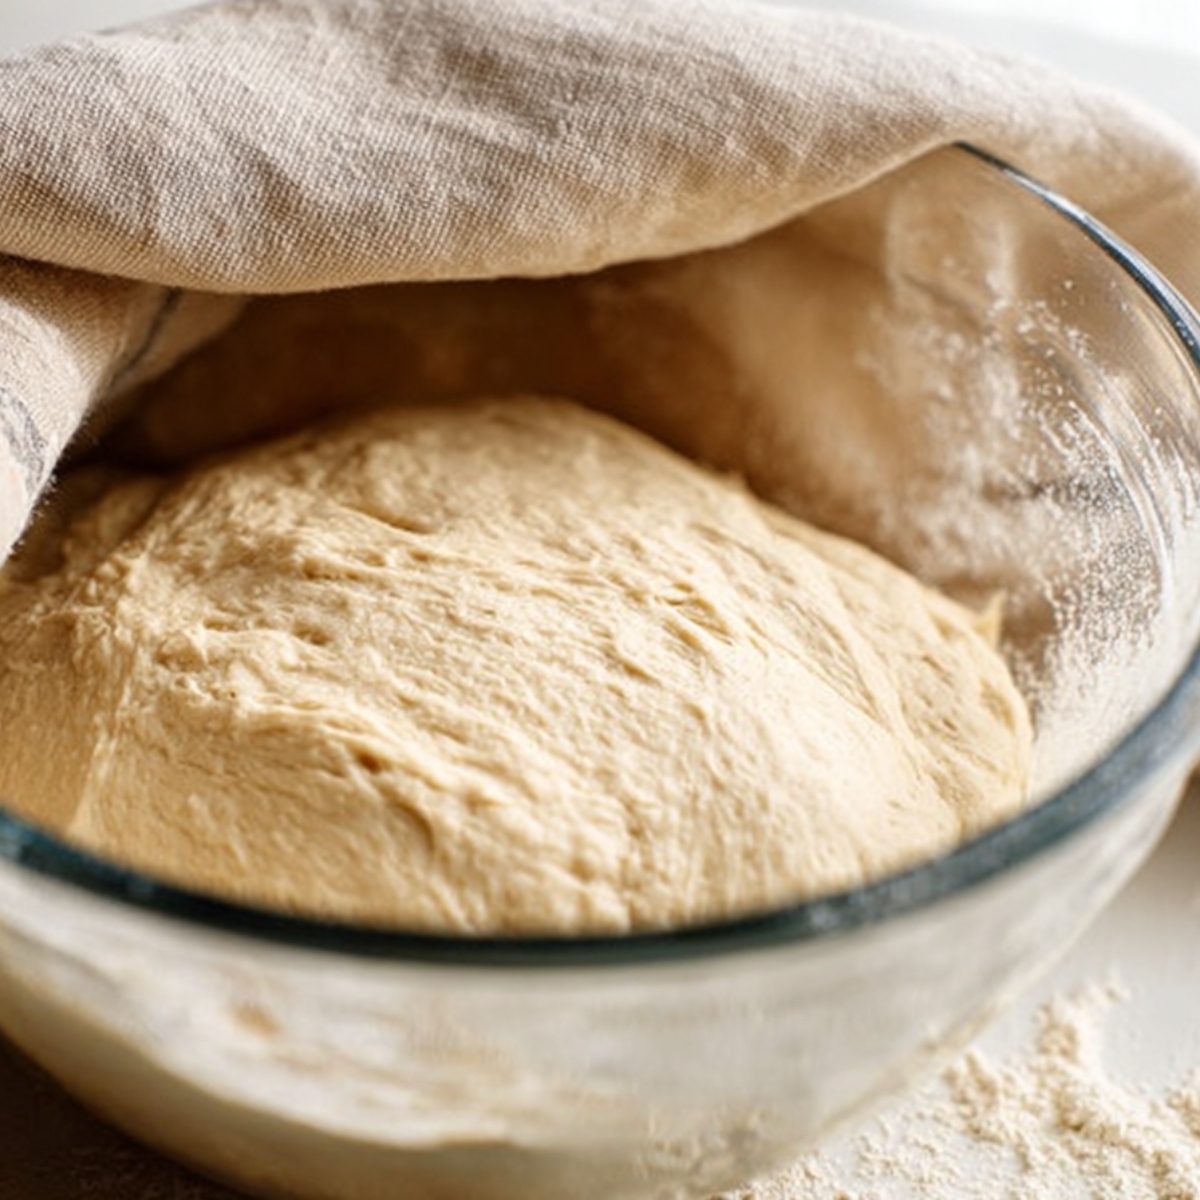
Adjust if needed: After rising, if the dough is too sticky to handle, sprinkle in a little extra flour, ¼ cup at a time, and gently work it in until the dough is soft but manageable. Don't overdo it or the bread will lose its soft texture.
Divide the dough: Turn the dough out onto a floured surface and divide it into 2 equal portions for large loaves, or 3 portions for smaller ones.
Shape the loaves: Roll each portion out to your desired length, then roll it up lengthwise like a jelly roll, keeping it tight but not squished.
Set on the pan: Place each loaf seam-side down on a greased cookie sheet and tuck the ends under neatly. Use a sharp knife to cut diagonal slashes across the top of each loaf, about every couple of inches.
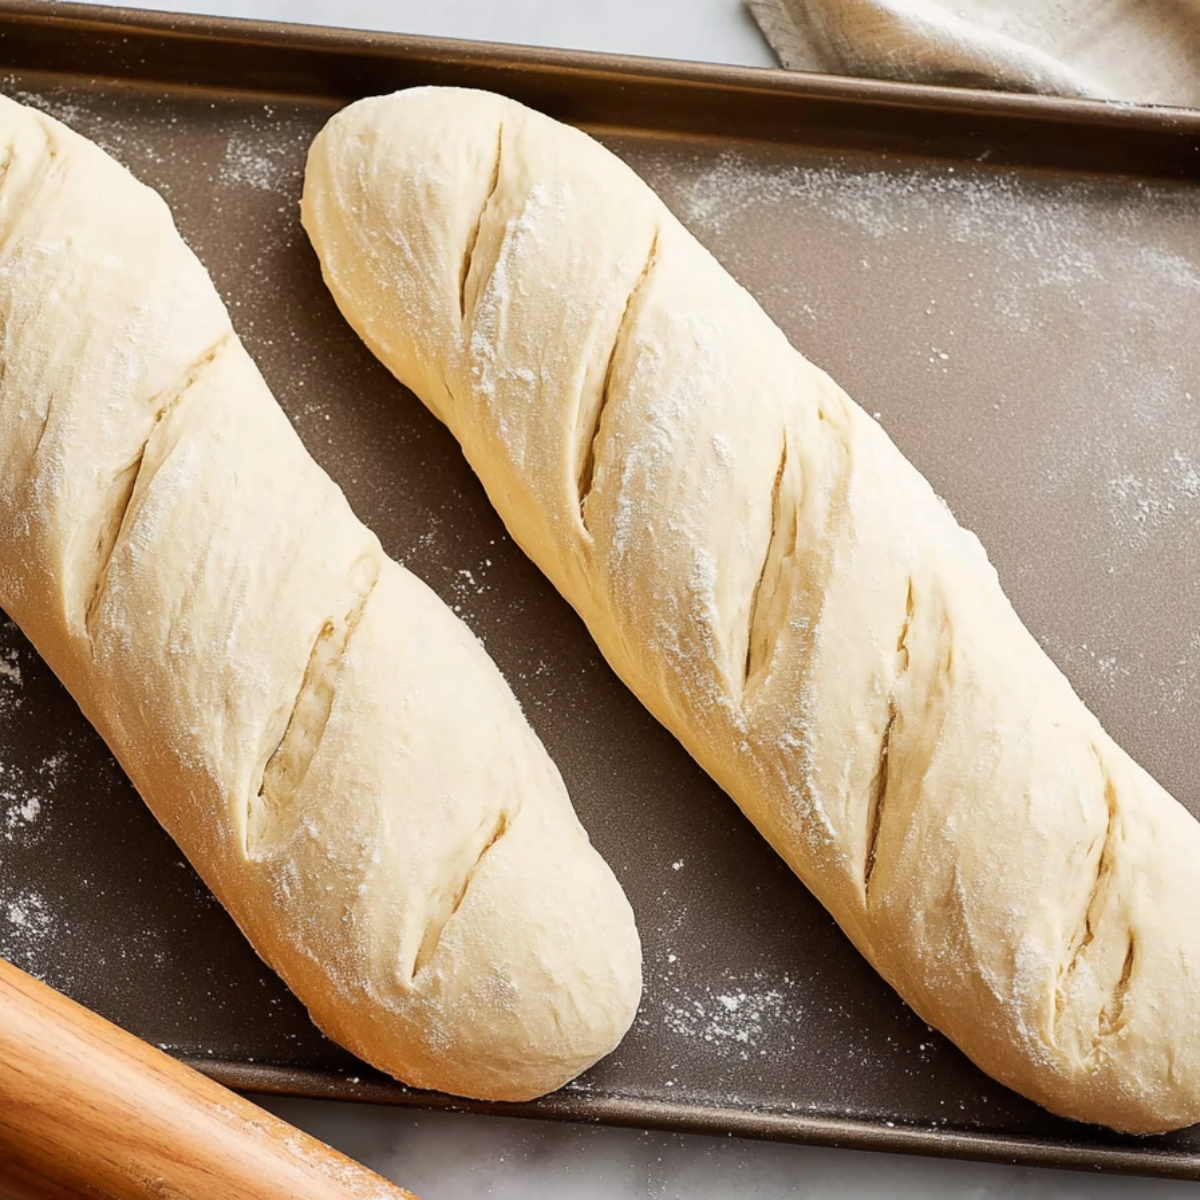
Second rise: Cover the shaped loaves loosely and let them rise for another 30 minutes. While they rest, preheat your oven to 400°F (204°C).
Brush and bake: Whisk the egg white and brush it evenly over the tops of the loaves. Bake for 25 to 30 minutes, until the crust is deep golden brown and the loaves sound hollow when you tap them on the bottom.
Substitutions
Active dry yeast vs. instant yeast: You can swap in instant yeast at the same amount. With instant yeast, you can skip the separate proofing step and add it directly to the dry ingredients.
Vegetable oil: A neutral oil like canola works fine. For a slightly richer flavor, you could use light olive oil.
All-purpose flour: Italian Bread flour works here and will give you a slightly chewier texture with a bit more structure. Don't use self-rising flour.
Egg white wash: If you prefer a softer crust, skip it or brush with melted butter instead for a different finish.
Sugar: If you'd like a more savory loaf, you can reduce the sugar in the dough to 1 tablespoon. Don't skip the small amount for the yeast.
Storage Tips
Room temperature: Wrap cooled loaves tightly in plastic wrap or store in a bread bag. They stay soft for 2 to 3 days on the counter.
Freezing: This Italian Bread freezes really well. Wrap the fully cooled loaves in plastic wrap, then in foil, and freeze for up to 3 months. Thaw overnight at room temperature.
Refreshing: If your Italian Bread feels a little dry the next day, wrap it in foil and warm it in the oven at 300°F for about 10 minutes. It comes right back.
Ways to Serve It
This homemade Italian loaf is one of those Italian Breads that goes with almost everything.
With soup or pasta: Thick slices alongside a big bowl of tomato soup or a pasta dinner are an easy weeknight win. The Italian Bread is perfect for soaking up every last bit.
As garlic bread: Slice it in half lengthwise, spread with garlic butter, and broil for a few minutes until the edges crisp up. It's better than anything from the freezer aisle.
For sandwiches: The slices hold together beautifully and don't get soggy quickly, which makes this a great sandwich bread for lunches.
On a cheese board: A fresh loaf pulled apart with your hands, served next to cheese and olives and maybe a slice of Pistachio Tart, makes a lovely spread for when people come over.
Expert Tips
Temperature matters for the yeast. Too cool and it won't activate. Too hot and you'll kill it. Aim for 110°F for the proofing water. If you don't have a thermometer, it should feel warm on your wrist but not uncomfortable.
Sticky dough is good. This recipe intentionally produces a soft, slightly sticky dough, and that's what gives you such a tender crumb. Resist adding too much flour during the first mix.
The diagonal slashes are functional. Scoring the tops of the loaves before baking lets the Italian Bread expand properly in the oven and keeps the crust from cracking unevenly. Use a sharp knife or a bread lame if you have one.
Tuck those ends under. Folding the ends of the loaf underneath before baking keeps the shape neat and helps the Italian Bread hold together as it rises and bakes.
FAQ
How do you make homemade Italian bread?
You bloom the yeast in warm water with a little sugar, mix it into a flour base with oil and salt, let it rise for an hour without kneading, shape the loaves, do a second short rise, brush with egg white, and bake at 400°F. The full instructions above walk you through each step with all the details you need.
What makes Italian Bread soft inside?
The combination of vegetable oil, a higher water ratio, and minimal handling keeps the crumb soft and tender. The sticky dough is actually a sign it'll bake up fluffy. Kneading too much or adding too much flour are the main reasons homemade Italian Bread can turn out tough instead of soft.
Can I use instant yeast instead of active dry yeast?
Yes. Use the same amount, 1½ tablespoons, and skip the proofing step. Mix the instant yeast directly into the dry ingredients with the flour. The dough will still rise beautifully. My tip: even with instant yeast, I usually do a quick bloom just to make sure the yeast is active if I haven't used it in a while.
Why is my homemade bread dense?
Dense bread usually comes from yeast that didn't activate properly, not enough rise time, or too much flour. Make sure your water temperature is right when proofing the yeast, give the dough the full hour for the first rise, and don't pack in extra flour just because the dough feels sticky. Sticky is fine. Trust the dough.
Related
Looking for other recipes like this? Try these:


Pairing
These are my favorite dishes to serve with Italian Bread



Homemade Italian Bread
Ingredients
Method
- Combine the warm water, yeast, and ½ teaspoon sugar in a small bowl. Let the mixture rest for about 5-10 minutes until it becomes foamy.
- In a large mixing bowl or stand mixer, stir together the hot water, remaining sugar, salt, vegetable oil, and 3 cups of flour until mostly smooth. Mix in the activated yeast mixture.
- Gradually add another 2 to 3 cups of flour until a soft, sticky dough forms. Cover the bowl with a clean towel and allow the dough to rise for 1 hour until doubled in size.
- If the dough remains too sticky after rising, work in small amounts of additional flour, about ¼ cup at a time, until it is easy to handle without becoming dry.
- Divide the dough into 2 equal portions. On a lightly floured surface, roll each piece into a rectangle, then tightly roll it into a loaf, sealing the seam as you go.
- Place each loaf seam-side down onto a lightly greased baking sheet. Tuck the ends underneath and cut shallow diagonal slashes across the tops with a sharp knife.
- Cover the shaped loaves and let them rise for another 30 minutes. Meanwhile, preheat the oven to 400°F (200°C).
- Brush the tops of the risen loaves evenly with the beaten egg white for a shiny golden crust.
- Bake for 25 to 30 minutes, or until the loaves are deep golden brown and sound hollow when tapped on the bottom. Allow them to cool slightly before slicing.

Leave a Reply