
Fudgy, chewy, loaded with peanut butter and M&M's, these monster cookie brownies are exactly what happens when your two favorite desserts decide to share a pan. The bottom layer is rich and dark, almost like a thick chocolate fudge, and the top is soft monster cookie dough packed with oats, mini chocolate chips, and those little bursts of color from the M&M's. I started making these for a neighbor's potluck and honestly had to make a second batch to actually bring one because the first disappeared before I even covered the pan.
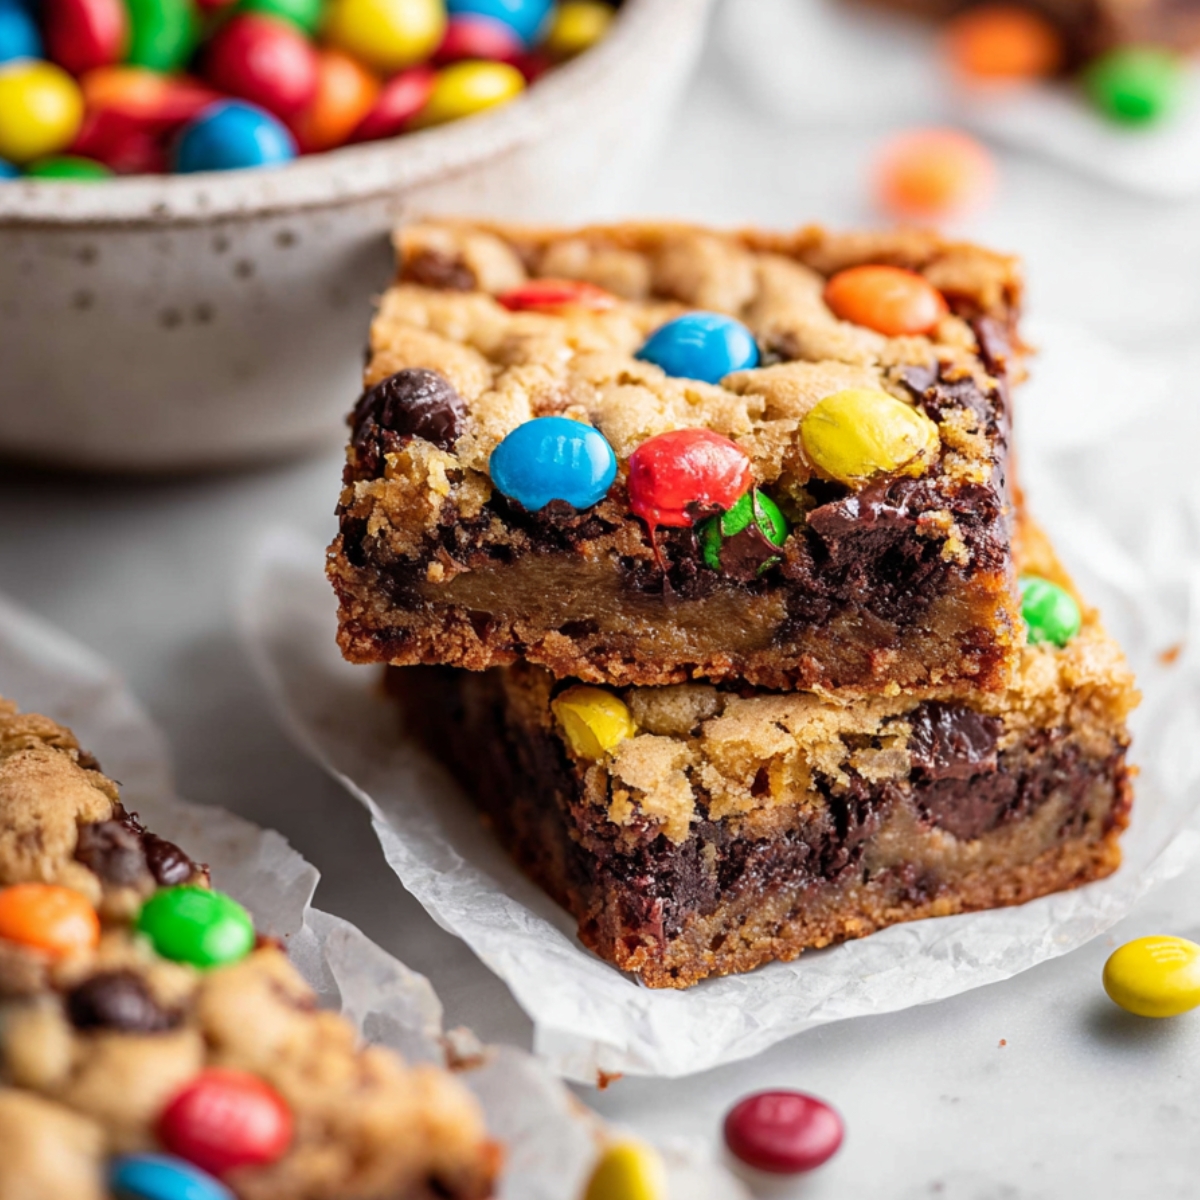
If you've ever loved a batch of Strawberry Crunch Brownies or a warm slice of Cookie Dough Cheesecake, you already know the kind of dessert happiness we're talking about here. They look bakery-level impressive but the whole thing comes together with pantry staples and a little patience while they cool.
Why You'll Love This Monster Cookie Brownies
These Monster Cookie Brownies are the kind of thing that gets talked about at every table.
- The Monster Cookie Brownies base is genuinely fudgy, not cakey. The cornstarch and the extra yolk make a big difference.
- The monster cookie dough layer stays soft and chewy even after baking, almost like it hasn't fully set, which is exactly right.
- They hold together well for slicing, packing, and gifting, so they're great for bake sales or wrapping up for someone.
- Every bite has at least one M&M and usually a little pocket of melted chocolate chip. Kids lose their minds over these.
Jump to:
- Why You'll Love This Monster Cookie Brownies
- Monster Cookie Brownies Ingredients
- How to Make Monster Cookie Brownies
- Substitutions and Swaps
- Equipment For Monster Cookie Brownies
- Storage Tips For Monster Cookie Brownies
- Serving Suggestions
- Expert Tips For Monster Cookie Brownies
- FAQ
- Related
- Pairing
- Monster Cookie Brownie
Monster Cookie Brownies Ingredients
Here's everything you'll need. Both layers use simple pantry ingredients, and the full list might look long at first, but most of it overlaps between the two.
See Recipe Card Below This Post For Ingredient Quantities
For the Brownie Layer
- White granulated sugar: Sweetens the batter and helps create that shiny, crinkly top that good brownies always have.
- Eggs and egg yolk: The whole eggs add structure and moisture while the extra yolk makes the texture richer and more fudgy. Don't skip it.
- Unsalted butter: Adds fat and flavor. Melt it and let it cool slightly before adding it to the eggs so you don't accidentally scramble them.
- Canola or vegetable oil: Keeps the brownies soft and moist even after they cool. This combo of butter and oil is the secret to a chewy, dense crumb.
- Pure vanilla extract: Rounds out the chocolate flavor. A small amount makes a noticeable difference.
- All-purpose flour: Just half a cup keeps these brownies dense and fudgy instead of cakey.
- Unsweetened Dutch-process cocoa powder: This is what gives the brownies that deep, dark chocolate flavor. Dutch-process has a smooth, rich taste that regular cocoa can't quite match.
- Cornstarch: Works in both layers. In the brownie, it helps create a tender, fudge-like bite.
- Salt: Keeps the chocolate from tasting flat. Always include it.
- Semi-sweet and milk chocolate chips: Stirred into the batter right before baking, these melt into little pockets of extra chocolate throughout the brownie layer.
For the Monster Cookie Dough Layer
- All-purpose flour: Gives the cookie dough structure so it holds its shape on top of the brownies.
- Cornstarch: Helps keep the cookies soft and slightly thick after baking.
- Baking soda and baking powder: Just small amounts, but they help the cookie dough puff up slightly as it bakes on top.
- Salt: Balances the sweetness of the sugar and the peanut butter.
- Unsalted butter, room temperature: Room-temperature butter creams properly and creates a lighter, softer cookie texture. Cold butter won't work here.
- Brown sugar and white granulated sugar: The brown sugar brings chewiness and a light molasses flavor. The white sugar helps the edges set.
- Creamy peanut butter: The star of the monster cookie layer. It adds flavor, richness, and a soft, almost sticky texture to the dough.
- Pure vanilla extract: Ties all the cookie flavors together.
- Large egg, room temperature: Helps the dough come together and adds moisture.
- Quick oats: Classic monster cookie ingredient. They add chewiness and a little hearty texture to the top layer.
- Mini chocolate chips: Smaller chips distribute more evenly through the dough so you get chocolate in every bite.
- Mini M&M's: These are what make the cookies look like monster cookies. They add color, sweetness, and a little candy crunch.
How to Make Monster Cookie Brownies
These are made in two stages. Start the cookie dough first so it has time to chill while you prep the Monster Cookie Brownies.
Make the Cookie Dough
Mix the dry ingredients: In a medium mixing bowl, whisk together the flour, cornstarch, baking soda, baking powder, and salt. Set it aside for now.
Cream the butter and sugars: Using a mixer, beat the room-temperature butter, brown sugar, and granulated sugar on medium speed for about 1 minute, until the mixture looks light and fluffy.
Add the peanut butter: Mix in the creamy peanut butter and beat for another minute. The dough should smell amazing at this point.
Mix in the egg and vanilla: Add the vanilla extract and egg, then mix until fully combined. Scrape down the sides of the bowl and mix again for about 20 seconds so everything is even.
Add the dry ingredients: Gradually mix the dry ingredients into the wet, mixing until just combined and no dry streaks remain.
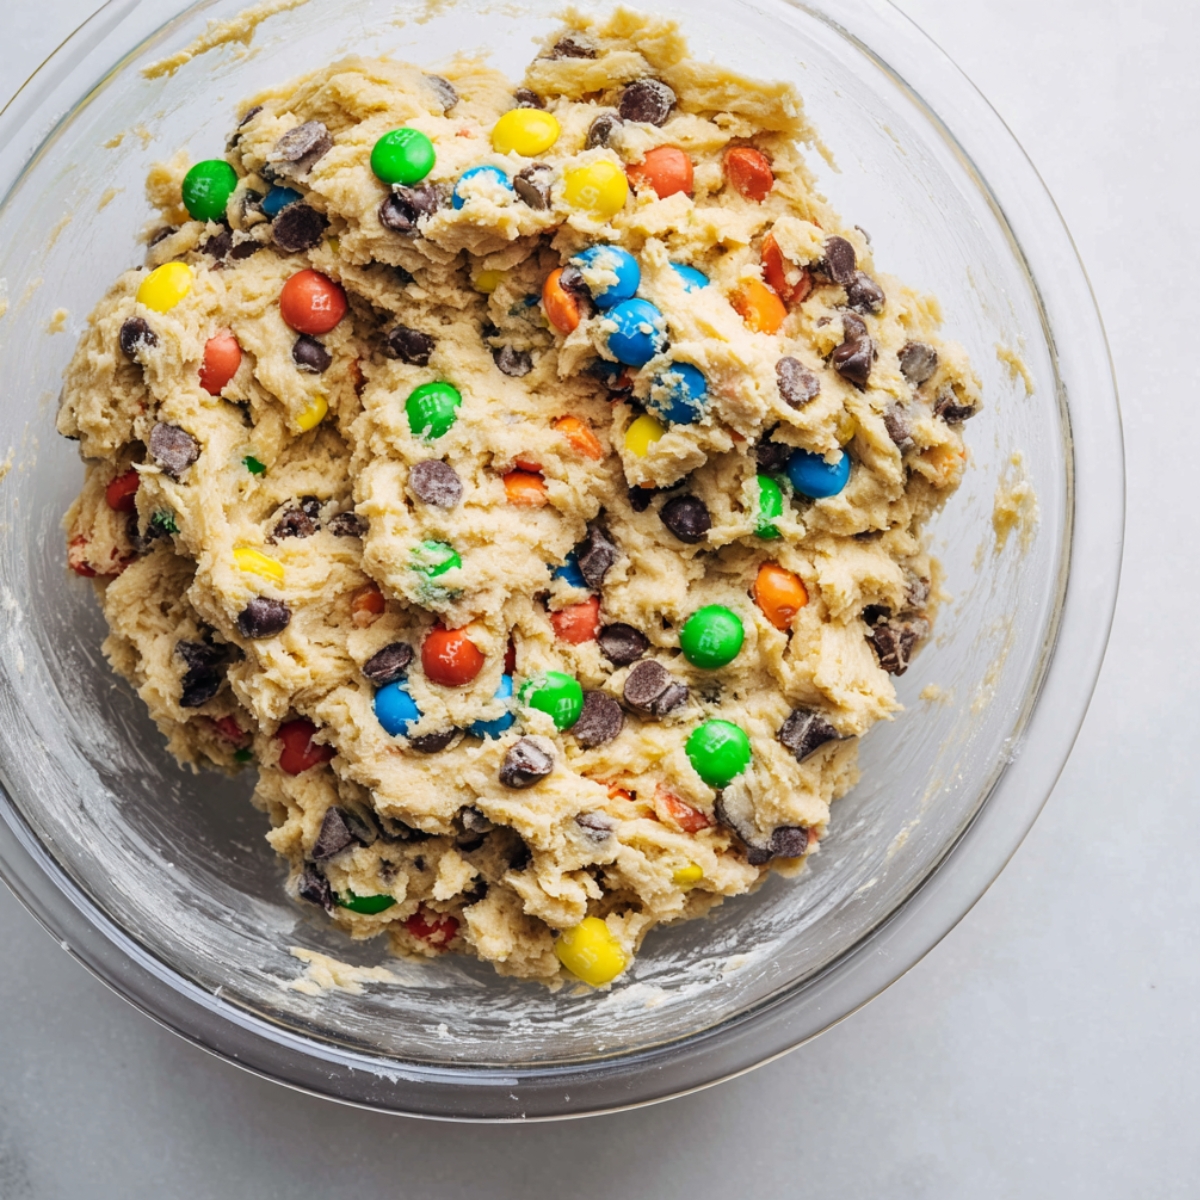
Fold in the mix-ins: Gently fold in the quick oats, mini M&M's, and mini chocolate chips with a rubber spatula. The dough will be thick and colorful.
Chill the dough: Cover the bowl and refrigerate the dough for 40 minutes. This step firms it up so it doesn't just sink into the brownies during the first bake.
Make the Brownie Batter
Preheat and prep the pan: Near the end of the chilling time, preheat your oven to 325°F (163°C). Spray a 9x9-inch baking pan with non-stick baking spray, then line the bottom and two sides with parchment paper. The parchment makes lifting the bars out so much easier later.
Whisk the dry ingredients: In a medium bowl, whisk together the flour, Dutch-process cocoa powder, cornstarch, and salt until combined.
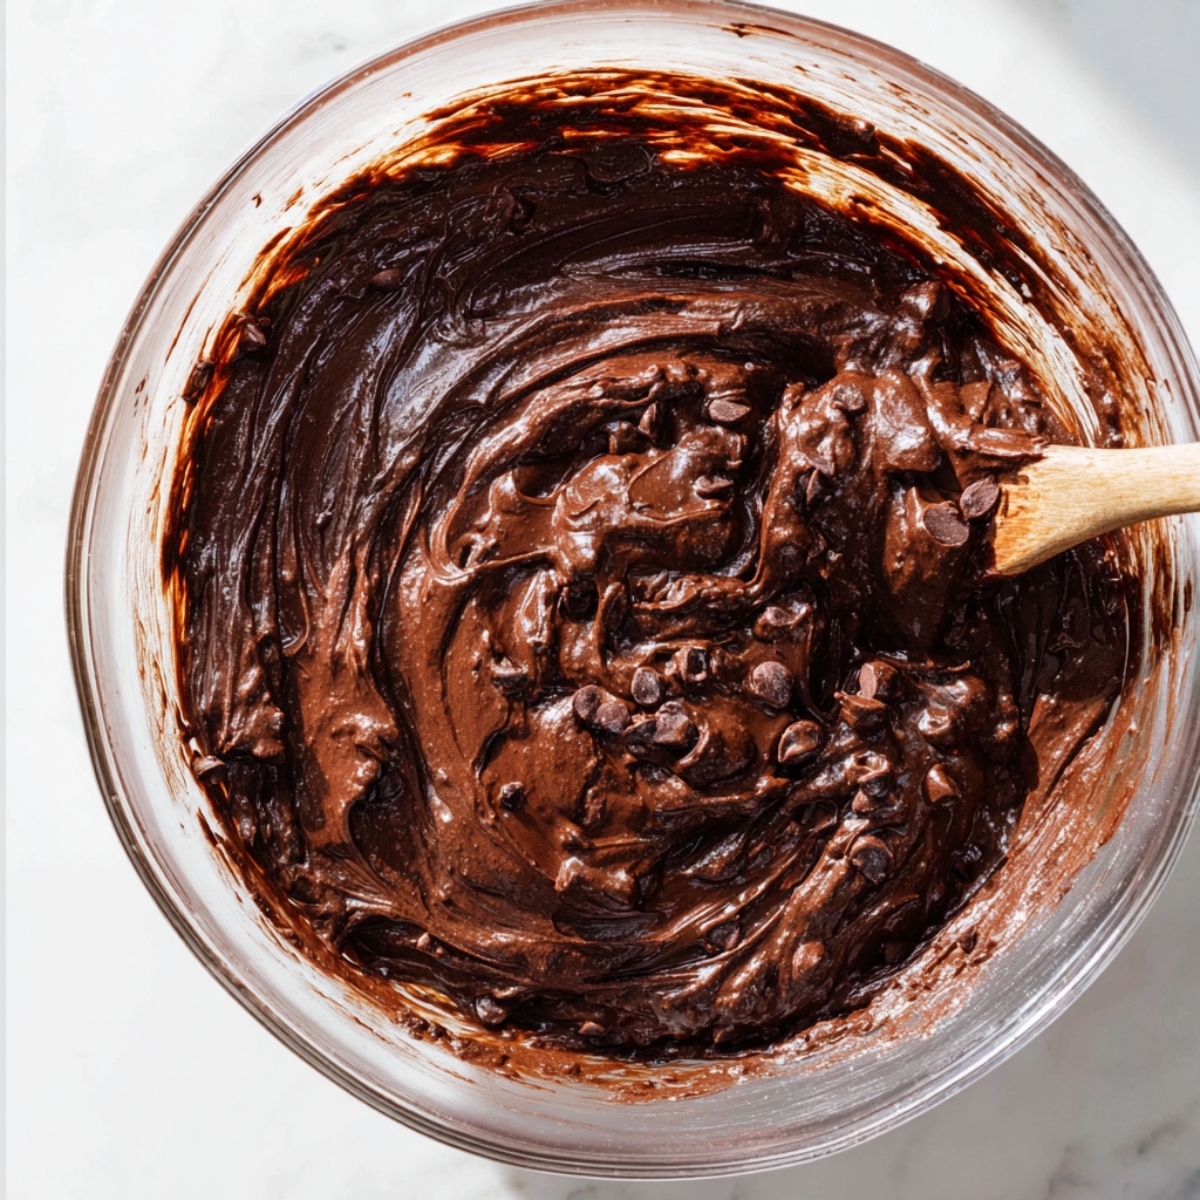
Beat the eggs and sugar: Using a mixer with a whisk attachment, beat the sugar, whole eggs, and egg yolk together for 5 full minutes. The mixture should turn lighter in color and more voluminous. This step matters for that shiny top.
Add the butter, oil, and vanilla: Melt the butter and let it cool slightly, then add it to the egg mixture along with the oil and vanilla extract. Mix on low speed until just combined.
Fold in the dry ingredients: Remove the bowl from the mixer. Use a rubber spatula to gently fold in the dry ingredients, being careful not to knock all the air out of the batter. Stop when you see no more dry streaks.
Add the chocolate chips: Fold in the semi-sweet and milk chocolate chips, then pour the batter into the prepared pan and spread it evenly into the corners.
Assemble and Bake
First bake: Bake the brownies at 325°F for 15 minutes, until the surface is just beginning to set. It won't look fully done and that's fine.
Add the cookie dough: Pull the pan from the oven and grab the chilled cookie dough from the refrigerator. Flatten small portions into rough discs and place them evenly over the surface of the partially baked Monster Cookie Brownies, covering the top as much as possible until all the dough is used.
Second bake: Return the pan to the oven and bake for 20 more minutes.
Cover with foil: Loosely tent the pan with aluminum foil to prevent the cookie tops from over-browning, then continue baking for an additional 5 to 10 minutes. The brownies are done when both layers are fully set with no jiggle in the center when you gently shake the pan.
Cool completely: Transfer the pan to a cooling rack. Let the bars cool all the way to room temperature before cutting, which takes about 1 to 2 hours. Cutting too early means messy bars. It's hard to wait but worth it.
Substitutions and Swaps
Canola oil: Any neutral oil works here, like vegetable or sunflower.
Dutch-process cocoa: If you only have natural cocoa powder, it'll still work. The color will be a little lighter and the flavor slightly less smooth, but the Monster Cookie Brownies will still taste great.
Creamy peanut butter: Almond butter or sunflower seed butter can replace peanut butter for an allergy-friendly version. Just make sure it's a no-stir style so the dough holds together properly.
Mini M&M's: Regular M&M's work fine, though smaller ones distribute a bit more evenly through the dough.
Quick oats: You can use old-fashioned rolled oats in a pinch. The texture will be slightly heartier and chewier, which some people actually prefer.
Equipment For Monster Cookie Brownies
- 9x9-inch baking pan
- Parchment paper
- Non-stick baking spray
- Medium mixing bowls (you'll use at least two)
- Stand mixer or hand mixer
- Whisk attachment
- Rubber spatula
- Measuring cups and spoons
- Cooling rack
Storage Tips For Monster Cookie Brownies
Store these Monster Cookie Brownies at room temperature in an airtight container. They stay soft and fresh for up to 4 days. If your kitchen runs warm, you can refrigerate them, but let them come to room temperature before serving so the cookie layer softens back up.
To freeze, wrap individual bars tightly in plastic wrap and place them in a freezer-safe bag. They freeze well for up to 2 months. Thaw at room temperature for a couple of hours before eating.
Serving Suggestions
With a cold glass of milk: The classic. That cold, creamy sip between bites of chocolate and peanut butter is unbeatable.
Warmed up with a scoop of vanilla ice cream: Pop a bar in the microwave for 10 to 12 seconds, then add a scoop on top. The fudgy layer gets just slightly gooey and it's really something.
Packed for a bake sale or lunchbox: These Monster Cookie Brownies hold together beautifully after fully cooling, so they're easy to wrap and transport. Kids and adults both get excited when they see the M&M's on top.
On a dessert table next to something creamy: They pair really well alongside something like a Jello Creamsicle Pie or a slice of Victoria Sponge Cake when you're putting together a spread.
Expert Tips For Monster Cookie Brownies
Don't skip the egg beating step. Five minutes feels like a long time but that's what gives fudgy Monster Cookie Brownies their signature crinkly, slightly shiny top. Rushing it means a flat, dull surface.
Chill the cookie dough. If the dough isn't firm when it goes on top of the Monster Cookie Brownies, it'll spread and sink instead of sitting as a distinct layer. Forty minutes in the refrigerator makes all the difference.
Spoon and level your flour. Scooping directly from the bag packs too much flour in and dries out both layers. Spoon it into the measuring cup and level the top with a straight edge.
Use parchment paper. It makes lifting the entire slab out of the pan much easier. Without it, you're cutting them in the pan and the bottom layer can stick.
Let them cool completely before cutting. The Monster Cookie Brownies layer needs time to firm up. If you cut into them warm, they'll fall apart and the layers won't look as clean.
FAQ
What are Monster Cookie Brownies?
They're a layered bar dessert where a fudgy Monster Cookie Brownies bakes as the base and a thick, chewy monster cookie dough, packed with peanut butter, oats, mini chocolate chips, and M&M's, bakes on top. The result is part brookie bars, part candy-studded cookie, and completely over the top in the best way. These are the ultimate peanut butter brownies for anyone who can never choose between cookies and brownies.
How do you make fudgy brownie cookie bars?
The key is building each layer separately, then combining them in a two-stage bake. The brownie batter goes in first and bakes for 15 minutes until just barely set. Then the chilled cookie dough goes on top and everything bakes together for another 25 to 30 minutes. The foil tent at the end prevents the M&M's and cookie top from getting too dark. It's an easy Monster Cookie Brownies once you know the timing, and the layered effect looks really impressive when you slice them.
Can I freeze Monster Cookie Brownies?
Yes, these freeze really well. Let them cool completely, then wrap each bar individually in plastic wrap and store in a freezer bag for up to 2 months. Thaw at room temperature. A family tip: freeze them in single servings so everyone can grab one whenever they want without cutting into the whole batch.
Why are my brownies not fudgy?
Usually it comes down to overbaking, too much flour, or skipping the oil. In this recipe, the combination of butter and oil keeps the texture moist. The extra egg yolk adds richness, and the cornstarch helps prevent a cakey, dry crumb. Make sure you're measuring flour correctly by spooning it into the cup rather than scooping, and pull the pan when the center has no jiggle but still looks very slightly soft. Monster Cookie Brownies firm up as they cool.
Related
Looking for other recipes like this? Try these:
Pairing
These are my favorite dishes to serve with Monster Cookie Brownies



Monster Cookie Brownie
Ingredients
Method
- Whisk together the flour, cornstarch, baking soda, baking powder, and salt for the cookie layer until evenly combined.
- Beat the softened butter with the brown sugar and granulated sugar until pale and fluffy, then blend in the peanut butter until smooth.
- Mix in the vanilla extract and egg until fully incorporated, scraping the bowl once if needed.
- Fold the dry ingredients into the wet mixture just until combined, then stir in the oats, mini chocolate chips, and mini M&M's. Cover and refrigerate for 40 minutes.
- Near the end of the chilling time, preheat the oven to 325°F and line a 9×9-inch baking pan with parchment paper before lightly greasing it.
- Whisk together the flour, cocoa powder, cornstarch, and salt for the brownie batter in a separate bowl.
- Beat the sugar, eggs, and egg yolk for about 5 minutes until thick, pale, and fluffy while allowing the melted butter to cool slightly.
- Blend the melted butter, oil, and vanilla into the whipped egg mixture on low speed until smooth.
- Gently fold the dry ingredients into the wet mixture with a spatula, then fold in both kinds of chocolate chips without overmixing.
- Spread the brownie batter evenly into the prepared pan and smooth the surface.
- Bake the brownie layer for 15 minutes until the surface is lightly set but the center remains soft.
- Flatten small portions of the chilled cookie dough into discs and arrange them across the partially baked brownies until the surface is covered.
- Return the pan to the oven and bake for 20 minutes. Loosely tent the pan with foil and continue baking for another 5-10 minutes until both layers are fully set with no noticeable jiggle.
- Cool the bars completely in the pan on a wire rack before lifting them out and slicing into 16 squares.
Leave a Reply