
These thick, fudgy chickpea brownies are so rich and chocolatey, you'd never guess they're made with a can of chickpeas. I stumbled on this recipe during a pantry clean-out when I had dates that needed using and a random can of chickpeas staring at me. One bite and I was hooked they taste like the kind of Salted Caramel Butter Bars you'd splurge on at a bakery, but without the sugar crash.

Why You'll Love These Flourless Chickpea Brownies
They're naturally sweetened with dates instead of refined sugar, so you get that deep caramel sweetness without the spike. The peanut butter adds richness and a subtle nutty flavor, while the cocoa powder makes them taste like real chocolate brownies. Plus, they're packed with protein and fiber from the chickpeas, so you feel satisfied instead of reaching for another piece five minutes later.
These healthy chocolate brownies come together in one food processor, bake in under 30 minutes, and slice into perfect squares that keep well all week. They're great for lunchboxes, afternoon snacks, or whenever you need a guilt-free chocolate fix.
These chickpea brownies prove that healthy desserts don't have to taste like cardboard. They're thick, rich, and satisfy every chocolate craving without the guilt. If you're looking for more simple treats that taste indulgent, try my Cinnamon Roll Muffins or Greek Yogurt Cake Donuts-they're just as cozy and way easier than you'd think.
Jump to:
Chickpea Brownies Ingredients
Here's what goes into these vegan Chickpea Brownies:
See Recipe Card Below This Post For Ingredient Quantities
Main Ingredients:
- Pitted dates: Provide natural sweetness and help bind the brownies together without refined sugar. Make sure they're packed tightly in the measuring cup.
- Water: Helps the dates blend into a smooth paste that acts like caramel in the batter.
- Chickpeas: The protein-packed base that makes these brownies fudgy, filling, and surprisingly decadent. Drain them well but save the liquid.
- Aquafaba: The liquid from the chickpea can adds moisture and helps everything blend smoothly.
- Natural peanut butter: Adds richness, moisture, and a subtle nutty flavor. Smooth or chunky both work beautifully.
- Raw unsweetened cocoa powder: Gives these flourless brownies their deep chocolate flavor without any added sugar.
Optional Fill-ins:
- Vegan chocolate chips: For extra chocolatey pockets throughout. You can also sprinkle some on top before baking.
- Walnut pieces: Add a nice crunch and toasty flavor that pairs perfectly with chocolate.
How to Make Chickpea Brownies
These Chickpea Brownies desserts come together quickly in a food processor.
Preheat oven: Preheat your oven to 350℉ (176℃) and line an 8"x8" square baking pan with parchment paper, letting the edges hang over for easy lifting later.
Blend dates: Add the dates and water to a food processor and process until a smooth, thick paste forms, scraping down the sides as needed.

Combine ingredients: Add the drained chickpeas, aquafaba, peanut butter, and cocoa powder to the food processor and blend until everything is well combined and the batter looks smooth and fudgy.
Add mix-ins: If using, add the vegan chocolate chips and walnut pieces and pulse a few times to incorporate them without over-processing. You want chunks, not powder.
Prepare the pan: Scoop the brownie batter into the prepared baking dish and smooth out the top using a silicone spatula, pressing down gently to ensure an even surface.
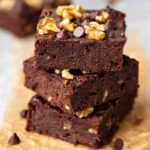
Add toppings: If you like, sprinkle more chocolate chips and walnuts on top for extra texture and visual appeal.

Bake: Bake for 25 to 30 minutes, checking for doneness around the 25-minute mark. The brownies should look slightly underdone when you pull them out they'll set as they cool and you want them fudgy, not dry.
Cool completely: Let the brownies cool in the pan for 5 minutes, then use the parchment paper to lift them out. Transfer to a cutting board and let them cool for at least 20 minutes before slicing into squares.
Substitutions and Variations
- No dates? You can use maple syrup or honey instead, though the texture will be slightly less fudgy.
- Almond butter or cashew butter work beautifully in place of peanut butter for a different flavor profile.
- Swap walnuts for pecans or leave out the nuts entirely if you have allergies.
- Add a pinch of espresso powder to the batter to make the chocolate flavor even richer.
- For a simple chickpea brownies recipe, skip the mix-ins and just make the base batter.
Equipment For Chickpea Brownies
- Food processor: Essential for blending the chickpeas and dates into a smooth, fudgy batter.
- 8"x8" baking dish (or similar size): Gives you thick, bakery-style squares.
- Parchment paper: Makes cleanup easy and helps you lift the brownies out cleanly.
- Silicone spatula: Perfect for scraping down the food processor and smoothing the batter in the pan.
Storage and Make-Ahead Tips
Store these guilt-free chocolate treats in an airtight container at room temperature for up to 3 days, or in the fridge for up to a week. They actually taste even better the next day once the flavors have settled.
You can freeze them for up to 3 months. Just wrap each brownie individually in parchment paper, then store them all in a freezer-safe bag. Thaw at room temperature for about 30 minutes, or warm in the microwave for 10 to 15 seconds for that fresh-baked feel.
Serving Suggestions
These peanut butter brownies are perfect on their own, but here are a few cozy ways to enjoy them:
- Warm one up for 10 seconds and top with a scoop of vanilla ice cream for an easy dessert that feels fancy.
- Pack them in lunchboxes alongside fresh fruit for a protein-packed midday treat.
- Serve them with a cup of hot coffee or tea for an afternoon pick-me-up that won't leave you crashing later.
- Crumble one over Greek yogurt with berries for a breakfast that tastes like dessert.
Top Tip
- Use soft, fresh dates. If your dates are dry or hard, soak them in warm water for 10 minutes, then drain before blending.
- Don't skip the cooling time. These Chickpea Brownies need at least 20 minutes to set properly, or they'll crumble when you cut them.
- Blend the batter well. You want it completely smooth with no chunks of chickpeas visible this is what gives you that fudgy texture.
- Check early. Ovens vary, so start checking at 25 minutes. The centers should look slightly soft and underdone.
- Line your pan well. Let the parchment paper hang over the edges so you can lift the whole block out easily.
FAQ
Is chickpea brownie healthy?
Yes, Chickpea Brownies are a healthier alternative to traditional brownies. They're naturally sweetened with dates, packed with protein and fiber from the chickpeas, and contain no refined flour or sugar. Liam loves these because they give him energy for soccer practice without making him feel heavy.
What are the 3 ingredient brownies for vegans?
The simplest vegan brownies use just chickpeas, cocoa powder, and a sweetener like maple syrup or dates. This recipe adds peanut butter and aquafaba for extra richness and moisture, but you can strip it down if you want a truly minimalist version.
What can I add to chickpea brownies?
You can fold in chocolate chips, walnuts, pecans, dried cherries, or shredded coconut. A swirl of tahini or almond butter on top before baking adds a beautiful marbled effect. My friend Jackeline likes to press a few sea salt flakes on top for a sweet-salty contrast.
Can I use chickpea flour to make brownies?
Chickpea flour works, but it won't give you the same fudgy texture as whole chickpeas. Whole chickpeas blended smooth create a dense, moist base that mimics traditional Chickpea Brownies much better. If you're using chickpea flour, you'll need to adjust the liquid ratios and it'll taste more like a cakey brownie.
Related
Looking for other recipes like this? Try these:


Pairing
These are my favorite dishes to serve with Chickpea Brownies


Chickpea Brownies
Ingredients
Method
- Preheat your oven to 350°F (176°C) and line a square 8-inch baking pan with parchment paper.
- Add the dates and water to your food processor and process until smooth. Then add the chickpeas, aquafaba, peanut butter, and cocoa, processing until well combined.
- Add the optional chocolate chips and walnuts (if using) and pulse a few times to incorporate them without overprocessing.
- Transfer the brownie batter into your prepared pan and smooth the top with a spatula, pressing it down to eliminate any gaps. The batter will be thick.
- Sprinkle additional chocolate chips and walnuts on top if desired, then bake for 25-30 minutes, until a toothpick comes out mostly clean.
- Let the brownies cool in the pan for 5 minutes. Lift them out using the parchment paper and transfer them to a cutting board. Allow them to cool for at least 20 minutes before slicing.


Leave a Reply