
Silky, creamy, mini cheesecakes with a buttery graham cracker crust, baked right in your muffin pan no springform pan, no fuss, no stress. I first made these on a Friday afternoon when I needed something impressive for a last-minute get-together, and I couldn't believe how bakery-quality they turned out using just a handful of everyday ingredients.
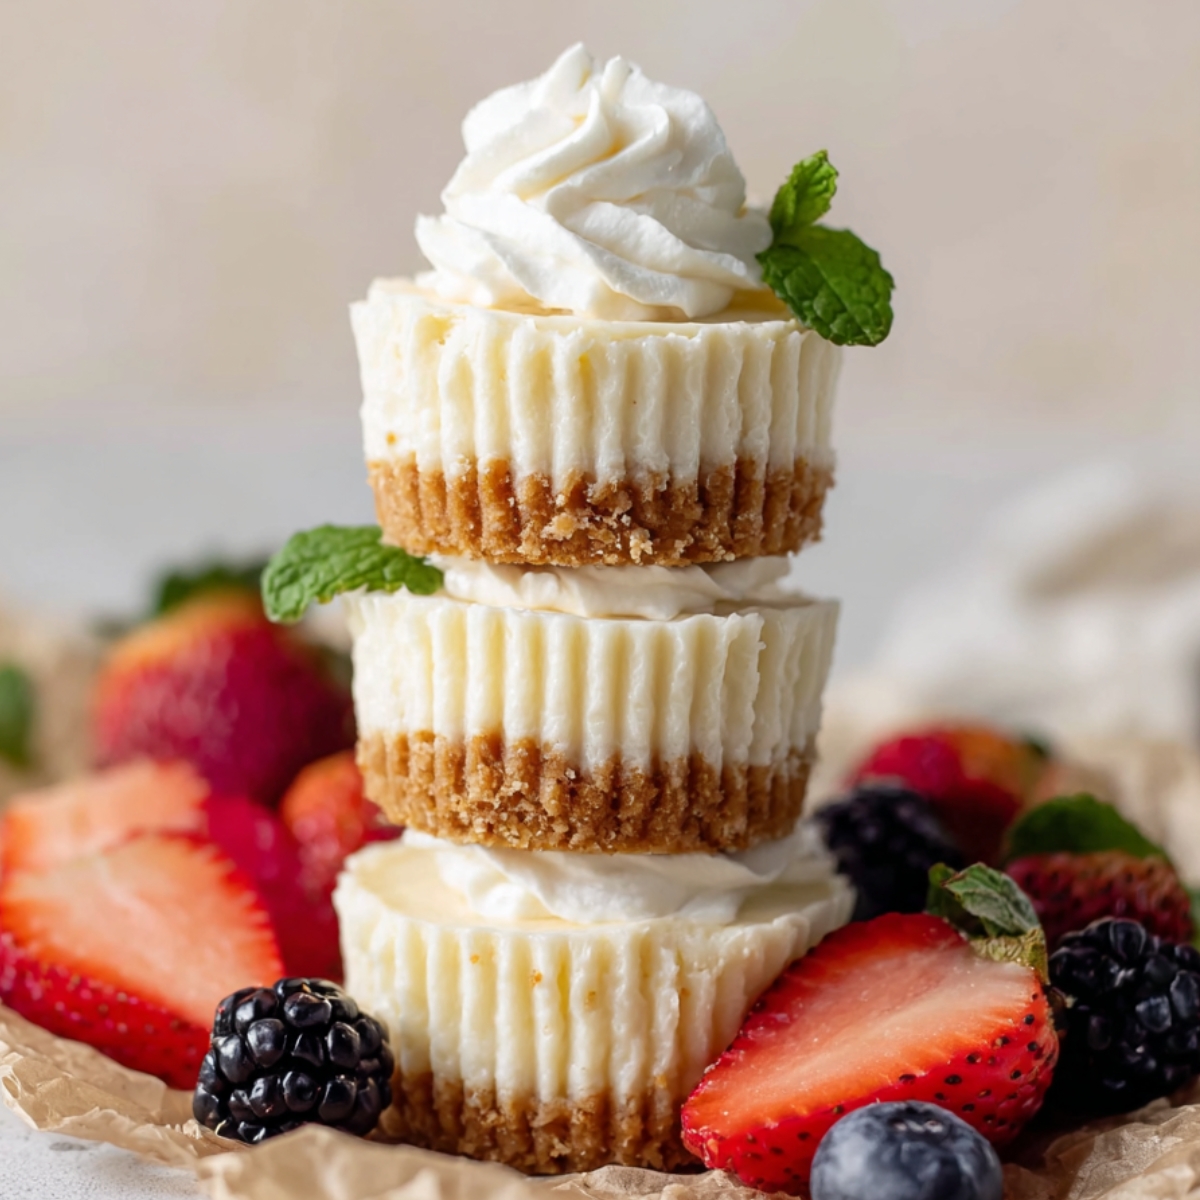
If you love cozy desserts like these Raspberry Cheesecake Brownies or those dreamy No Bake Cheesecake Jars, you'll be making these on repeat.
Why You'll Love This Mini Cheesecakes
- These individual Mini Cheesecakes are sized perfectly for serving a crowd without slicing
- The graham cracker crust bakes up golden and firm in just 6 minutesYou get that smooth, sour cream cheesecake filling that tastes like it took hours
- Easy to make ahead, which makes holiday baking feel way more manageable
- Endless topping options, from a simple berry to a full chocolate ganache situation
- No water bath required, though there's an easy optional steam trick if you want extra smoothness
Jump to:
Mini Cheesecakes Ingredients
Here's everything you'll need for the crust and filling. Simple pantry staples, nothing fancy.
See Recipe Card Below This Post For Ingredient Quantities
For the Crust
- Graham cracker crumbs: These form the base of every good cheesecake bite. You can buy pre-ground crumbs or crush about 8 full sheet crackers yourself.
- Granulated sugar: A small amount adds just enough sweetness to balance the buttery crust.
- Unsalted butter, melted: Binds the crumbs and helps the crust hold its shape after baking. Unsalted keeps the flavor clean.
For the Filling
- Full-fat brick cream cheese, softened: This is the heart of the recipe. Brick-style cream cheese (not the spreadable tub kind) gives you that dense, creamy texture. Make sure it's fully softened so the filling stays smooth and lump-free.
- Granulated sugar: Sweetens the filling without overpowering the tangy cream cheese flavor.
- Full-fat sour cream, at room temperature: Adds a subtle tang and keeps the filling silky and rich. Room temperature helps it blend in evenly.
- Pure vanilla extract: Rounds out the flavor and makes the whole thing smell like comfort food.
- Freshly squeezed lemon juice: Just a teaspoon brightens everything up without tasting like lemon dessert.
- Large eggs, at room temperature: Bind the filling together and help it set properly during baking. Room-temperature eggs mix in more gently, which keeps the filling from getting overworked.
How to Make Mini Cheesecakes
Here's a quick overview before you dive in: crust first, then filling, then a simple bake and chill.
Preheat and prep: Preheat your oven to 350°F (177°C). Line a standard 12-count muffin pan with cupcake liners and set it aside.
Make the crust: Combine all three crust ingredients in a medium bowl. The mixture will look sandy and a little crumbly, which is exactly right. Firmly press a heaping tablespoon into the bottom of each liner, using your fingers or the back of a spoon to pack it down. Bake for 6 minutes until lightly set, then pull the pan out and set it on the counter.
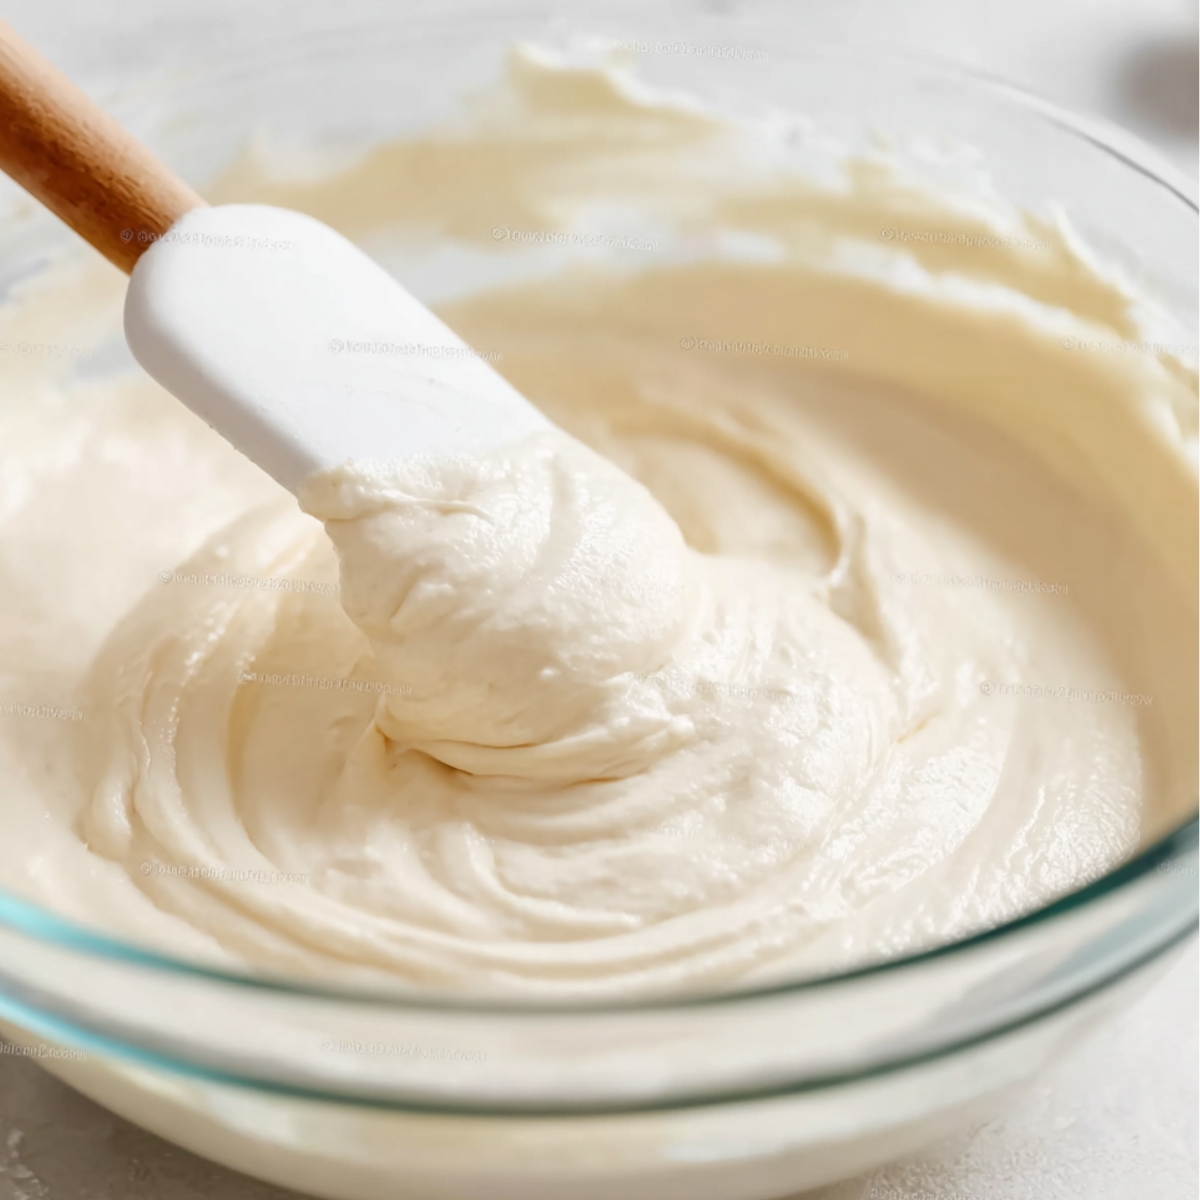
Make the filling: In a large bowl, beat the cream cheese and sugar together on medium-high speed for about 2 minutes, until it's completely smooth and creamy with no lumps. Add the sour cream, lemon juice, and vanilla and beat until fully combined. Drop the speed to medium and add the eggs one at a time, beating just until each one disappears into the batter. Don't over-mix after adding the eggs that's what causes cracks.
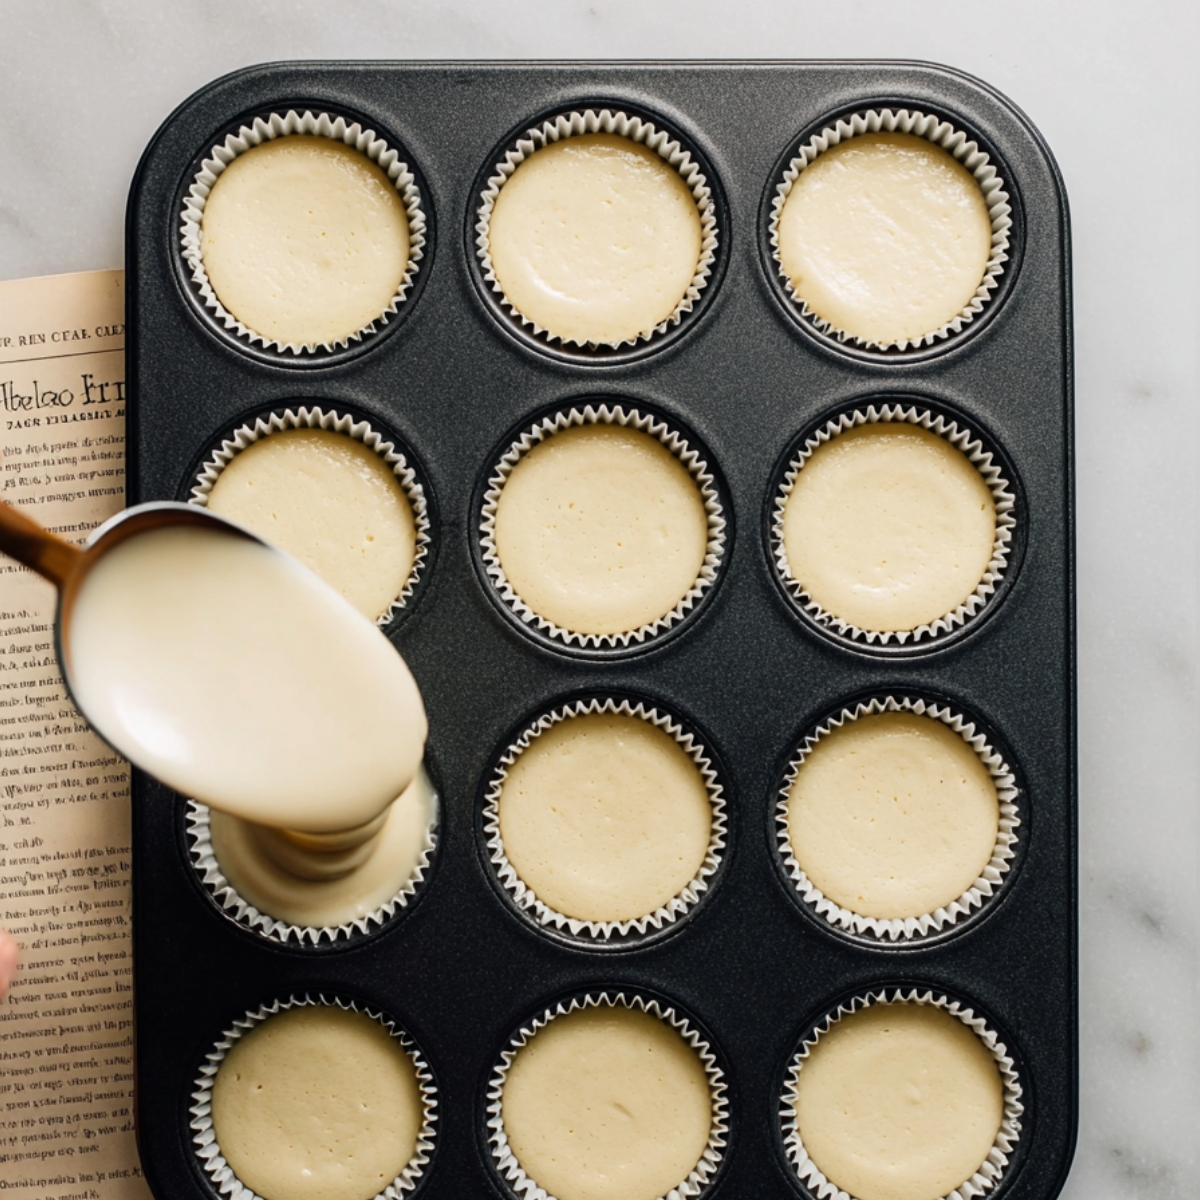
Divide the batter evenly among the liners, filling each one right to the top. It's fine if the crust is still warm.
Optional steam bath: If you want extra insurance against sinking, place a large metal baking or roasting pan on the bottom oven rack and pour boiling water to about 1 inch deep. Immediately slide the muffin pan onto the center rack and close the oven to trap the steam. The muffin pan stays completely dry it's just the surrounding steam that helps.
Bake: Bake for approximately 20 minutes. You're looking for set edges and a center that jiggles slightly when you tap the pan. They won't look fully done yet, and that's okay.
Cool and chill: Let the pan cool at room temperature on a wire rack for 45 minutes, then refrigerate for at least 2 hours and up to 24 hours. If chilling longer than 2 hours, loosely cover the pan. Some light sinking in the center is totally normal and is why toppings exist. If you're short on time, pop them in the freezer for 1 hour instead.
Top and serve: Once chilled, garnish each cheesecake however you like, fresh berries and mint, a drizzle of salted caramel, a dollop of whipped cream piped with a Wilton 1M tip. Whipped cream can be piped up to 24 hours in advance and kept covered in the fridge.
Equipment For Mini Cheesecakes
- 12-count standard muffin pan
- Cupcake/muffin liners
- Medium and large mixing bowls
- Food processor (optional, for making crumbs)
- Handheld or stand mixer with paddle or whisk attachment
- Cooling rack
- 9x13-inch metal baking or roasting pan (for the optional steam bath)
- Piping bag and Wilton 1M tip (optional, for whipped cream)
Easy Swaps and Substitutions
No graham crackers? Swap in 1 cup (105g) of digestive biscuit crumbs (about 7 biscuits) with 30g of melted butter and 2 tablespoons (25g) of sugar. Grind the biscuits, mix with the sugar, stir in the butter, press into liners, and pre-bake as directed.
Outside the US cream cheese? Spreadable cream cheese sold in tubs in many countries is actually thicker and sturdier than the US tub variety, and should work fine in this filling.
Want to make them tinier? Use a 24-count mini muffin pan. Press 2 teaspoons of crust per liner and pre-bake at 350°F for 4 minutes. Fill with batter and bake 10 to 11 minutes until set. Follow the same cooling steps. You'll get about 30 super mini cheesecakes.
Topping swaps: These work beautifully with salted caramel, lemon curd, strawberry topping, chocolate ganache, red wine chocolate ganache, or fresh berries and mint. Whatever you have on hand or whatever the occasion calls for.
How to Store Mini Cheesecakes
In the fridge: Store covered for up to 5 days. Keep them in the liners until ready to serve.
In the freezer: Freeze fully baked Mini Cheesecakes for up to 3 months. Wrap them well and thaw overnight in the refrigerator before serving.
Make ahead tip: You can prepare through the filling step (Step 3) up to 2 to 3 days before baking. Cover the unbaked Mini Cheesecakes and refrigerate until you're ready to pop them in the oven. Great for holiday baking weeks.
Serving Ideas
- Set them on a little dessert board with a few of these Pecan Sugar Cookies and Blueberry Pie Bars for a gorgeous party spread
- Top each one a different way and let guests choose - it's a fun and easy interactive dessert moment
- Serve alongside a mug of hot coffee or chamomile tea for a cozy evening treat
- Stack them in a cupcake box tied with ribbon for an easy homemade gift
Expert Tips
Bring dairy to room temperature. Cold cream cheese or eggs in the batter is the most common reason for lumpy or cracked cheesecakes. Set everything out about an hour before you start.
Don't over-mix after the eggs go in. Once you add the eggs, mix just until they're incorporated. Over-beating at this stage whips in extra air, which can cause puffing and cracking during baking.
Press the crust firmly. A loose, under-pressed crust crumbles when you bite in. Take an extra 30 seconds to really pack it down with the back of a spoon or a small glass.
Tap for doneness, not color. These Mini Cheesecakes don't brown the way cookies or cakes do. Tap the pan and look for set edges with a gentle jiggle in the center. That slight wobble sets up firm during chilling.
Some sinking is completely normal. Every baked Mini Cheesecakes sinks a little in the center as it cools. It's not a mistake; it's actually the perfect natural cup for holding your toppings.
FAQ
Why do mini cheesecakes sink in the middle after baking?
A little sinking is totally normal and happens to almost every baked Cheesecake, including full-size ones. It's caused by the air that expands during baking slowly releasing as the cheesecake cools. Over-mixing the batter (especially after adding eggs) can make sinking more dramatic, so mix just until smooth. Use that little dip to your advantage and spoon your favorite topping right into it.
Can I make mini cheesecakes without a water bath?
Yes, absolutely. The steam bath in this Mini Cheesecakes is optional. Skipping it may lead to slightly more sinking or a slightly less silky top surface, but the flavor and texture of the filling are still excellent. If you want the smoothest possible result without fully submerging the muffin pan, the indirect steam method (water in a separate pan on a lower rack) is a great middle-ground option.
How long do Mini Cheesecakes need to chill before serving?
At least 2 hours in the refrigerator, though overnight gives you the best, firmest texture. If you're in a hurry, the freezer trick works well: 1 hour in the freezer and they're ready to top and serve. My tip: make them the night before your party and just add toppings the day of.
What can I use instead of graham crackers for the crust?
Digestive biscuits work beautifully as a swap. Use 1 cup (105g) of digestive biscuit crumbs (about 7 biscuits), 30g of melted butter, and 2 tablespoons (25g) of sugar. Mix, press, and pre-bake the same way. The flavor is slightly less sweet and a little more shortbread-like, which honestly pairs really well with the tangy filling.
Related
Looking for other recipes like this? Try these:
Pairing
These are my favorite dishes to serve with Mini Cheesecakes

Mini Cheesecakes
Ingredients
Method
- Preheat your oven to 350°F (177°C) and line a standard 12-count muffin pan with paper cupcake liners.
- In a medium bowl, stir together the graham cracker crumbs, sugar, and melted butter until the mixture resembles damp sand.
- Spoon a heaping tablespoon of the crumb mixture into each lined cup and press it down firmly using the back of a spoon or the flat bottom of a glass.
- Slide the pan into the preheated oven and bake the crusts for 6 minutes, then set aside while you prepare the filling.
- In a large bowl, beat the softened cream cheese and sugar together on medium-high speed until completely smooth and creamy, about 2 minutes.
- Add the sour cream, vanilla extract, and lemon juice to the cream cheese mixture and beat until fully incorporated.
- Reduce mixer speed to medium and add the eggs one at a time, beating just until each egg disappears into the batter before adding the next do not overmix.
- Divide the batter evenly among the 12 lined cups, filling each one all the way to the top.
- Optional steam bath: Place a large metal roasting pan on the bottom oven rack and carefully pour about 1 inch of boiling water into it, then immediately place the muffin pan on the center rack and close the oven door to trap the steam.
- Bake the cheesecakes for 20 minutes, until the edges look set and the centers still have a slight jiggle when the pan is gently tapped.
- Remove the pan from the oven and set it on a wire rack to cool at room temperature for 45 minutes.
- Transfer the pan to the refrigerator and chill the cheesecakes for at least 2 hours, or up to 24 hours before serving loosely cover if chilling longer than 2 hours.
- When ready to serve, add your choice of toppings such as whipped cream, fresh berries, caramel sauce, or lemon curd, then plate and enjoy.
Leave a Reply