
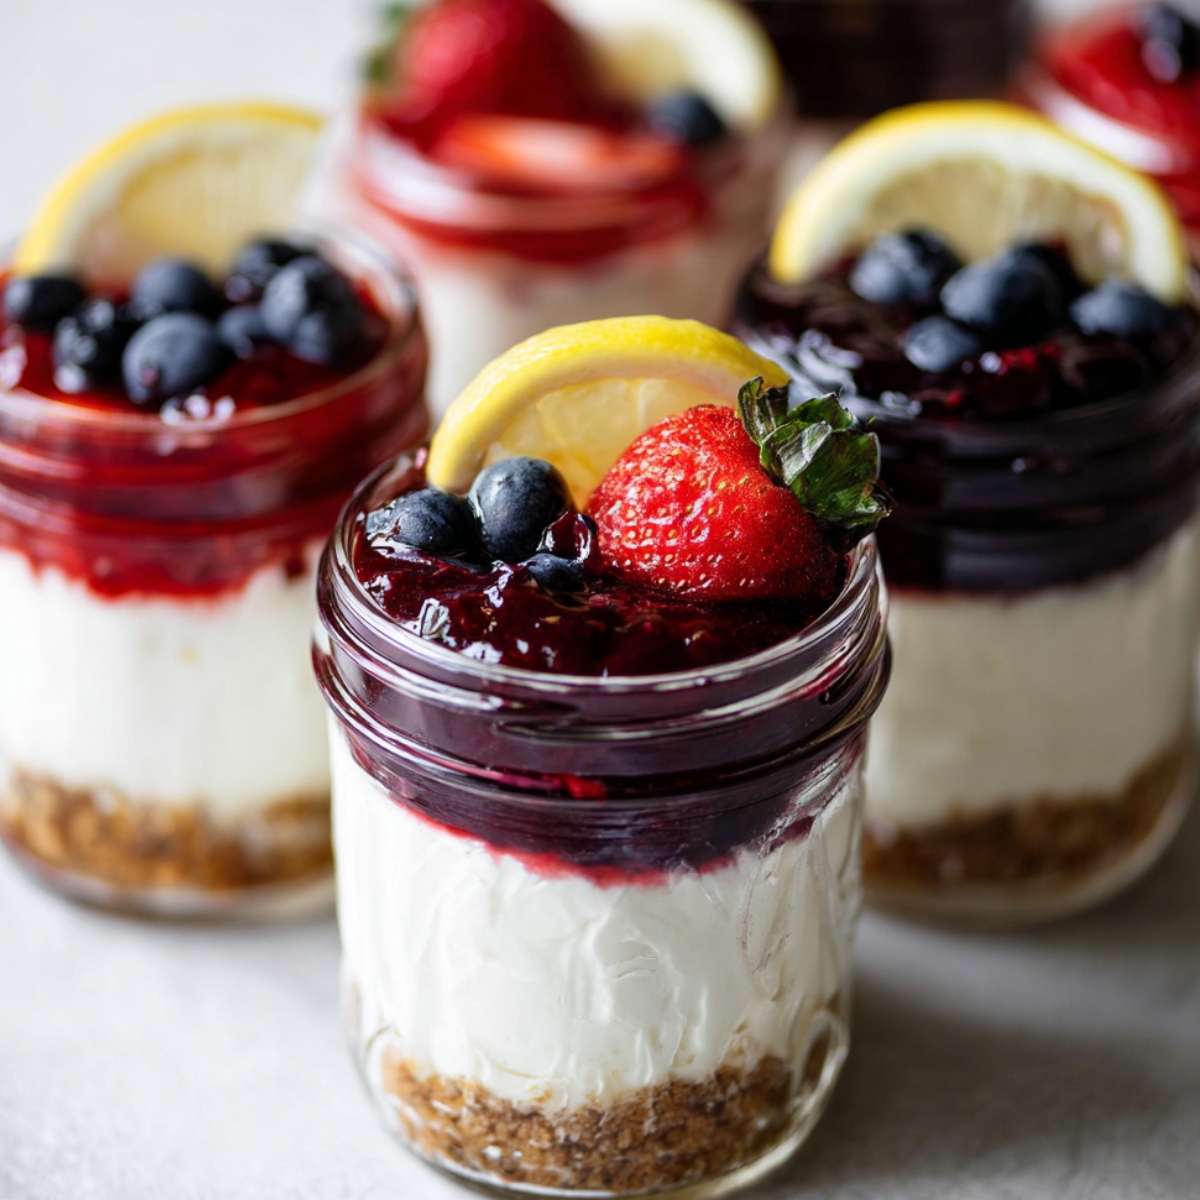
These creamy, dreamy No Bake Cheesecake Jars layer buttery graham cracker crust with cloud-light cheesecake filling that whips up in just 30 minutes. I made my first batch for a summer cookout last year, and they disappeared so fast I didn't even get a second taste. They're ridiculously easy to throw together, and the best part? You can top them however you want.
If you love simple, make-ahead desserts, you'll also want to try this No-Bake Greek Yogurt Fruit Tart or these adorable Lemon Pudding Cakes. For something a little more elegant, this Berry Galette is always a hit.
What Makes No Bake Cheesecake Jars So Special
There's a reason these No Bake Cheesecake Jars show up at every potluck and party I throw. They're portable, they look fancy without any effort, and you don't have to turn on the oven. The filling is lighter than traditional baked cheesecake but still has that rich, tangy cream cheese flavor we all crave. Plus, everyone gets their own jar, which means no messy slicing and zero arguments over who got the bigger piece.
Jump to:
No Bake Cheesecake Jars Ingredients
Here's everything you need to make these No Bake Cheesecake Jars. Measurements are exact, so your jars turn out perfectly every time.
See Recipe Card Below This Post For Ingredient Quantities
Graham Cracker Crust
- Unsalted butter: Melted butter binds the crumbs together and adds rich flavor. Make sure it's fully melted so it mixes evenly.
- Graham cracker crumbs: This is the base of your crust. You'll need about 8 full graham crackers, crushed into fine crumbs. You can use a food processor or just put them in a ziplock bag and crush them with a rolling pin.
Cheesecake Filling
- Heavy cream: Cold heavy cream whips up into stiff peaks and gives the filling that light, airy texture. Don't skip the cold part-it whips better.
- Cream cheese: Full-fat brick cream cheese is key here. It needs to be softened to room temperature so it blends smoothly without lumps. Block cream cheese works best; tub-style spreads won't give you the same texture.
- Granulated sugar: Sweetens the filling just enough without making it overly sugary.
- Sour cream: Adds a slight tang that balances the sweetness and gives the filling that classic cheesecake flavor.
- Lemon juice: Just a teaspoon brightens everything up and adds a subtle zing.
- Vanilla extract: Pure vanilla rounds out the flavor and makes everything taste a little more homemade.
How to Make No Bake Cheesecake Jars
These No Bake Cheesecake Jars come together fast, so make sure you have all your ingredients ready before you start.
Prepare the jars: Line up your jars on the counter before you begin. This recipe makes about 6 8-ounce jars or 10 6-ounce jars, depending on what size you're using.
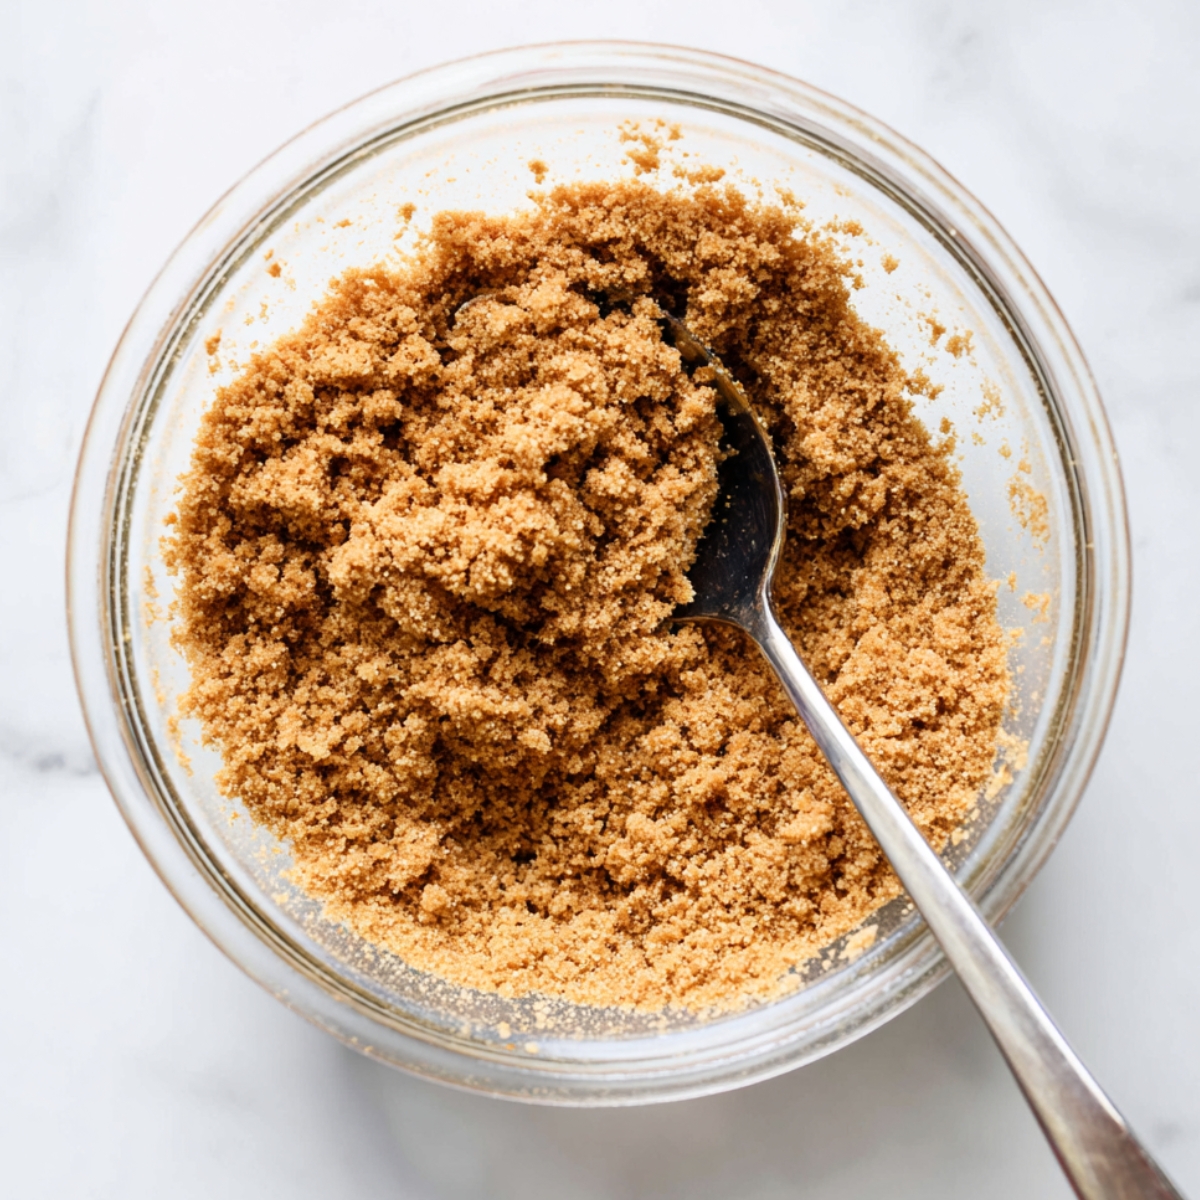
Make the graham cracker crust: Melt the butter in a microwave-safe bowl or on the stovetop, then stir in the graham cracker crumbs until the mixture looks like wet sand. Spoon about 2 tablespoons into each 8-ounce jar, or about 1½ tablespoons into each 6-ounce jar. Set them aside.
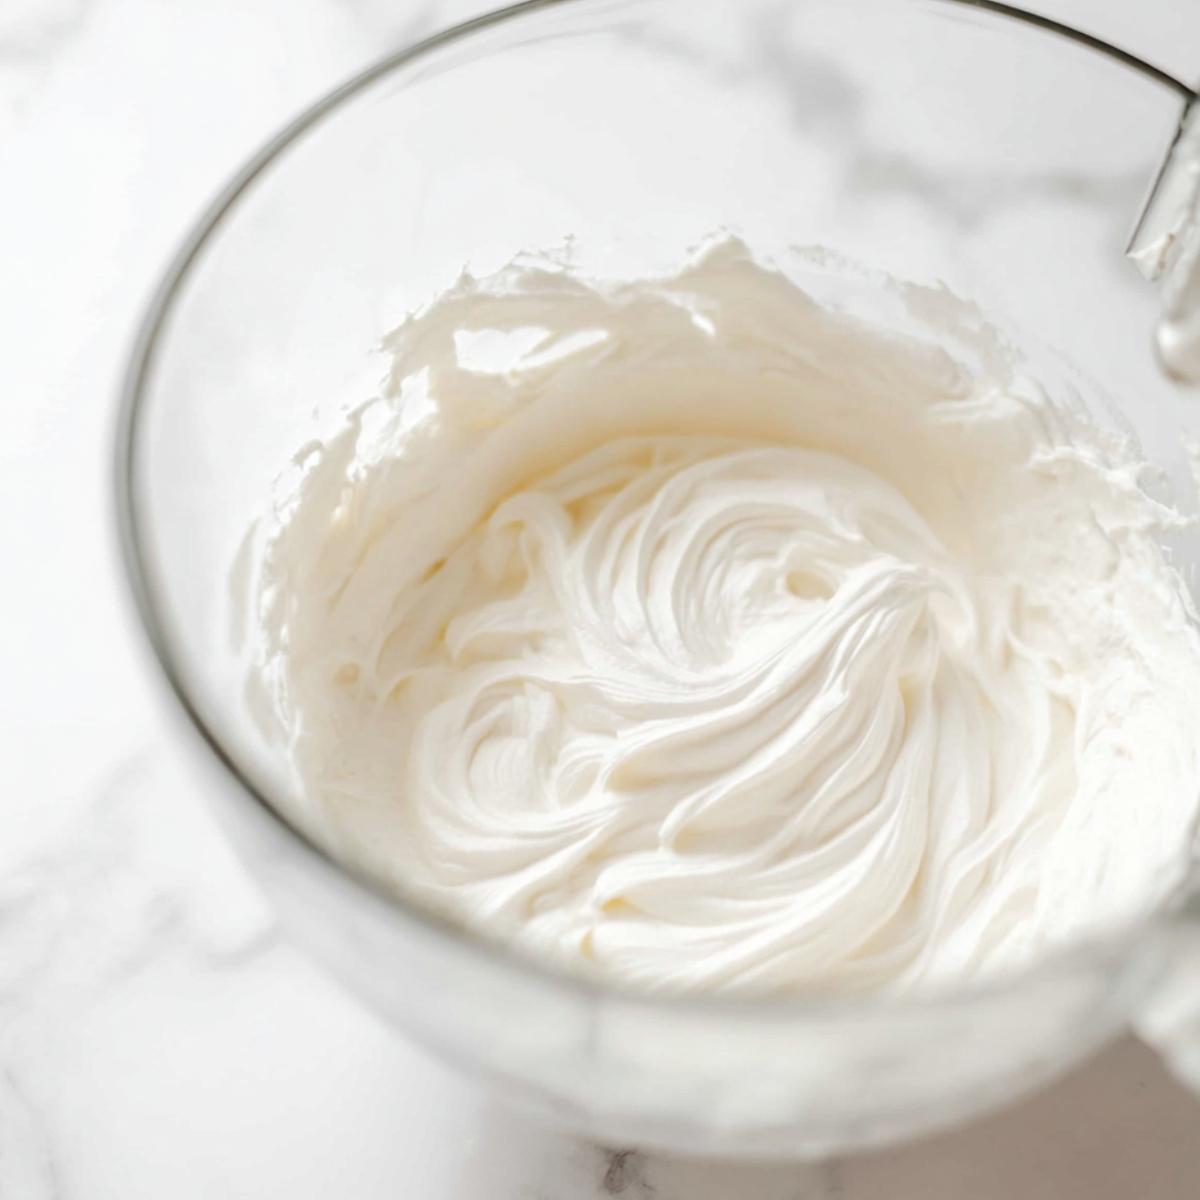
Whip the heavy cream: Using a hand mixer or stand mixer with a whisk attachment, whip the cold heavy cream on medium-high speed until stiff peaks form, about 3 to 4 minutes. You'll know it's ready when the cream holds its shape and doesn't slump. Set it aside.
Prepare the cheesecake filling: In a separate bowl, beat the cream cheese, sugar, sour cream, lemon juice, and vanilla on medium-high speed until the mixture is smooth and creamy with no lumps. This usually takes 2 to 3 minutes.
Fold the mixtures together: Use low mixer speed or a silicone spatula to gently fold the whipped cream into the cheesecake mixture until everything is fully combined. Don't overmix-you want to keep it light and airy.
Assemble the cheesecake jars: Spoon the cheesecake filling over the crust layer. Use about ¼ to ⅓ cup for 8-ounce jars, or about 3 tablespoons for 6-ounce jars. Leave a little space at the top for toppings.
Chill (optional): You can serve these right away at room temperature, or chill them for at least 30 minutes if you want a firmer texture. If you're chilling them longer than 30 minutes, cover the jars so they don't pick up any fridge odors.
Add toppings and serve: Add your favorite toppings and garnishes just before serving, or up to 2 hours ahead if you're prepping for a party.
Store leftovers: Cover the jars and refrigerate any leftovers for up to 5 days.
Substitutions and Variations
Swap the crust. You can use Oreo crumbs, vanilla wafer crumbs, or even crushed pretzels instead of graham crackers. Just keep the same proportions.
Try different flavors. Add a tablespoon of cocoa powder to the filling for chocolate cheesecake jars, or swap the vanilla for almond extract.
Make it lighter. You can use reduced-fat cream cheese and light sour cream if you want to cut some calories. The texture will be a little less rich, but it'll still taste great.
Go dairy-free. Use dairy-free cream cheese, coconut cream instead of heavy cream, and a non-dairy sour cream substitute. The texture won't be quite the same, but it'll still be delicious.
Equipment For No Bake Cheesecake Jars
You don't need anything fancy to make these No Bake Cheesecake Jars. Here's what I use:
- 8-ounce or 6-ounce glass jars (mason jars work perfectly)
- Medium mixing bowls
- Electric hand mixer or stand mixer
- Whisk attachment
- Silicone spatula
- Microwave-safe bowl or small saucepan (for melting butter)
- Measuring cups and spoons
Storage and Make-Ahead Tips
These No Bake Cheesecake Jars are perfect for making ahead. You can prep them up to 2 days in advance and keep them covered in the fridge. Just wait to add the toppings until you're ready to serve, especially if you're using fresh fruit or whipped cream.
If you're bringing these to a party, keep them chilled in a cooler with ice packs. They'll hold up just fine for a few hours at room temperature, but they taste best when they're cold.
Leftovers will keep in the fridge for up to 5 days. Just make sure the jars are covered tightly so the filling doesn't dry out or absorb any fridge smells.
Serving Suggestions
These No Bake Cheesecake Jars are pretty versatile. Here are a few ways I like to serve them:
With fresh berries. Sliced strawberries, blueberries, raspberries, or blackberries are always a hit. You can toss them with a little sugar and lemon juice first if you want them extra sweet and juicy.
As a dessert bar. Set out a bunch of toppings and let everyone build their own. It's fun for parties and takes the pressure off you to decorate everything perfectly.
With a drizzle of caramel or chocolate. Salted caramel and hot fudge are my go-to toppings. They add richness without being too heavy.
Alongside coffee or tea. These make a great afternoon treat with a hot cup of coffee. The tangy cheesecake pairs beautifully with something warm and slightly bitter.
Expert Tips
Let your cream cheese soften completely. If it's too cold, you'll end up with lumps in your filling. Leave it out on the counter for about an hour before you start.
Don't overwhip the cream. Stop as soon as you see stiff peaks. If you keep going, you'll end up with butter.
Fold gently. When you combine the whipped cream and cream cheese mixture, use a light hand. You want to keep all that air you just whipped in.
Chill for the best texture. While you can serve these right away, they're so much better after a little time in the fridge. The filling firms up and the flavors meld together.
Use a piping bag for a cleaner look. If you want your No Bake Cheesecake Jars to look extra pretty, spoon the filling into a piping bag and pipe it into the jars instead of spooning it in. It's faster and looks more polished.
FAQ
How long do No Bake Cheesecake Jars last in the fridge?
These will keep for up to 5 days when stored covered in the fridge. Just make sure the lids are on tight so the filling doesn't dry out. Liam always asks if we can make extra for the week, and they hold up beautifully.
Can you freeze cheesecake jars?
Yes, you can freeze them for up to 2 months. Leave off the toppings, cover the jars tightly, and freeze. Thaw them in the fridge overnight before serving. The texture might be a tiny bit softer after freezing, but they're still delicious.
What are the best toppings for No Bake Cheesecake Jars?
My favorites are fresh strawberries, salted caramel, and chocolate ganache. But honestly, you can use whatever you love-cherry pie filling, lemon curd, hot fudge, whipped cream, or even crumbled cookies. Get creative and have fun with it.
Can you make no bake cheesecake jars ahead of time?
Absolutely. These are perfect for making 1 to 2 days ahead. Just keep them covered in the fridge and add the toppings right before serving. It's one of my favorite tricks for stress-free entertaining.
Related
Looking for other recipes like this? Try these:
Pairing
These are my favorite dishes to serve with No Bake Cheesecake Jars
No Bake Cheesecake Jars
Ingredients
Method
- Arrange the serving jars on the counter so they are ready for layering.
- Combine the melted butter and graham cracker crumbs in a bowl until the texture resembles damp sand.
- Divide the crumb mixture evenly between the jars and gently press it into the bottom layer.
- Whip the cold heavy cream with an electric mixer until stiff peaks form.
- In a separate bowl, beat the cream cheese, sugar, sour cream, lemon juice, and vanilla until completely smooth and creamy.
- Carefully fold the whipped cream into the cream cheese mixture until light and fully combined.
- Spoon the cheesecake filling over the crust layer in each jar, leaving space at the top for toppings.
- Refrigerate the jars for at least 30 minutes so the filling can firm up before serving.
- Add your favorite toppings and garnishes just before serving.
Leave a Reply